


2KN/2KP-1
1-6-1
1-6 Requirements on PWB Replacement
1-6-1 Upgrading the firmware
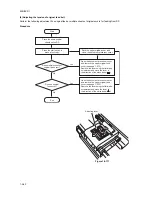
Follow the procedure below to upgrade the firmware on the main PWB and engine PWB.
Firmware upgrading requires the following tools:
Compact Flash (Products manufactured by SANDISK are recommended.)
NOTE
When writing data to a new Compact Flash from a computer, be sure to format it in advance.
Procedure
1. Press the Power key on the operation panel
to off. Make sure that the Power lamp is off
before turning off the main power switch.
And then unplug the power cable from the
wall outlet.
* Turning off the main power switch before
pressing the Power key to off may cause
damage to the equipped hard disk.
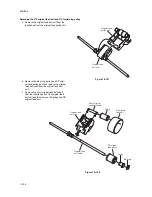
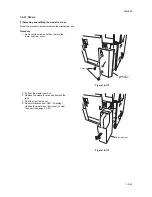
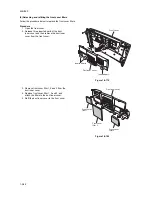
2. Remove the screw and release the projec-
tion.
Remove the CF cover.
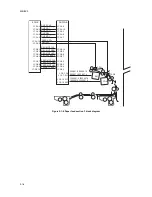
Figure 1-6-1
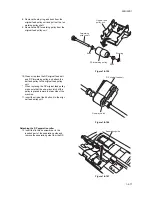
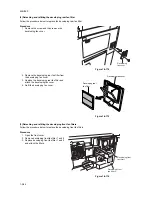
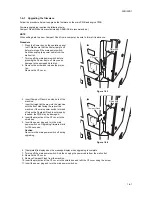
3. Insert Compact Flash in a notch hole of the
machine.
* Insert it straight all the way into the machine
with the front side facing the rear of the
machine. If the main power switch is turned
off when the Compact Flash is not properly
inserted, the PWB may be damaged.
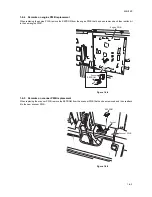
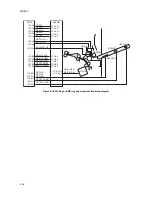
4. Insert the projection of the CF cover to the
shield box.
5. Insert the power plug and turn the main
power switch on. Upgrading firmware starts
for 100 seconds.
Caution
Never turn the main power switch off during
upgrading.
Figure 1-6-2
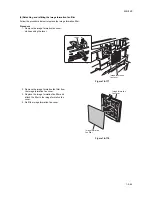
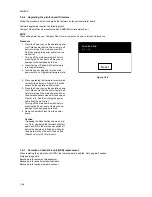
6. [Completed] is displayed on the message display when upgrading is complete.
7. Turning off the main power switch. And then unplug the power cable from the wall outlet.
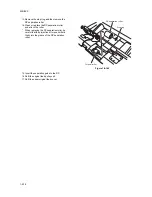
8. Remove the CF cover.
9. Remove Compact Flash from the machine.
10. Insert the projection of the CF cover to the shield box and refit the CF cover using the screw.
11. Insert the power plug and turn the main power switch on.
CF cover
Projection
Notch hole
Compact Flash
Summary of Contents for TASKalfa 620
Page 1: ...SERVICE MANUAL Published in August 2009 842KP112 2KPSM062 Rev 2 TASKalfa 620 820 ...
Page 4: ...This page is intentionally left blank ...
Page 10: ...This page is intentionally left blank ...
Page 144: ...2KN 2KP 1 3 106 This page is intentionally left blank ...
Page 308: ...2KN 2KP 1 5 88 This page is intentionally left blank ...
Page 412: ...2KN 2KP 2 3 60 This page is intentionally left blank ...
Page 435: ...1 1 INSTALLATION GUIDE INSTALLATION GUIDE FOR SIDE FEEDER ...
Page 442: ...INSTALLATION GUIDE FOR LARGE SIZE SIDE FEEDER ...
Page 460: ...INSTALLATION GUIDE FOR DOCUMENT FINISHER ...
Page 475: ...INSTALLATION GUIDE FOR CENTERFOLD UNIT ...
Page 490: ...INSTALLATION GUIDE FOR MULTI JOB TRAY ...
Page 501: ...INSTALLATION GUIDE FOR PUNCH UNIT ...
Page 512: ...INSTALLATION GUIDE FOR STOPPER GUIDE ...
Page 515: ...INSTALLATION GUIDE FOR PRINTING SYSTEM ...
Page 518: ...INSTALLATION GUIDE FOR SCAN SYSTEM ...
Page 520: ......
Page 521: ......


