


2KN/2KP
1-2-12
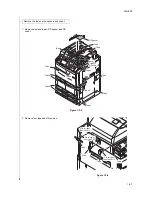
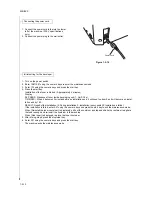
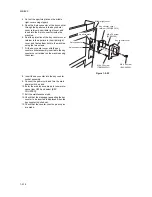
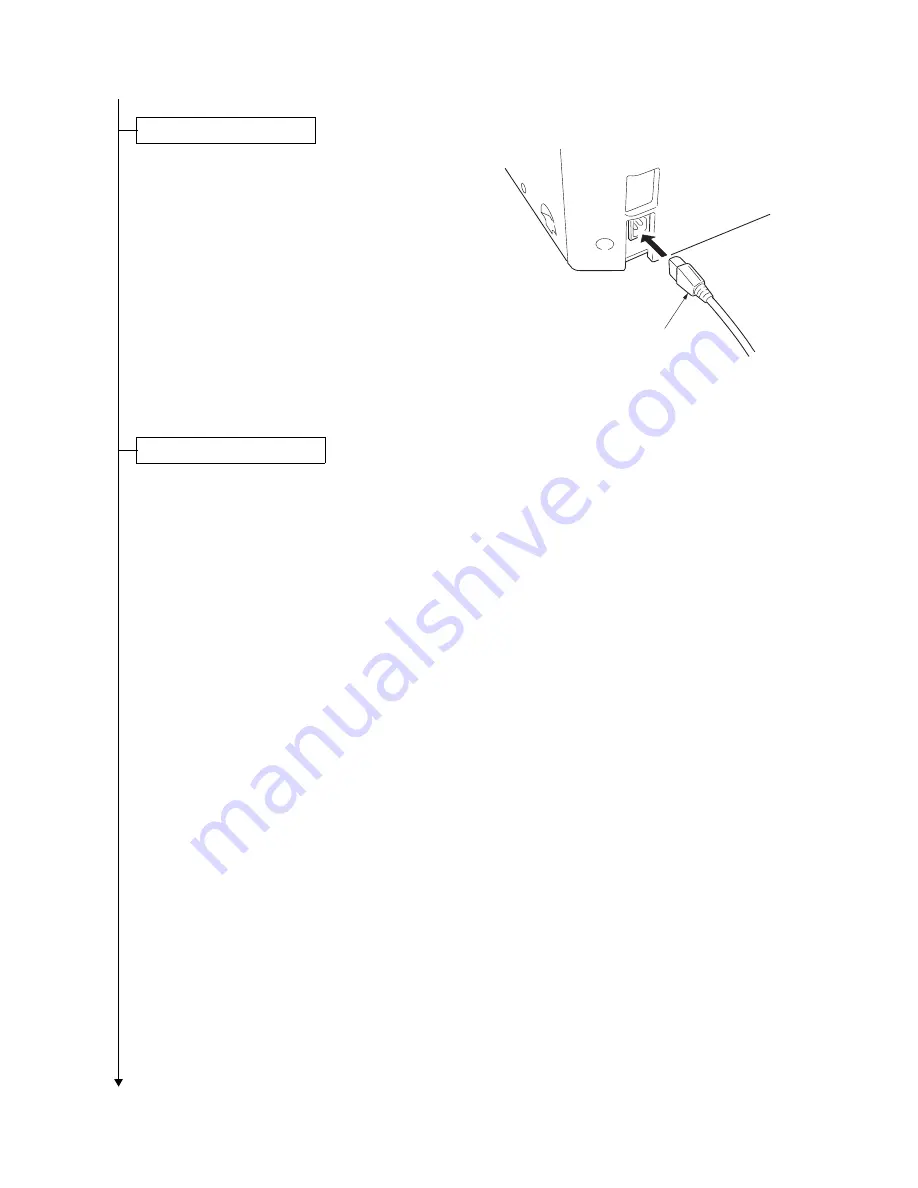
1. Connect the power cord to the inlet on lower
left of the machine. (230 V specifications
only.)
2. Connect the power plug to the wall outlet.
Figure 1-2-16
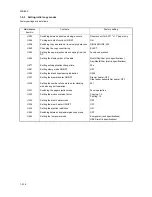
1. Turn on the power switch.
2. Enter 10871087 using the numeric keys to enter the maintenance mode.
3. Enter 130 using the numeric keys and press the start key.
4. Press the start key.
Installation of the toner is started. (Approximately 5 minutes)
Display
DLP SENS: Presence of toner inside developing unit (1: No/0: Yes)
TIME(SEC): When it becomes 3 minutes before an installation end, it will count up from 0 and will become an instal-
lation end by 180.
RESULT: Result of the installation (0: During installation/1: Installation is successful/2: Installation is failed)
If the installation is failed, enter 001 using the numeric keys and press the start key to exit the maintenance mode.
When [Reinstall the toner container.] is displayed, pull out the container and tap and shake the container to agitate
the toner enough and re-install the container in the machine.
When [Add toner.] is displayed, replace the toner container.
5. After driving stops, press the stop/clear key.
6. Enter 001 using the numeric keys and press the start key.
The machine exits the maintenance mode.
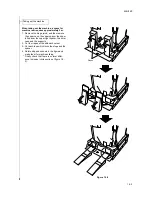
Connecting the power cord.
Power cord
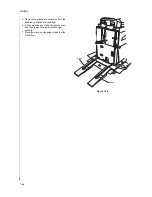
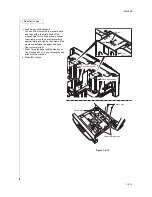
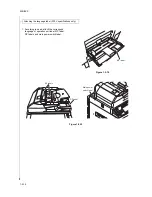
Initial setting for the developer.
Summary of Contents for TASKalfa 620
Page 1: ...SERVICE MANUAL Published in August 2009 842KP112 2KPSM062 Rev 2 TASKalfa 620 820 ...
Page 4: ...This page is intentionally left blank ...
Page 10: ...This page is intentionally left blank ...
Page 144: ...2KN 2KP 1 3 106 This page is intentionally left blank ...
Page 308: ...2KN 2KP 1 5 88 This page is intentionally left blank ...
Page 412: ...2KN 2KP 2 3 60 This page is intentionally left blank ...
Page 435: ...1 1 INSTALLATION GUIDE INSTALLATION GUIDE FOR SIDE FEEDER ...
Page 442: ...INSTALLATION GUIDE FOR LARGE SIZE SIDE FEEDER ...
Page 460: ...INSTALLATION GUIDE FOR DOCUMENT FINISHER ...
Page 475: ...INSTALLATION GUIDE FOR CENTERFOLD UNIT ...
Page 490: ...INSTALLATION GUIDE FOR MULTI JOB TRAY ...
Page 501: ...INSTALLATION GUIDE FOR PUNCH UNIT ...
Page 512: ...INSTALLATION GUIDE FOR STOPPER GUIDE ...
Page 515: ...INSTALLATION GUIDE FOR PRINTING SYSTEM ...
Page 518: ...INSTALLATION GUIDE FOR SCAN SYSTEM ...
Page 520: ......
Page 521: ......


