


2KN/2KP
1-2-18
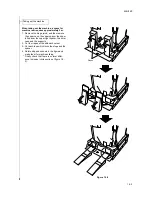
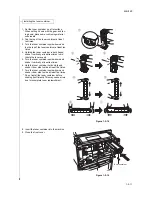
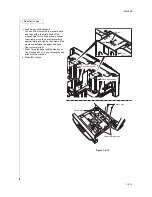
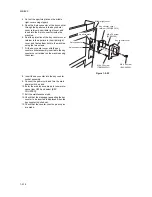
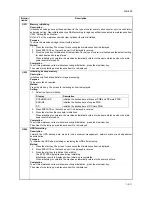
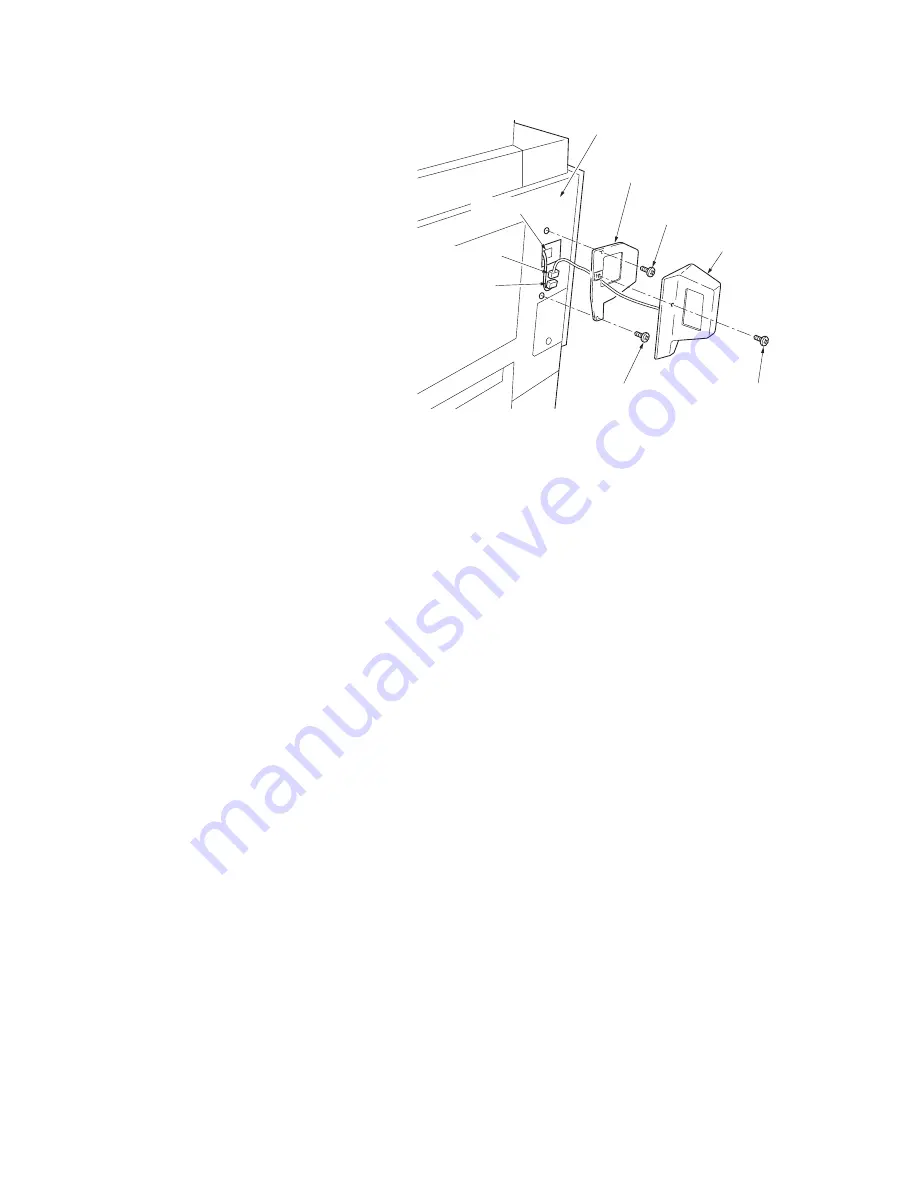
4. Cut out the aperture plate on the middle
right cover using nippers.
5. Pass the 4-pin connector of the key counter
through the apertures in the key counter
cover retainer and middle right cover, and
insert into the 4-pin connector inside the
machine.
6. Seat the projection of the key counter cover
retainer in the aperture in the middle right
cover, and fasten them both to the machine
using the two screws.
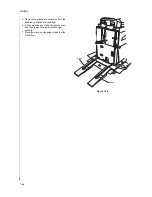
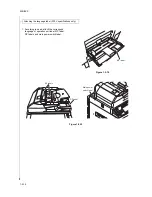
7. Fit the key counter cover with the key
counter socket assembly inserted to the key
counter cover retainer on the machine using
the screw.
Figure 1-2-22
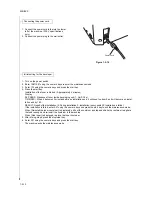
8. Insert the key counter into the key counter
socket assembly.
9. Connect the power cord and turn the main
power switch on and
10. Enter the maintenance mode to run mainte-
nance item U204 and select [KEY-
COUNTER].
11. Exit the maintenance mode.
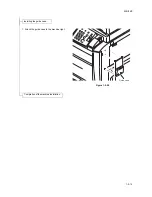
12. Check that the message requesting the key
counter to be inserted is displayed when the
key counter is pulled out.
13. Check that the counter counts up as copies
are made.
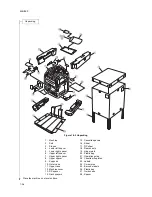
M4
x
6 screw
(B4A04060)
M4
x
20 screw
(7BB100420H)
Key counter cover
retainer (302GR03010)
Middle right cover
Aperture plate
Key counter cover
M4
x
30 screw
(B1B54300)
4-pin connector
4-pin connector
Summary of Contents for TASKalfa 620
Page 1: ...SERVICE MANUAL Published in August 2009 842KP112 2KPSM062 Rev 2 TASKalfa 620 820 ...
Page 4: ...This page is intentionally left blank ...
Page 10: ...This page is intentionally left blank ...
Page 144: ...2KN 2KP 1 3 106 This page is intentionally left blank ...
Page 308: ...2KN 2KP 1 5 88 This page is intentionally left blank ...
Page 412: ...2KN 2KP 2 3 60 This page is intentionally left blank ...
Page 435: ...1 1 INSTALLATION GUIDE INSTALLATION GUIDE FOR SIDE FEEDER ...
Page 442: ...INSTALLATION GUIDE FOR LARGE SIZE SIDE FEEDER ...
Page 460: ...INSTALLATION GUIDE FOR DOCUMENT FINISHER ...
Page 475: ...INSTALLATION GUIDE FOR CENTERFOLD UNIT ...
Page 490: ...INSTALLATION GUIDE FOR MULTI JOB TRAY ...
Page 501: ...INSTALLATION GUIDE FOR PUNCH UNIT ...
Page 512: ...INSTALLATION GUIDE FOR STOPPER GUIDE ...
Page 515: ...INSTALLATION GUIDE FOR PRINTING SYSTEM ...
Page 518: ...INSTALLATION GUIDE FOR SCAN SYSTEM ...
Page 520: ......
Page 521: ......


