


3
H
1
H
4
D
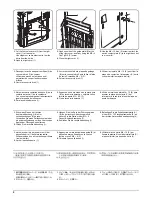
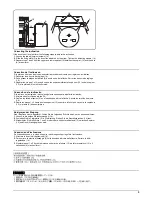
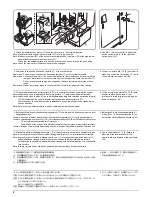
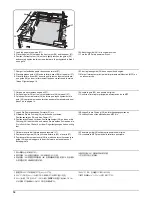
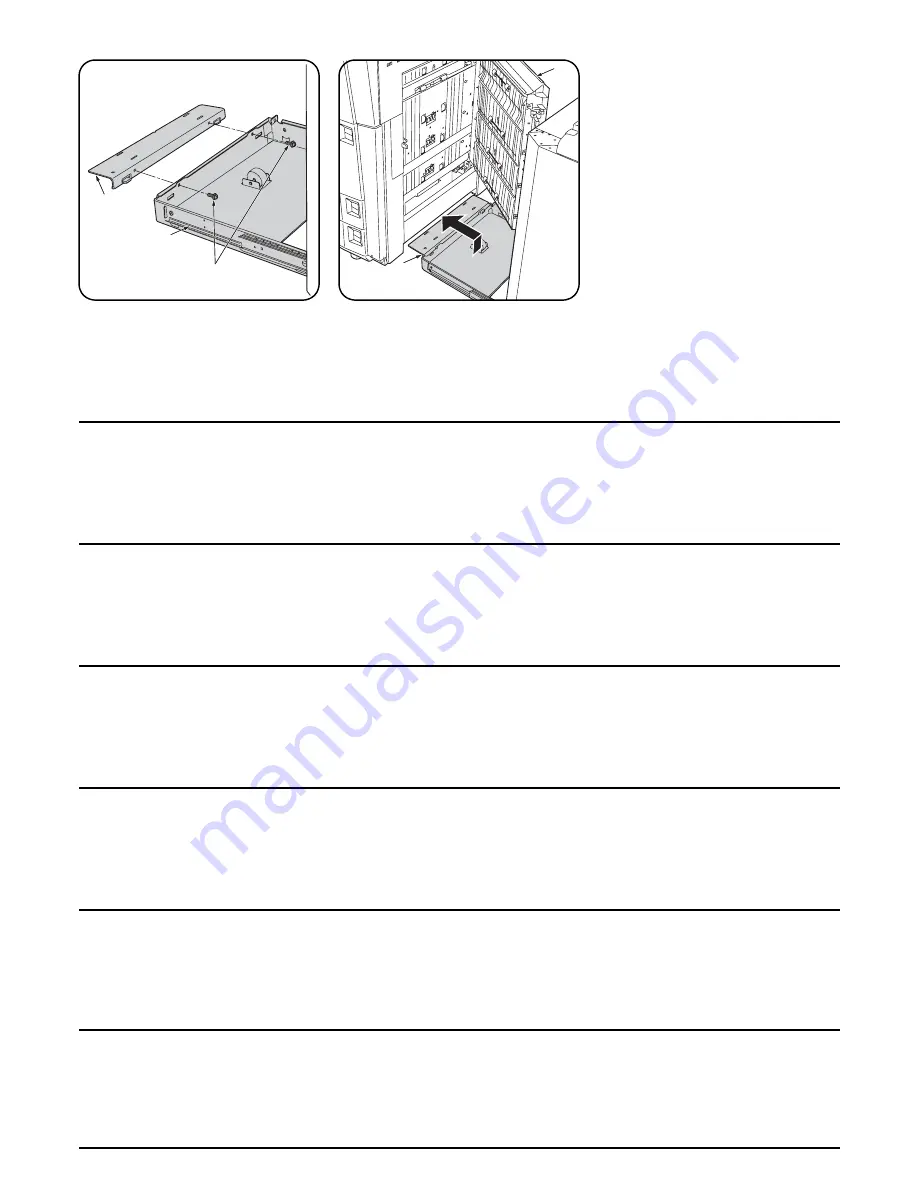
6. Attach the retainer (H) to the fixing plate (4)
using two M4 × 8 SEMS (D) screws.
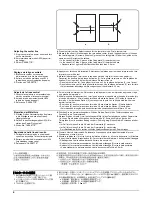
7. Open the right cover (1) of the MFP and
insert the retainer (H) to the MFP.
Raise the retainer to insert it.
6. Fixer le dispositif de retenue (H) à la plaque
de fixation (4) à l’aide de 2 vis SEMS M4 × 8
(D).
7. Ouvrir le couvercle droit (1) de l’imprimante
multifonction (MFP) et introduire le dispositif
de retenue (H) dans l’imprimante
multifonction (MFP).
Soulever le dispositif pour l’introduire.
6. Acople el retén (H) a la placa de fijación (4)
utilizando dos tornillos SEMS M4 × 8 (D).
7. Abra la cubierta derecha (1) de la MFP e
introduzca el retén (H) a la MFP.
Levante el retén para introducirlo.
6. Befestigen Sie die Halterung (H) mit zwei M4
× 8 SEMS (D) Schrauben an der Fixierplatte
(4).
7. Öffnen Sie die rechte Abdeckung (1) des
MFP, und führen Sie die Halterung (H) in den
MFP ein.
Heben Sie die Halterung an, um sie
einzuführen.
6. Con due viti sems M4 × 8 SEMS (D)
applicare il fermo (H) alla base di fissaggio
(4).
7. Aprire il pannello destro (1) della MFP ed
inserirvi il fermo (H) alla MFP.
Per inserire il fermo è necessario sollevarlo.
6. 固定板 (4) に取付板 (H) をビス M4 × 8 セム
ス (D)2 本で取り付ける。
7. MFP 本体の右カバー(1) を開け、取付板 (H)
を右カバー下に差し込む。
取付板を持ち上げるようにして差し込む。
6. 用 2 颗 M4 × 8 组合螺钉 (D) 将安装板 (H) 安
装到固定板 (4) 上。
7. 打开复印机主机右盖 (1),将安装板 (H) 插入
右盖的下端。
将安装板提起并插入。
Summary of Contents for TASKalfa 620
Page 1: ...SERVICE MANUAL Published in August 2009 842KP112 2KPSM062 Rev 2 TASKalfa 620 820 ...
Page 4: ...This page is intentionally left blank ...
Page 10: ...This page is intentionally left blank ...
Page 144: ...2KN 2KP 1 3 106 This page is intentionally left blank ...
Page 308: ...2KN 2KP 1 5 88 This page is intentionally left blank ...
Page 412: ...2KN 2KP 2 3 60 This page is intentionally left blank ...
Page 435: ...1 1 INSTALLATION GUIDE INSTALLATION GUIDE FOR SIDE FEEDER ...
Page 442: ...INSTALLATION GUIDE FOR LARGE SIZE SIDE FEEDER ...
Page 460: ...INSTALLATION GUIDE FOR DOCUMENT FINISHER ...
Page 475: ...INSTALLATION GUIDE FOR CENTERFOLD UNIT ...
Page 490: ...INSTALLATION GUIDE FOR MULTI JOB TRAY ...
Page 501: ...INSTALLATION GUIDE FOR PUNCH UNIT ...
Page 512: ...INSTALLATION GUIDE FOR STOPPER GUIDE ...
Page 515: ...INSTALLATION GUIDE FOR PRINTING SYSTEM ...
Page 518: ...INSTALLATION GUIDE FOR SCAN SYSTEM ...
Page 520: ......
Page 521: ......


