237
English
Operation instructions
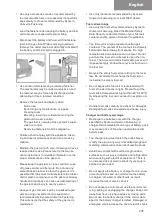
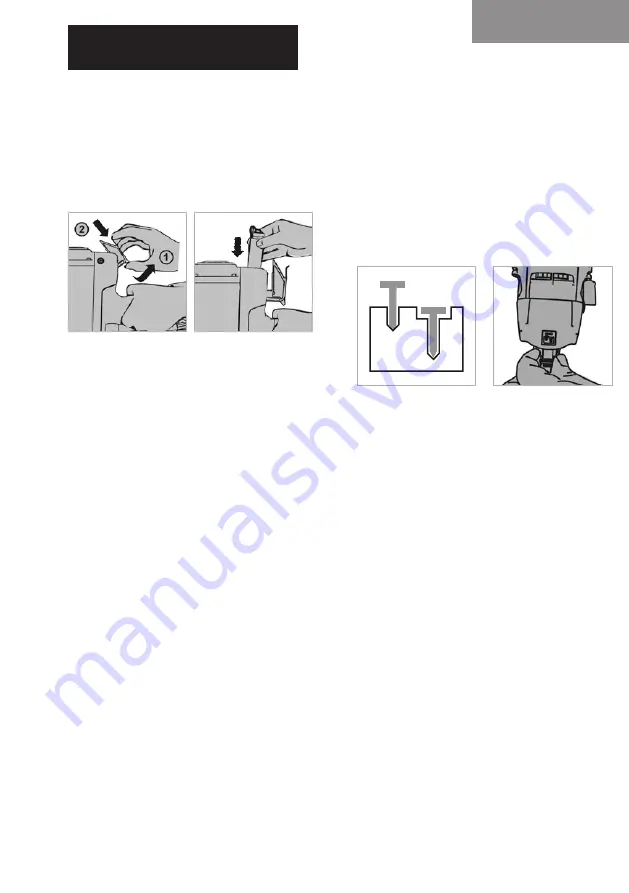
Load and unload the fuel cell
• Open the fuel cell door by pulling the door and
rotate
•
Insert the fuel cell into the chamber. Align the fuel
cell nozzle to the fuel stem on the gas tool.
•
Close the fuel cell door.
Load and unload the fastener
•
Insert battery and fuel cell before you load the fas
-
teners. If you load the fastener before the battery
and/or fuel cell is connected, the fastener may be
shoot out accidentally.
•
Point the nozzle away from any personnel and
keep your finger away from the trigger when load
-
ing the fastener.
For magazine without stopper
•
To load the fastener, slide in the fastener strip into
the magazine
•
Push the release lever and pull the pusher until it
is behind the fastener strip.
•
Gently release the pusher to engage the fastener
strip
•
To unload the fastener from the magazine, press
the release lever on the pusher and tilt the gas
tool to slide the fastener strip to the rear end of the
magazine.
•
Unload the fastener strip by sliding out the fastener
strip.
For 3 steps magazine design, follow the same
safety precaution and continue with following
steps
•
To load fasteners, pull the pusher to the rear until it
is locked to the magazine at rear position.
•
Slide fastener strip into the magazine.
•
Gently release the pusher to engage the fastener
strip
•
To unload the fastener from the gas tool, pull
the pusher to the rear locking position. Slide the
fastener out of the magazine.
Depth of drive adjustment
• The gas tool is equipped with a depth of drive
adjustment. Test the depth of drive on scrap piece
before you start your work.
• Turn the knob to adjust the depth of drive.
• Repeat above procedure until you find your de
-
sired depth of drive setting.
Specific for concrete nailer; push the slider
sidewards to adjust the depth.
Actuating the gas tool
• The gas tool is equipped with a full sequential
actuation system only.
• To actuate the gas tool, depress the safety against
the workpiece, and then pull the trigger.
• To actuate the gas tool again, you will need to re
-
lease the safety fully and release the trigger before
you repeat above procedure.
• Make sure you are driving against workpiece
before you pull the trigger.
Operating the gas tool
• To ensure proper operation and avoiding overheat
-
ing or choking of the gas tool, driving pace should
not exceed 1,000 shots/h and 4,000 shots/day at
optimal working conditions. High temperatures
and/or high altitudes will decrease the feasible
mamimum number of shots per day.
Jam clearing for framing nailers and
staplers
• In the case of fastener jam, disconnect the fuel cell
and battery before you perform any actions.
Summary of Contents for TJEP GRF 34/90 GAS 3G
Page 2: ...www tjep eu...
Page 4: ...2 2 3 6 6 7 7 7 7 8 8 8 9 9 9 9 LED 9 10 10 11 TJEP...
Page 5: ...3 CE CE CE...
Page 6: ...4 49 C 120 F...
Page 7: ...5 Kyocera Unimerco Fastening Kyocera Unimerco Fastening...
Page 10: ...8 3...
Page 11: ...9 1000 4000 2 Phillips TJEP TJEP ST 15 50 GAS 2 TJEP ST 15 50 GAS LED 2 1 LED LED LED...
Page 80: ...78 78 79 82 82 83 83 84 84 84 84 84 85 85 85 85 LED 85 86 86 87 TJEP...
Page 81: ...79 CE CE CE...
Page 82: ...80 49 C 120 F...
Page 83: ...81 Kyocera Unimerco Fastening Kyocera Unimerco Fastening...
Page 86: ...84 3...
Page 87: ...85 1 000 4 000 2 TJEP TJEP ST 15 50 GAS 2 TJEP ST 15 50 GAS LED 2 1 LED LED...
Page 243: ...www tjep eu EXPLORE OUR WEBSITE FOR MORE INFORMATION...

