background image

FAX Operation Guide

Summary of Contents for Triumph-Adler P-3527w

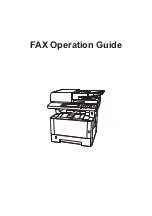
Page 1: ...FAX Operation Guide ...

Page 2: ...PBX Setting Europe only 2 10 Registering Destinations in the Address Book 2 11 Adding a Destination Address Book 2 11 Adding a Destination on One Touch Key 2 17 3 Sending Faxes 3 1 Basic transmission procedure 3 2 Using redial 3 3 Checking the Send Status 3 4 Cancelling Memory Transmission while originals are being scanned 3 4 Cancelling Memory Transmission during communication 3 4 Cancelling Tran...

Page 3: ...Reception Date Time 4 7 Duplex Printing 4 7 2 in 1 Print 4 7 Batch Print 4 7 5 Using Convenient Fax Functions 5 1 Forward Settings 5 2 Type of Forwarding Destination 5 2 Setting Forwarding 5 2 Registering Forwarding Destination 5 2 Changing Registration Contents 5 3 Deleting Registration Contents 5 3 Forwarding Time Setting 5 4 File Format Setting 5 4 File Separation 5 5 E mail Subject Add Info Se...

Page 4: ... of Network FAX Receiving 6 2 Setup 6 3 Installing the FAX Driver 6 4 Uninstalling the FAX Driver 6 7 Basic Transmission 6 8 Configuring the Driver Default Settings 6 11 Default Settings Dialog Box 6 12 Changing Transmit Settings 6 16 Using Cover Pages 6 21 Cover Page Registration Default Settings 6 27 Transmission Control 6 32 7 Managing Jobs 7 1 Various Tools for Checking Transmission Results an...

Page 5: ...ng Reception Restriction 8 17 Unknown Number Reception 8 17 Unusable Time 8 18 Account Management 8 19 9 Troubleshooting 9 1 Indicators During Sending Receiving Operation 9 2 Responding to an Attention Indicator Flashes 9 2 Precautions When Turning Power OFF 9 3 Messages 9 4 Error Code List 9 5 Troubleshooting 9 8 Common inquiries 9 10 10 Appendix 10 1 Character Entry Method 10 2 Entry Screens 10 ...

Page 6: ...lains the general methods for receiving faxes and reception functions 5 Using Convenient Fax Functions Explains convenient fax functions such as storing received faxes in boxes in the memory forwarding received faxes and polling communication a function that allows the receiving party to call and initiate fax reception 6 Sending Faxes from PC Explains how to send a FAX from a PC 7 Managing Jobs Ex...

Page 7: ...nt page to the previously displayed page This is convenient when you want to return to the page from which you jumped to the current page Click an item in the Table of Contents to jump to the corresponding page Caution Indicates that personal injury or mechanical damage may result from insufficient attention to or incorrect compliance with the related points NOTE Indicates supplemental explanation...

Page 8: ...n this Operation Guide continuous operation of the keys on the touch panel is as follows Actual procedure Procedure indicated in this guide Select the System Menu Counter key Select Select Common Settings Select Sound System Menu Counter key Common Settings Sound ...

Page 9: ...ollowing topics Notice 1 2 Safety Conventions in This Guide 1 2 About this Operation Guide 1 3 Legal Notice 1 3 IMPORTANT SAFETY INSTRUCTIONS 1 3 IMPORTANTES MESURES DE SECURITE 1 3 Declarations to European Directives 1 4 Technical regulations for terminal equipment 1 5 Network Compatibility Declaration 1 5 Trademark Information 1 5 ...

Page 10: ...points of attention are indicated inside the symbol General warning Warning of high temperature The symbol indicates that the related section includes information on prohibited actions Specifics of the prohibited action are indicated inside the symbol Warning of prohibited action Disassembly prohibited The symbol indicates that the related section includes information on actions which must be perf...

Page 11: ...k or laundry tub in a wet basement or near a swimming pool 2 Avoid using a telephone other than a cordless type during an electrical storm There may be a remote risk of electric shock from lightning 3 Do not use the telephone to report a gas leak in the vicinity of the leak 4 Use only the power cord and batteries indicated in this manual Do not dispose of batteries in a fire They may explode Check...

Page 12: ...ives DECLARATION OF CONFORMITY TO 93 68 EEC 1999 5 EC and 2009 125 EC We declare under our sole responsibility that the product to which this declaration relates is in conformity with the following specifications Terminal Equipment TE Attachment requirements for pan European approval for connection to the analogue Public Switched Telephone Networks PSTNs of TE excluding TE supporting the voice tel...

Page 13: ...es in this Operation Guide are trademarks or registered trademarks of their respective companies The designations and are omitted in this guide TBR21 DE 05R00 National AN for D AN 01R00 AN for P DE 08R00 National AN for D AN 02R01 AN for CH and N DE 09R00 National AN for D AN 05R01 AN for D E GR P and N DE 12R00 National AN for D AN 06R00 AN for D GR and P DE 14R00 National AN for D AN 07R01 AN fo...

Page 14: ...4 Touch Panel 2 5 Using the Enter key 2 6 Using the Quick No Search key 2 6 Quick Setup Wizard Fax Setup 2 7 Fax setup items 2 7 Fax setup procedure 2 8 Setting Date and Time 2 9 PBX Setting Europe only 2 10 Registering Destinations in the Address Book 2 11 Adding a Destination Address Book 2 11 Adding a Destination on One Touch Key 2 17 ...

Page 15: ...uide 1 Operation panel Perform the fax operation with this panel 2 Power switch Set this switch to the ON side when performing the fax or copier operation The touch panel lights to enable operation 3 LINE connector Connect the modular cord for the telephone line to this connector 4 TEL connector When using a commercially available telephone set connect the modular cord to this connector IMPORTANT ...

Page 16: ... jammed in the Document Processor 6 Opening handle Hold this handle when opening or closing the Document Processor 7 Original eject table Read originals are ejected onto this table 8 Original table Stack the sheet originals on this table 9 Original width guides Adjust these guides according to the original width 9 8 7 6 5 ...

Page 17: ...perates linked with the on screen OK 9 Start key Starts copying and scanning operations and processing for setting operations 10 Stop key Cancels or pauses the job in progress 11 Quiet Mode key You can make the machine quiet by reducing its running noise 12 Authentication Logout key Authenticates user switching and exits the operation for the current user i e log out 13 Energy Saver key Puts the m...

Page 18: ...g keys Use these buttons to switch between desktop pages This is displayed when there are multiple pages 4 Status Displays the Status screen If an error occurs the icon will show Once the error clears the display will return to normal 5 Task Screen Displays the Task Screen 6 Logout Logs out the current user This is displayed when user login administration is enabled 7 Login User Name Displays the ...

Page 19: ...nal Orientation Duplex 1 4 Ready to send FAX TX Resolution 200x100dpi Normal Add Edit Shortcut FAX On Hook Chain Check Address Book Add Dest Direct Ext Address Book Functions 10 10 Dest One Touch Key Recall Favorites Shortcut 1 Shortcut 2 Ready to send 1 1 Displays the status of the equipment as well as necessary operation messages 2 Enters destinations 3 Configures function settings 4 Displays av...

Page 20: ...you can communicate Enter the 4 digit local FAX ID number 8 7 TTI Select whether or not to print the local fax information on the fax on the receiving system 8 7 3 Sound Speaker Volume Set the volume when selecting On Hook Speaker Volume Volume of the built in speaker when the line is connected by selecting On Hook 8 5 Monitor Volume Set the monitor volume Monitor Volume Volume of the built in spe...

Page 21: ... user authentication screen appears enter your login user name and login password and select Login The factory default login user name and login password are set as shown below Control Description End Exits the wizard Previous Returns to the previous item Skip Advances to the next item without setting the current item Next Advances to the next screen Back Returns to the previous screen Model Name ...

Page 22: ...en appears during operations log in by referring to the machine s Operation Guide for Administrator User Name and Password The factory default login user name and login password are set as shown below Item Description Time Zone Set the time difference from GMT Choose the nearest listed location from the list If you select a region that utilizes summer time configure settings for summer time Date T...

Page 23: ...nstalled the PBX system to request connection of this machine Note that correct operation cannot be guaranteed in environment in which this machine is connected to PBX because the functions of this machine may be restricted Item Setting value Description Exchange Selection PSTN Use when connecting this machine to a public switched telephone network default PBX Use when connecting this machine to P...

Page 24: ...creen Address Book Menu Add Contact 2 Enter the destination name 1 Enter the destination name to be displayed on the Address Book Next 2 To specify an Address Number select Address Number 3 Use or numeric keys to enter a particular Address Number 001 to 250 If you set 000 as the address number the address is registered under the lowest available number 4 Select OK NOTE Registering and editing of t...

Page 25: ...the entry of the destination number This is useful when checking if the destination number has been entered correctly Moves the cursor Backspace To correct the fax number select Backspace on the touch panel and delete the digits one by one before reentering the fax number To delete the number entirely select the Clear key on the operation panel Key Description Detail Settings TX Start Speed This i...

Page 26: ...the screen FAX on the Home screen Address Book Menu Add Group 2 Enter the group name 1 Enter the group name to be displayed on the Address Book Next 2 To specify an Address Number select Address Number 3 Use or numeric keys to enter a particular Address Number 001 to 250 If you set 000 as the address number the address is registered under the lowest available number 4 Select OK Sub Address Transmi...

Page 27: ...destinations contacts you added to the Address Book Changing the Address Book 1 Display the screen 1 FAX on the Home screen Address Book Menu Edit 2 Select the destination contacts or group to edit NOTE Select the checkbox to select the desired destination from the list The selected destinations are indicated by a checkmark in the check box To cancel a selection select the corresponding checkbox t...

Page 28: ...in confirmation screen 4 To add the destination select Select the members to be added to add them 5 After you have completed the change of members select End 6 After you have completed the changes Save Yes The changed group is registered Deleting a Contact or Group 1 Display the screen FAX on the Home screen Address Book Menu Delete 2 To delete 1 Select the destination contacts or group to delete ...

Page 29: ... list of destinations registered in the Address Book You can sort the list in the order of index or address numbers of the destinations 1 Display the screen System Menu Counter key Address Book One Touch Print List 2 Print FAX List Index or FAX List No Yes The list is printed FAX Address List Index FAX Address List No ...

Page 30: ...y 1 Select the One Touch Key to be added and select 2 Select one destination contact or group from the Address Book 3 Enter the One Touch Key name displayed in the send base screen Next 4 Save Yes The destination is registered to the One Touch Key NOTE Destinations can be sorted or searched by destination name or address number Choosing from the Address Book page 3 8 NOTE Up to 24 characters can b...

Page 31: ...Key you wish to edit and select Menu Edit 2 To change to a different destination select Destination then select the destination and select OK 3 To change the name of the One Touch Key displayed on the basic screen select Name then enter the name and select OK 4 Save Yes The destination is registered to the One Touch Key To delete 1 Select the One Touch Key you wish to delete and select 2 Select Ye...

Page 32: ...y 3 9 Broadcast Transmission 3 10 Login Logout 3 12 Logging in when User Login Administration has been Enabled 3 12 Logging in when Job Accounting has been Enabled 3 13 Fax transmission functions 3 14 Original Size 3 15 Original Orientation 3 15 Duplex Only on models with a duplex scanning function 3 16 FAX TX Resolution 3 16 Density 3 16 Original Image 3 17 Continuous Scan 3 17 File Name Entry 3 ...

Page 33: ...y default Direct transmission The destination is dialed and communication starts before the original is scanned Select Direct to change the transmission method to direct transmission The key will be highlighted on the touch panel If the Direct is selected in the highlighted state the transmission method will change to memory transmission 4 Specifying destination Specify the transmission destinatio...

Page 34: ...does not respond when you have tried to send a fax When you want to send the fax to the same receiving system select Recall and you can call the receiving system you dialed on the destination list 1 Select Recall 2 Press the Start key The transmission will start NOTE When continuous scan is set you can continue with scanning of a next original after an original on the glass surface has been stored...

Page 35: ...l Scanning of originals is canceled and the originals are ejected When originals remain in the document processor take them out from the original output table Cancelling Memory Transmission during communication 1 Select the Status Job Cancel key 2 Canceling Transmission 1 Select Send Job Status 2 Select the transmission job that you want to cancel and select Cancel Yes Cancel the transmission NOTE...

Page 36: ...X Line Off To cancel direct transmission refer to the following To cancel a delayed transmission or send a fax by immediate transmission refer to the following To cancel polling transmission refer to the following NOTE To cancel direct transmission delayed transmission or polling transmission refer to the section for that function Cancelling Direct Transmission page 3 19 Cancelling Delayed Transmi...

Page 37: ...c keys changes the screen to the fax number entry screen NOTE Up to 64 digits can be entered Use the numeric keys to enter a number Key Description Pause Selecting this key adds about three seconds of waiting time during dialing For example when dialing the receiving system on an external line you can use this method to insert a pause before resuming dialing after you dial a specific number Space ...

Page 38: ...change the transmission start speed Select the speed from 33 600 bps 14 400 bps and 9 600 bps NOTE Normally this should be used with the default setting ECM ECM is a communication mode specified by the ITU T International Telecommunication Union that retransmits data when an error occurs Fax machines that have ECM mode check for errors as they communicate preventing distortion of the image due to ...

Page 39: ... name or address number Sort Name and Sort No Sorts the list by destination name or address number 3 Select OK Accept the destinations NOTE For more information about how to register destinations in the Address Book refer to the following Registering Destinations in the Address Book page 2 11 For details on the external address book refer to the following Embedded Web Server RX User Guide NOTE You...

Page 40: ...e screen Select One Touch Key 2 Enter a speed dial number 1 Select the Quick No Search key 2 Enter the One Touch Key number speed dial number with the numeric keys 3 Select OK The entered destination is selected 4 Select OK Accept the destinations NOTE For more information on adding One Touch Key refer to the following Adding a Destination on One Touch Key page 2 17 NOTE You can specify a One Touc...

Page 41: ...ns and select OK NOTE When using a group for the destination you can send originals to up to 100 destinations in one operation You can use this function together with sub address communication and delayed transmission When direct transmission has been selected it changes to memory transmission at the time of transmission NOTE If New Destination Entry FAX is set to Prohibit it is not possible to di...

Page 42: ...elect the destination from the One Touch Key 1 Select One Touch Key 2 Select all destinations and select OK 3 After selecting all the destinations press the Start key NOTE For details of One Touch Key refer to the following Choosing by One Touch Key page 3 9 ...

Page 43: ...n password OK 2 Select Login Simple Login If this screen is displayed during operations select a user and log in Character Entry Method page 10 2 NOTE If Network Authentication is selected as the user authentication method authentication destinations are displayed and either Local or Network can be selected as the authentication destination NOTE If a login password is required an input screen will...

Page 44: ...t ID entry screen enter the account ID using the numeric keys and select Login Logout When the operations are complete select the Authentication Logout key to return to the account ID entry screen NOTE If you entered a wrong character select the Clear key and enter the account ID again If the entered account ID does not match the registered ID a warning beep will sound and login will fail Enter th...

Page 45: ...or transmission 3 18 FAX Direct Transmission Sends FAX directly without reading original data into memory 3 19 FAX Polling RX Dial the destination and receive documents for Polling Transmission stored in the polling box 5 17 FAX TX Report Print a report of FAX transmission results 3 20 Function Description Reference Page Standby Transmission During a communication you can scan originals and schedu...

Page 46: ...ize DP Automatically detect the original size Metric A4 A5 A6 B5 B6 Folio 216 340 mm Select from the Metric standard sizes Inch Letter Legal Statement Executive Oficio II Select from the Inch series standard sizes Others 16K ISO B5 Envelope 10 Envelope 9 Envelope 6 Envelope Monarch Envelope DL Envelope C5 Hagaki Cardstock Oufuku Hagaki Return postcard Youkei 4 Youkei 2 Custom For instructions on h...

Page 47: ...tation Displayed when 2 sided Binding Left Right or 2 sided Binding Top is selected in Duplex Top Edge on Top Top Edge on Left Select the orientation of the original document top edge to scan correct direction Item Description 400 400 dpi Ultra when sending originals with minute characters and lines more finely Typical character size 6 point example Resolution Resolution 200 400 dpi Super when sen...

Page 48: ...th select Job No Date and Time or Date and Time Job No Job Finish Notice Sends E mail notice when a job is complete Users can be notified of the completion of a job while working at a remote desk saving the time spent waiting beside the machine to finish It is possible to attach an image to the e mail notice Job Finish Notice Setting page 8 4 Item Description Text Photo Best for mixed text and pho...

Page 49: ...elayed transmissions are set for the same time the communication will start in the order that the delayed transmissions have been set When delayed transmissions have been set in reverse order however sending of originals to be sent to the same destination is prioritized over the ones to be sent to different destinations You can cancel a delayed transmission any time before the specified transmissi...

Page 50: ...During direct transmission to cancel communication during transmission select the Stop key on the operation panel or Cancel on the touch panel The originals that have been scanned are ejected and the screen returns to the send default screen When originals remain in the document processor take them out Setting for Direct transmission Description On Starts direct transmission Dials the receiving sy...

Page 51: ...e receiving system 5 Press the Start key When you hear the fax tone the telephone line has connected to the receiving system Press the Start key Transmission begins Item Description Off Does not print reports On Prints reports Error Only Prints reports only if an error occurs NOTE This setting is displayed if FAX TX Result Reports is set to Specify Each Job Send Result Reports page 7 4 NOTE Connec...

Page 52: ...creen 2 Place the originals 3 Select the destination and set transmitting functions if you want to use any 4 Press the Start key Scanning of the originals starts and the next transmission is scheduled 5 When the communication is completed the scheduled transmission will begin NOTE Together with delayed transmission and interrupt send up to 35 transmissions can be scheduled You can use the broadcas...

Page 53: ...the Start key The originals are left in queue and the transmission will start when transmission becomes possible 5 When the interrupt send is completed the waiting communication and standby transmission will automatically resume NOTE When the total number of standby transmissions and delayed transmissions has already reached 35 you cannot use interrupt send FAX Direct Transmission page 3 19 NOTE W...

Page 54: ...e selected 2 When OK is selected 212 is automatically added to all destinations For the procedure for selecting a destination in the address book refer to the following Select fax number from One Touch Key 1 Select One Touch Multiple destinations can be selected 2 When OK is selected 212 is automatically added to all destinations NOTE It is convenient to register chain numbers that are used freque...

Page 55: ...ed so continue by entering the fax number 3 Menu Next Dest Another fax number can be entered When all destinations have been entered select OK NOTE When On is selected in Entry Check for New Dest a confirmation screen is displayed for the entered FAX number Re enter the same FAX number and select OK Machine s Operation Guide ...

Page 56: ...tting For the procedure for registering a favorites refer to the following Machine s Operation Guide 1 Select Favorites on the Home screen 2 Select a favorite When using the wizard mode 1 The registered screens are displayed in order Make the desired settings and select Next When all the settings are complete the confirmation screen is displayed 2 Place the originals and press the Start key When u...

Page 57: ...ception Method 4 2 Automatic Reception 4 3 Flow of automatic reception 4 3 Canceling reception Disconnection of communication 4 3 Manual Reception 4 4 Flow of manual reception 4 4 Fax reception functions 4 5 Media Type for Print Output 4 6 Reception Date Time 4 7 Duplex Printing 4 7 2 in 1 Print 4 7 Batch Print 4 7 ...

Page 58: ...s Reception Method The methods for receiving faxes on the machine are shown below Auto Normal Auto FAX TEL Refer to 5 26 Auto Answering machine Refer to 5 28 Manual Refer to 4 4 Auto DRD Available for some countries Refer to 5 30 Set the Reception Method 1 Display the screen System Menu Counter key FAX Reception Reception Mode 2 Select the reception method Select the reception method For Automatic...

Page 59: ...ception Printing Jobs are displayed on Printing Jobs of the Status screen To print the received originals supply paper or remove jammed paper For the Status screen refer to the following 2 Reception Print Received faxes are output to the inner tray with the printed side facing down Canceling reception Disconnection of communication When you cancel receiving by disconnecting the telephone line duri...

Page 60: ...at person 4 FAX on the Home screen On Hook Manual RX Reception will start 5 Replace the handset When reception starts return the handset to its original position NOTE To use manual reception a handset commercially available must be connected to the machine and the reception mode must be changed to manual reception To change to manual mode refer to the following Reception page 8 8 Connecting a tele...

Page 61: ...nd other information Reception Date Time page 4 7 Print received faxes on both sides of the paper Duplex Printing page 4 7 Receive a 2 page fax on 1 page 2 in 1 Print page 4 7 Print received faxes together as a batch Batch Print page 4 7 Forward received faxes to another fax machine or a computer Forward Settings page 5 2 Store received faxes in the machine without printing them Sub Address Box Fu...

Page 62: ...to use for fax reception 2 Selecting the paper size 1 Paper Size Metric or Inch 2 Select the paper size 3 Selecting the paper type 1 Select Media Type 2 Select the paper type 4 Set the paper type Configure paper settings for fax reception When selecting the paper type select the same paper type as you selected in step 3 For more information about configuring settings refer to the following Support...

Page 63: ...specify 2 in 1 reception and duplex printing at the same time 2 in 1 reception is disabled For more information about configuring settings refer to the following Batch Print When a multi page fax is received the pages are printed in a batch after all pages are received For more information about configuring settings refer to the following NOTE When the received fax data is forwarded after retrievi...

Page 64: ...ox 5 10 Printing Originals from a Sub Address Box 5 11 Checking Details 5 12 Deleting Originals after Printing from a Sub Address Box 5 12 Deleting Originals from a Sub Address Box 5 13 Printing a Sub Address Box List 5 13 Sub Address Transmission 5 14 Polling Communication 5 15 Polling Transmission 5 15 Polling Reception 5 17 Printing from a Polling Box 5 19 Checking Details 5 20 Deleting Origina...

Page 65: ...en System Menu Counter key FAX Forward Settings Forwarding 2 Configure the function To set Forwarding select On Registering Forwarding Destination 1 Display the screen System Menu Counter key FAX Forward Settings Forward Destination 2 Configure the function 1 Select Display the add destination screen and follow the procedure below to register the forwarding destination Only one destination can be ...

Page 66: ...er key FAX Forward Settings Forward Destination 2 Edit the destination Select and change the destination 3 Select End Deleting Registration Contents 1 Display the screen System Menu Counter key FAX Forward Settings Forward Destination 2 Delete the destination Select the destination and select Machine s Operation Guide NOTE For details on character entry refer to the following Character Entry Metho...

Page 67: ...me and End Time 2 Enter the start time and select Next 3 Enter the end time and select OK File Format Setting If you are sending the file as an E mail attachment or transferring it to a folder SMB or FTP select PDF TIFF XPS or OpenXPS as the file format 1 Display the screen System Menu Counter key FAX Forward Settings File Format 2 Configure the function Select PDF TIFF XPS or OpenXPS NOTE Enter t...

Page 68: ...ou can select either Sender Name or Sender 1 Display the screen System Menu Counter key FAX Forward Settings E mail Subject Add Info 2 Configure the function Select Sender Name Sender FAX No or Off FTP Encrypted TX Setting Specify whether to use FTP encryption when you send data 1 Display the screen System Menu Counter key FAX Forward Settings FTP Encrypted TX 2 Configure the function Select On or...

Page 69: ...formation addition To add document information select Date and Time Job No Job No Date and Time or Date and Time Job No and set None Add No Addr to Front or Add No Addr to Back for sender name information addition File name sample Example doc00352720140826181723 pdf doc file name 6 digit job number year month day hour minute second file format default setting is pdf NOTE For details on character e...

Page 70: ...2 In the Address or Location bar enter the machine s IP address as the URL e g 192 168 48 21 The web page displays basic information about the machine and Embedded Web Server RX as well as the current status of the machine 2 Select settings in Embedded Web Server RX Select a category from the navigation bar on the left to view and set values for that particular category If administrator privileges...

Page 71: ...d machines These include confidential delivery sending originals to an original delivery box set up in the receiving system and polling communication reception of documents from a source machine that is controlled from the receiving machine Using sub address communication on this machine also allows advanced communication functions such as storing received originals in Sub Address Boxes Sub addres...

Page 72: ...e 10 2 NOTE You can use up to 20 digits including the numbers from 0 to 9 space and characters to enter a sub address Item Description Box No Enter the box number If you enter 00 the smallest number available will be automatically assigned Owner Displayed when the user login administration is enabled Set the owner of the box Select the owner from the user list that appears Permission Select whethe...

Page 73: ...nel Box No Enter the box number If you enter 00 the smallest number available will be automatically assigned Sub Address Enter the sub address Owner Displayed when the user login administration is enabled Set the owner of the box Select the owner from the user list that appears Permission Select whether to share the box Box Password User access to the box can be restricted by specifying a password...

Page 74: ... 2 Press the Start key Printing starts NOTE When the password is set to a Sub Address Box you need to enter the password in the following situations If user login administration is disabled If user login administration is enabled but the Sub Address Box has been selected by another user when you login with user privileges Item Description Delete afterPrint The original is deleted after printing De...

Page 75: ...ls of the selected document are displayed Deleting Originals after Printing from a Sub Address Box To automatically delete the originals printed form the Sub Address Box use the following operation 1 Select Sub Address Box on the Home screen 2 Selecting the Originals 1 Select the box containing the document you want to print 2 Select the document you want to print 3 Select Print 3 Configure the fu...

Page 76: ...the Sub Address Box list in which the list of Box No s and Box names of the registered Sub Address Boxes are described When there are originals in the Sub Address Boxes the number of pages is displayed 1 Display the screen System Menu Counter key Document Box Sub Address Box 2 Print Print List Yes The list is printed NOTE The list can be printed when user login administration has been enabled and ...

Page 77: ...ng the numeric keys and then enter the OK key You can use up to 20 digits including the numbers from 0 to 9 space and characters to enter a sub address password 5 OK OK 5 Send Start Check the destination and press the Start key NOTE To use sub address transmission check that a sub address and password have been set in the receiving system in advance Encrypted transmission cannot be used in sub add...

Page 78: ...nsmission page 5 15 Deleting Originals After Polling Transmission Originals intended for polling transmission are automatically deleted after they have been sent to the destination To allow polling transmission of the same original to multiple destinations set this option to Off 1 Display the screen System Menu Counter key Document Box Polling Box 2 Configure the function Delete Transmitted File O...

Page 79: ...uplex Only on models with a duplex scanning function Select the type and binding of originals Scan Resolution Set the resolution at which to scan originals Density Adjust density File Name Entry Allows you to rename the files created from scanned originals Functions Original Size Select the size of originals to be scanned Orig Orientation Select the orientation of the original document top edge to...

Page 80: ...istered encrypted communication is disabled for polling reception To use polling reception you must first ensure that the sending machine is set up for polling transmission IMPORTANT The recipient s machine must also be equipped with a sub address bulletin board function Some fax machines cannot store originals and some do not support polling transmission Check both the sending and receiving machi...

Page 81: ...refer to the following 3 Select the destination and entering the sub address For the procedure for setting a sub address refer to the following For the procedure for selecting a destination refer to the following NOTE When the other party is using sub addresses refer to Using Polling Reception with Sub Addresses below Methods For Entering the Destination page 3 6 NOTE When On is selected in Dest C...

Page 82: ...r each of the functions refer to the following 2 Press the Start key Printing starts NOTE When On is selected in Dest Check before Send a destination confirmation screen is displayed when you press the Start key Confirmation Screen of Destinations page 7 10 Item Description File Name Entry Allows you to rename the files created from scanned originals Job Finish Notice Sends E mail notice when a jo...

Page 83: ...the Home screen 2 To delete 1 Select the document you want to delete and select 2 Select Yes The original is deleted NOTE If Delete Transmitted File is set to On originals are automatically deleted following polling transmitted Deleting Originals After Polling Transmission page 5 15 Polling Box 10 10 Document Box doc00006620100908151210 doc00006520100908150414 Cancel Store File Menu 1 1 Polling Bo...

Page 84: ...ed Therefore the sending system and the receiving system need to have the same encryption key and 2 digit key No registered in advance Description of settings at sending and receiving systems IMPORTANT In order to use encryption communication the fax of the other party needs to be an our brand system with the same type of encryption functions Settings Sending system Receiving system Reference page...

Page 85: ...letters arbitrarily The created encryption key is registered with a 2 digit key No 01 to 20 1 Display the screen System Menu Counter key FAX TX RX Common Encryption Key Registration 2 Configure the function 1 Select for the unregistered encryption key 2 Enter the 16 digit encryption key 3 Select OK 4 To register other encryption keys repeat Steps 2 1 to 2 3 3 Finish registration Select End NOTE Up...

Page 86: ...g Select End Deleting Registration Contents of Encryption Key 1 Display the screen System Menu Counter key FAX TX RX Common Encryption Key Registration 2 Deleting 1 Select the encryption key you want to delete and select 2 Select Yes This deletes the encryption key 3 Finish deleting Select End 10 10 System Menu Counter Key01 Menu 1 5 End Key02 Key03 Key04 TX RX Common Encryption Key Registration 1...

Page 87: ...ed Transmission Encryption On Encryption Key No 2 Select the encryption key number that you used to register the encryption key that you decided upon with the recipient For the procedure for registering an encryption key refer to the following 6 Select the encryption box If you need to select an encryption box set the box 1 Encryption Box On Encryption Box No 2 Enter the box number 0000 to 9999 wi...

Page 88: ...yption key refer to the following 2 Display the screen System Menu Counter key FAX Reception 3 Turn on encrypted reception 1 Encrypted Reception On 2 Select the encryption key number that you used to register the encryption key that you decided upon with the sender 3 Select OK The machine receives the encrypted originals from the sender of the specified encryption key NOTE When On is selected in D...

Page 89: ...charges even if the receiving system does not respond FAX FAX Telephone When the other party has sent originals with automatic send When the other party has sent originals with manual send When the other party is calling from a telephone Receives incoming call without making ringing tone The other party is required to pay the phone line charge from this point Makes ringing tone twice Only the othe...

Page 90: ...Lift the handset of the telephone within 30 seconds 2 Talk to the other party When the call is from a fax The machine starts receiving fax originals Reception Mode page 8 8 NOTE You can change the number of times the ringing tone rings Rings FAX TEL page 8 8 NOTE If you do not lift the handset within 30 seconds the machine switches to fax reception NOTE At the end of the conversation you can also ...

Page 91: ...switches to fax reception NOTE In order to use FAX Answering Machine Auto Switch Reception it is necessary to connect an answering machine equipped telephone set commercially available product to the machine For details such as responding to messages refer to the Operation Guide of each answering machine Set the number of rings to be made by the machine more than the number of rings to be made by ...

Page 92: ...ent The answering machine plays a response message and starts recording the other party s message When the call is from a fax The machine starts receiving fax originals NOTE If you lift the handset while the telephone set is still making the ringing tone the machine enters a status the same as manual reception Manual Reception page 5 33 NOTE When silence continues for at least 30 seconds during re...

Page 93: ...ive to the fax Flow of reception Preparation Select Auto DRD NOTE Using DRD Reception to receive a telephone call is only possible if a separately purchased telephone is connected to the machine DRD reception is only possible if you subscribe to the Distinctive Ring Pattern service provided by your telephone company Contact your telephone company for further information on the Distinctive Ring Pat...

Page 94: ...he call is from a telephone Lift the handset and speak with the other party When the conversation is over fax reception can be initiated manually When the call is from a fax Once the ringing tone stops fax reception will start automatically NOTE If you lift the handset while the telephone is still ringing the machine will deal with the call in the same manner as standard Manual FAX Reception Manua...

Page 95: ...Dial the destination Lift the handset and dial the number of the receiving system 3 Check if the telephone line has connected to the fax of the receiving system If the destination is a fax machine you will hear a long high beep sound If a person answers you can talk to that person 4 FAX on the Home screen On Hook 5 Press the Start key Transmission begins 6 Replace the handset When sending starts r...

Page 96: ...ax machine you will hear soft beep sounds If a person answers you can talk to that person 4 FAX on the Home screen On Hook Manual RX Reception will start 5 Replace the handset When reception starts return the handset to its original position NOTE FAX Automatic Reception has been preset for the receiving mode of this machine To use Manual Reception you need to change the receiving mode to Manual Re...

Page 97: ...2 digits When you hear the fax tone from the handset enter the 2 digit remote switch dial number using the dial button on the telephone set The telephone line switches to the machine and reception starts NOTE In order to use remote switch it is necessary to connect the tone signal sending telephone set commercially available product to the machine However even if it is a tone signal sending teleph...

Page 98: ...k FAX Receiving 6 2 Setup 6 3 Installing the FAX Driver 6 4 Uninstalling the FAX Driver 6 7 Basic Transmission 6 8 Configuring the Driver Default Settings 6 11 Default Settings Dialog Box 6 12 Changing Transmit Settings 6 16 Using Cover Pages 6 21 Cover Page Registration Default Settings 6 27 Transmission Control 6 32 ...

Page 99: ...ending Network FAX sending is performed in the following sequence Flow of Network FAX Receiving Network FAX receiving is performed in the following sequence Prepare a document using a PC networked to this machine Forward the document data from the PC to this machine using the same operation as for printing The machine sends the document data to another fax machine The other fax machine receives th...

Page 100: ... to the network using a network cable Registering Destinations in the Address Book Save frequently used destinations to the Address Book You can also select destinations from the Address Book using FAX Driver Machine s Operation Guide NOTE You can forward the received fax to the PC or forward it as an e mail attachment Forward Settings page 5 2 ...

Page 101: ...he screen 3 Select Custom Install NOTE Installation on Windows must be done by a user logged on with administrator privileges If the Welcome to the Found New Hardware Wizard dialog box displays select Cancel If the autorun screen is displayed click Run Setup exe If the user account management window appears click Yes Allow 1 Click View License Agreement and read the License Agreement 2 Click Accep...

Page 102: ... Click Install NOTE The machine cannot be detected unless it is on If the computer fails to detect the machine verify that it is connected to the computer via a network and that it is turned on and click Refresh If the desired device does not appear select Add custom device to directly select the device 1 2 2 3 1 ...

Page 103: ...6 6 Sending Faxes from PC Setup 5 Finish the installation If a system restart message appears restart the computer by following the screen prompts This completes the FAX driver installation procedure ...

Page 104: ...ssage appears restart the computer by following the screen prompts This completes the software uninstallation procedure NOTE Uninstallation on Windows must be done by a user logged on with administrator privileges NOTE In Windows 7 click Start button on the Windows and then select All Programs name of offer company and Uninstall Product Library to display the Uninstall Wizard NOTE The software can...

Page 105: ...nd orientation 3 Select Print from the File menu The Print dialog box for the application that you are using will appear 2 Select settings in the Print dialog box 1 Select the product name of the machine XXX XXX NW FAX to be used in the printer name list 2 Set the print range and other settings 3 Click Properties to open the Properties window NOTE Make sure that the number of copies is set to 1 Th...

Page 106: ...Print The Transmit Settings dialog box will appear 4 Select settings in the Transmit Settings dialog box You can specify settings such as a transmission time or a sub address in the Transmit Settings dialog box For details on the settings refer to the following 5 Specify a cover page To include a cover page select settings on the Cover Page tab For details on the settings refer to the following Co...

Page 107: ... entered 64 characters Characters that can be entered 0 to 9 space a space or CANNOT be entered as the first character 2 Click Add to Destination List The destination information will appear in the address list To send to multiple destinations repeat this operation 3 To use the Address Book click Select from Address Book and select the destination 7 Click Send Transmission will begin 1 2 3 ...

Page 108: ... click Start button on the Windows and then click Devices and Printers In Windows 10 click Start button on the Windows Control Panel hardware and sound and then Devices and Printers Item Description Original Size Select the size of the document being transmitted from the drop down list Available settings Letter Legal Statement A4 A5 Folio B5 JIS Orientation Specify whether the orientation of the d...

Page 109: ... order to activate the time fields to the right of the checkbox whenever you want to set the time that your documents will be transmitted The desired time setting can be entered directly with the keyboard or by clicking on the and arrows IMPORTANT If the time that is shown in the message display of this fax machine does not match the current time communications that use the timer may not be accomp...

Page 110: ...age Tab Item Description Attach Cover Page checkbox Check the checkbox when you want to add a cover page to your transmission NOTE For more information how to register the cover page refer to the following Cover Page Registration Default Settings page 6 27 ...

Page 111: ...en for entering the Login User Name and Password will be displayed when attempting a transmission The Login User Name and Password must be entered each time a transmission is attempted Job Accounting checkbox If the fax machine is set to Job Accounting select either Use Specific Account ID or Prompt for Account ID as desired Use Specific Account ID Enter the Account ID Transmission will be perform...

Page 112: ...tered Telephone Number A maximum of 20 characters can be entered Entry is allowed for the characters 0 to 9 and spaces FAX Number A maximum of 20 characters can be entered Entry is allowed for the characters 0 to 9 and spaces E Mail Address A maximum of 128 characters can be entered Available characters Symbols _ and Alphanumerics 0 9 A Z and a z NOTE Entering the e mail address makes it possible ...

Page 113: ...og box opens 2 Select the desired Address Book To select the Address Book registered in the fax machine select Address Book XXXX model name from the drop down menu NOTE There are three types of Address Books from which you can select the party to transmit to They are the fax machine s Address Book Windows Address Book and the Address Book for the Network FAX data file fdt Registering Destinations ...

Page 114: ...e Delete button To delete all of the destinations from the Destination List click on the Delete all button 4 Click on the OK button The Transmit Settings dialog box will be displayed once again NOTE The list can be sorted Click on the list item by which you want to sort the list Number Name Fax Number or are displayed next to the sorted items In addition the corresponding destinations can be selec...

Page 115: ...word as it is registered in the destination fax Maximum number of characters that can be entered 20 characters Characters that can be entered 0 to 9 space a space CANNOT be entered as the first character 3 Click on the OK button The Transmit Settings dialog box will be displayed once again NOTE In order to conduct sub address communication the other party s system also needs to be equipped with su...

Page 116: ... and used To attach and transmit a Cover Page place a check in the check box for Attach Cover Page in the Cover Page tab For more information how to use the cover page refer to the following 4 Optional Settings The settings that were selected in 1 Sending Options Tab can be changed by clicking the Options tab For the setting procedures refer to the following Using Cover Pages page 6 21 1 Sending O...

Page 117: ...ion 5 Transmitting Terminal Information Data The settings that were selected in 4 Sender Information Tab can be changed by clicking the Sender Information tab For the setting procedures refer to the following 4 Sender Information Tab page 6 15 ...

Page 118: ...e can be selected from a template The Cover Page contains such destination information and sender information as that shown below Sample of English template 01 No Item 1 Recipient Name 2 Destination Company Name 3 Destination Department Name 4 Destination Fax number 5 Sender Name 6 Sender Company Name 7 Sender Department Name 8 Sender Fax Number 9 Sender Telephone Number 10 Message 2 3 4 5 6 7 9 8...

Page 119: ...destination fax number and click on the Option Settings button 3 Enter the recipient information When finished click the OK button Basic Transmission page 6 8 1 Selecting a Destination from the Address Book page 6 16 Item Description FAX Number A maximum of 64 characters can be entered Item Description Company A maximum of 32 characters can be entered Department A maximum of 32 characters can be e...

Page 120: ...tem Description FAX Number The fax number cannot be changed Company A maximum of 32 characters can be entered Department A maximum of 32 characters can be entered Recipient A maximum of 32 characters can be entered 4 Sender Information Tab page 6 15 Item Description Company A maximum of 64 characters can be entered Department A maximum of 64 characters can be entered Name A maximum of 32 character...

Page 121: ...r Page to be attached Select a Cover Page template from the Cover Page Templates list NOTE If the Cover Page is registered in the Default Settings then the action of selecting the Cover Page for each transmission can be omitted Cover Page Registration Default Settings page 6 27 Original Cover Page templates can be created Creating New Cover Page Templates page 6 29 ...

Page 122: ... down menu 2 Click on the Close button 8 Edit the Message 1 Click on the Edit Message button IMPORTANT Before transmitting the fax be sure to use the Preview screen to check all of the displayed information including the recipient name and company name If there is a large number of characters for information that is automatically entered they might not completely fit in the field and the character...

Page 123: ... Basic Transmission 2 Enter the message to be added to the Cover Page and click on the OK button 9 Transmit Click on the Send button to begin the transmission Item Description Message A maximum of 1 000 characters can be entered ...

Page 124: ...tings The registration method is as follows 1 Open the Default Settings dialog box Perform the Default Settings Dialog Box procedure open the Default Settings dialog box 2 Attach a Cover Page Click on the Cover Page tab and place a check in the Attach Cover Page checkbox 3 Select the Cover Page to be attached Select a Cover Page template from the Cover Page Templates list Default Settings Dialog B...

Page 125: ...e the drop down menu at the top of the dialog box or click on the or button The template display magnification can also be changed within the range of 25 to 250 from the drop down menu 2 Click on the Close button 5 Edit the Message 1 Click on the Edit Message button 2 Enter the message to be added to the Cover Page and click on the OK button A maximum of 1 000 characters can be entered 6 Click on ...

Page 126: ...Open the Default Settings dialog box Perform the Default Settings Dialog Box procedure open the Default Settings dialog box 2 Edit the Cover Page templates 1 Click on the Cover Page tab and place a check in the Attach Cover Page checkbox and click on the New button The Edit Cover Page screen will be displayed NOTE For information regarding the registration method refer to the following 4 Sender In...

Page 127: ...ill not fit in the field box and some of the characters could be cut off When positioning the field box make it large enough and adjust the font point size so that the inserted information will fit in the field box NOTE When a fax is transmitted the information entered in the Default Settings and Destination Settings will automatically be entered in the fields Menu Item Template Display Inserted I...

Page 128: ... and can now be selected Sender Company Sender Company Sender information company name Department Sender Department Sender information department name Name Sender Name Sender information sender name FAX Number Sender FAX Number Sender information FAX number Telephone Number Sender Telephone Number Sender information telephone number Comment Comment Message entered in the Cover Page tab NOTE For in...

Page 129: ...ion Once a fax transmission starts being processed a Transmission Control icon will be displayed in the Windows Task Bar 1 Double click on that icon to access the Transmission Control window which indicates the status of all transmissions being processed To terminate any transmission select that transmission and then select Cancel from the Document menu Ending Transmission Control Right click on t...

Page 130: ...n 7 3 Printing Administrative Reports Result Report Setting 7 4 Send Result Reports 7 4 Report for Job Canceled before Sending 7 5 Recipient Format 7 5 FAX RX Result Reports 7 6 Activity Report Outgoing FAX Report and Incoming FAX Report 7 7 Printing Activity Reports 7 7 Automatic Printout 7 7 Status Page 7 8 Reporting FAX Receipt Result by E mail 7 9 Confirmation Screen of Destinations 7 10 ...

Page 131: ...esult report Receipt result report Report printing Latest send or receipt result Automatic printout after every sending or receiving operation No Print Output or Error Only is also optionally available 7 4 Activity report Report printing Latest 50 send or receipt results Any time and automatic printout after every 50 sending receiving 7 7 Status page Report printing Registration status of Local FA...

Page 132: ... in the list that you want to check A screen showing details will appear 2 Select Close to exit NOTE Even when job accounting is enabled 50 each of send and receipt results are displayed regardless of the account ID For details of the job history check refer to the following Machine s Operation Guide NOTE To check the fax save log select Status Job Cancel key Store Job Log FAX Job Log 10 10 Status...

Page 133: ... Counter key Report Result Report Setting Send Result Report FAX 2 Configure the function 1 Select Off not to print On to print Error Only or Specify Each Job 2 If you selected On Error Only or Specify Each Job specify whether the transmitted image is to be attached by selecting Off do not print transmitted image Partial Image print part of the transmitted image at full size or Full Image print th...

Page 134: ...nation is selected either the name destination name or the destination FAX No stored in the address book is shown When both a name and an address are saved in the address book the name is displayed If Name and Destination is selected both the name destination name and destination FAX No are shown When the destination was directly entered only the destination FAX No is shown 1 Display the screen Sy...

Page 135: ...was received successfully 1 Display the screen System Menu Counter key Report Result Report Setting RX Result Report FAX 2 Configure the function Select Off not to print On to print or Error SubAddress NOTE Fax receipt can also be notified by e mail instead of checking the receipt result report Reporting FAX Receipt Result by E mail page 7 9 FAX RX Result Report Completed ...

Page 136: ...ivity Reports The latest 50 sent or received fax data are printed as a report 1 Display the screen Status Job Cancel key FAX Job Log 2 Print 1 Select Outgoing FAX Report to print the sent fax report and select Incoming FAX Report to print the received fax report 2 Select Yes The report is printed Automatic Printout An activity report is printed out automatically after every 50 faxes sent or receiv...

Page 137: ...rrent status of machine FAX related information includes the Local FAX Number Local FAX Name fax line setting etc You can print it out as necessary 1 Display the screen System Menu Counter key Report Report Print 2 Print Status Page Yes A status page is printed Status Page ...

Page 138: ... the address book 1 E mail Address Book 2 Select the destination from the Address Book and select OK Enter the E mail address 1 E mail Address Entry 2 Enter the address of the destination and select OK For details on character entry refer to the following NOTE This setting is displayed when the FAX RX Result Report setting is On or Error SubAddress FAX RX Result Reports page 7 6 If the setting is ...

Page 139: ...tination Delete a destination 1 To delete the destination select the destination you want to delete and select 2 Select Yes The destination is deleted Add a destination To add the destination select Cancel and then return to the destination screen 3 Select Check When you have finished checking all destinations select Check 4 Press the Start key Start sending NOTE Be sure to confirm every destinati...

Page 140: ...n Restriction 8 10 Registering Permit FAX No 8 11 Changing Permit FAX No 8 12 Deleting Permit FAX No 8 12 Registering Reject FAX No 8 13 Changing Reject FAX No 8 14 Deleting Reject FAX No 8 14 Registering Permit ID No 8 15 Changing Permit ID No 8 16 Deleting Permit ID No 8 16 Setting Send Restriction 8 17 Setting Reception Restriction 8 17 Unknown Number Reception 8 17 Unusable Time 8 18 Account M...

Page 141: ...tings and exits NOTE If the login user name entry screen appears during operations log in by referring to the machine s Operation Guide for Administrator User Name and Password The factory default login user name and login password are set as shown below If function default settings have been changed the Reset key can be selected in each function screen to immediately change the settings System Me...

Page 142: ... 8 5 Document Box Configures settings related to the Sub Address Box and Polling Box For details on Sub Address Box refer to the following Sub Address Box Function page 5 8 For details on Polling Box refer to the following Polling Communication page 5 15 FAX Configures settings for fax functions 8 6 Address Book One Touch Configures Address Book and One Touch Key settings For details on Address Bo...

Page 143: ...ist of destinations registered in the Address Book You can sort the list in the order of names or address numbers of the destinations Printing Address List page 2 16 Outgoing FAX Report The latest 50 sent fax data are printed as a report Incoming FAX Report The latest 50 received fax data are printed as a report Item Description Outgoing FAX Report An activity report is printed out automatically a...

Page 144: ...se tray IMPORTANT The following paper sizes can be used for fax reception Inch models Letter Legal Statement Metric models A4 B5 A5 R A5 Folio Media Type Set the media type for multi purpose tray Value Plain Rough Transparency Vellum Labels Recycled Preprinted Bond Cardstock Color Prepunched Letterhead Envelope Thick High Quality Custom 1 8 Cannot be used to print received faxes Item Description B...

Page 145: ...ation message in power supply off Value Off On Item Description Encryption Key Registration This is used to register an encryption key for encrypted communication Encryption page 5 21 FAX Remote Diagnosis If a problem arises with this machine and you contact our service representative this feature enables our Service Center computer to access the machine over the phone and check the machine s stat...

Page 146: ...fication TTI However when job accounting has been enabled and you send originals after entering an Account ID the Account Name is printed This item is included in the Quick Setup Wizard Quick Setup Wizard Fax Setup page 2 7 Account Name Use Select whether or not to use account name as local FAX name Value Off On Dialing Mode Inch version only Select the telephone line according to the type you are...

Page 147: ...es are printed in a batch after all pages are received If Off is set each page is printed as it is received Value Off On Batch Print page 4 7 Rings Normal If the reception method is fax automatic reception the number of rings until the machine answers a call can be changed as needed NOTE This setting does not appear in some regions Rings Answering Machine If the reception method is FAX Answering M...

Page 148: ...e ITU T International Telecommunication Union that retransmits data when an error occurs Fax machines that have ECM mode check for errors as they communicate preventing distortion of the image due to noise on the line and other conditions Value On Off NOTE When there is a large amount of noise on the line communication may take slightly longer than when Off is selected RX Start Speed Change the RX...

Page 149: ...cation Establishing Requirements Send Restrictions Register Permitted FAX numbers or Permitted ID numbers Registering Permit FAX No page 8 11 Registering Permit ID No page 8 15 Send restriction settings are specified in Permit List Address Book in Send Restrictions Setting Send Restriction page 8 17 Register the Local FAX Numbers or Local FAX IDs of other parties If there is neither a Permitted FA...

Page 150: ...fied in Reject List in Reception Restrictions Setting Reception Restriction page 8 17 If there are no Reject FAX numbers registered calls are only rejected from senders whose Local FAX Numbers Indicates local FAX information entries not the actual line numbers are not registered The sender s Local FAX Number is not registered The sender s Local Fax Number matches a Reject FAX No registered on the ...

Page 151: ...eleting Permit FAX No 1 Display the screen System Menu Counter key FAX TX RX Restriction Permit No List 2 Deleting 1 Select Permit FAX No you want to delete and select 2 Select Yes The registration is deleted NOTE For the procedure for entering a number refer to the following Registering Permit FAX No page 8 11 System Menu Counter TX RX Restriction Permit No List 10 10 1 1 Menu End 6764 System Men...

Page 152: ...ject FAX No Up to 20 digits can be entered 3 Select OK 3 To register another Reject FAX No repeat Steps 2 1 to 2 3 NOTE Up to 25 Reject FAX numbers can be registered NOTE Select Pause to insert a pause between numbers Select Space to enter a space Use or to move the cursor Selecting Backspace deletes the character to the left of the cursor TX RX Restriction Reject No List 10 10 System Menu Counter...

Page 153: ...leting Reject FAX No 1 Display the screen System Menu Counter key FAX TX RX Restriction Reject No List 2 Deleting 1 Select Reject FAX No you want to delete and select 2 Select Yes The registration is deleted NOTE For the procedure for entering a number refer to the following Registering Reject FAX No page 8 13 TX RX Restriction Reject No List 10 10 System Menu Counter End Menu 1 1 6543 TX RX Restr...

Page 154: ...X RX Restriction Permit ID List 2 Add a Permit ID No 1 Select 2 Use or the numeric keys to enter Permit ID No 0000 to 9999 3 Select OK 3 To register another Permit ID No repeat Steps 2 1 to 2 3 NOTE Up to 10 Permit ID numbers can be registered System Menu Counter TX RX Restriction Permit ID List 10 10 1 1 Menu End 1111 ...

Page 155: ...leting Permit ID No 1 Display the screen System Menu Counter key FAX TX RX Restriction Permit ID List 2 Deleting 1 Select Permit ID No you want to delete and select 2 Select Yes The registration is deleted NOTE For the procedure for entering a number refer to the following Registering Permit ID No page 8 15 System Menu Counter TX RX Restriction Permit ID List 10 10 1 1 Menu End 1111 System Menu Co...

Page 156: ...n the list of Rejected FAX numbers or from senders whose Local FAX Number is not registered are rejected You can select whether reception from a party whose local fax number is not registered is allowed or rejected in Unknown Number Reception Unknown Number Reception page 8 17 1 Display the screen System Menu Counter key FAX TX RX Restriction RX Restriction 2 Configure the function To not use the ...

Page 157: ...rations are prohibited during the unusable time period including printing of copy jobs and printer jobs and printing from USB memory Faxes and print jobs received during the unusable time period are printed after the unusable time period ends or when the unusable time period is temporarily canceled NOTE If the login user name entry screen appears during operations log in by referring to the machin...

Page 158: ...ress transmission Encrypted transmission Manual send when dialed from this machine to the receiving system Polling reception Sending Faxes from PC Login Logout page 3 12 Item Description Registration of User Register user access privileges User ID and Password Enable Disable User accounting Enable User accounting NOTE Machine s Operation Guide Item Description Registration of Account Register Acco...

Page 159: ...transmission Manual send when dialed from this machine to the receiving system Polling reception Sending Faxes from PC When job accounting has been enabled batch transmission function works only for communication to be performed for the same Account ID The communication to be performed with a different Account ID is not conducted as a batch transmission Normally the Local FAX Name is printed in th...

Page 160: ...lains the following topics Indicators During Sending Receiving Operation 9 2 Responding to an Attention Indicator Flashes 9 2 Precautions When Turning Power OFF 9 3 Messages 9 4 Error Code List 9 5 Troubleshooting 9 8 Common inquiries 9 10 ...

Page 161: ...heck an error message If the message is not indicated on the touch panel when the Status Job Cancel key is pressed or the attention indicator flashes check the following Symptom Checkpoints Corrective Actions Reference Page Cannot send fax Is the modular cord connected correctly Connect the modular cord correctly Is Permitted FAX No or Permitted ID No registered correctly Check Permitted FAX No an...

Page 162: ...Turning Power OFF To power off the machine press the Power switch You cannot automatically receive a fax when the power switch is turned off The confirmation message for power supply off is displayed It takes about 3 minutes for power off Show Power Off Message page 8 6 OFF ...

Page 163: ...Box limit exceeded Is End displayed on the screen The specified box is full and no further storage is available Job is canceled Select End Try to perform the job again after printing or deleting data from the box Cannot process this job This job is canceled because it is restricted by User Authorization or Job Accounting Select End Job Accounting restriction exceeded Is the acceptable printing cou...

Page 164: ...ctly Send again If you still have trouble reduce TX Start Speed and send again NOTE If the communication error occurs frequently change the default setting of TX Start Speed in System Menu E00900 E00910 U00900 U00910 Page s not received correctly Ask the sender to resend NOTE If the communication error occurs frequently change the default setting of RX Start Speed in System Menu E01000 E01097 U010...

Page 165: ...chine is an our brand model and transmission restrictions were found set by the other party during polling reception Communication was interrupted because the password was incorrect 2 The other party s machine is an our brand model and transmission restrictions were found set by the other party during sub address bulletin board reception Communication was interrupted because the password was incor...

Page 166: ...s stopped because there is no more free space in the memory of this machine Create free space by outputting the data stored in the memory or cancel the reception to the Sub Address Box E14100 U14100 Transmission to the Sub Address Box or sub address box on our brand recipient machine was stopped because there is no more free space in the memory of the recipient machine Check with the recipient E19...

Page 167: ...the forwarding destination 5 2 Cannot receive document Is the modular cord connected correctly Connect the modular cord correctly Is Communication error displayed Remedy the cause of error and ask the sender to retry 9 5 Are you using an IP telephone line You may be able to temporarily clear the communication error by changing the setting of RX Start Speed in Reception 8 9 Is RX reception restrict...

Page 168: ...a Sub Address Box Is the box password been set Enter the correct box password 5 8 Cannot use polling reception Is polling transmission being used correctly on the sending machine Check with the sending machine Cannot use sub address bulletin board communication Does the other party s fax machine have the same sort of sub address bulletin board communication function If the other party s fax machin...

Page 169: ...are frequently received after this product has been purchased Question Answer 1 I want to add a completion stamp when sending faxes This product does not have a function for completion stamps 2 I want to send and receive faxes in color Fax images are transmitted and received in black and white ...

Page 170: ... the following topics Character Entry Method 10 2 Entry Screens 10 2 Entering Characters 10 4 Specifications 10 5 Menu Map 10 7 Received FAX Sizes and Paper Priority Metric Model 10 13 Received FAX Sizes and Paper Priority Inch Model 10 14 ...

Page 171: ...eyboard Select the character to enter 3 Cancel Select to cancel entered characters and return to the screen before the entry was made 4 Back Select to return to the previous screen 5 OK Next Select to save the entered characters and move to the next screen 6 Enter Key Select to enter a line break 7 Space Key Select to insert a space 8 Delete Key Select to delete a character to the left of the curs...

Page 172: ...een No Display Key Description 13 To enter a number or symbol not shown in the keyboard select the cursor key and scroll the screen to view other numbers or symbols to enter Input Limit Back Next Cancel AB Del 2 32 ABC A a Add Name Input Limit Symbol Del 3 32 Back Next Cancel Add Name 123 13 ...

Page 173: ...er numbers or symbols select ABC to display Symbol 3 Register the characters you entered Select Next The entered characters are registered Input Limit Back Next Cancel L Del 1 32 ABC A a Add Name Input Limit Back Next Cancel Add Name List Del 5 32 A a ABC 1 3 2 4 5 6 8 7 Input Limit Back Next Cancel List A Del 6 32 ABC A a Add Name Input Limit Symbol Del 8 32 Back Next Cancel Add Name List A 1 2 1...

Page 174: ...th 8 51 216 mm Max length 14 01 356 mm Automatic Document Feed Max 50 sheets with document processor Resolution Scan 200 100 dpi Normal 8 dot mm 3 85 line mm 200 200 dpi Fine 8 dot mm 7 7 line mm 200 400 dpi Super Super Fine 8 dot mm 15 4 line mm 400 400 dpi Ultra Ultra Fine 16 dot mm 15 4 line mm Print 600 dpi Gradations 256 shades Error diffusion One Touch Key 100 keys Multi Station Transmission...

Page 175: ...m Document Size Letter Legal Statement A4 A5 Folio B5 JIS FAX Delayed Transmit Based on settings in the Network FAX Driver setting is possible to any 1 minute increment within the subsequent 24 hour period Transmit and Print Fax transmission and print out at the machine is available Broadcast Transmission Max 100 destinations Job Accounting Requires the input of a Login User Name and Password in t...

Page 176: ...page 3 17 FAX Delayed Transmission page 3 18 FAX Direct Transmission page 3 19 FAX Polling RX page 5 17 FAX TX Report page 3 20 Add Edit Shortcut refer to the machine s Operation Guide Sub Address Box page 5 8 Polling Box page 5 15 Print Job Status refer to the machine s Operation Guide Send Job Status refer to the machine s Operation Guide Store Job Status refer to the machine s Operation Guide S...

Page 177: ...e machine s Operation Guide Removable Memory refer to the machine s Operation Guide USB Keyboard refer to the machine s Operation Guide Network Connection Status refer to the machine s Operation Guide Wi Fi Direct refer to the machine s Operation Guide Wi Fi refer to the machine s Operation Guide Quick Setup Wizard FAX Setup page 2 7 Paper Setup refer to the machine s Operation Guide Energy Saver ...

Page 178: ...page 7 7 Admin Report Settings page 7 7 Outgoing FAX Report page 7 7 Incoming FAX Report page 7 7 Result Report Setting Send Result Report E mail Folder refer to the machine s Operation Guide FAX page 7 4 Canceled before Sending page 7 5 Recipient Format page 7 5 RX Result Report FAX page 7 6 RX Result Report Type page 7 9 Job Finish Notice Setting refer to the machine s Operation Guide Send Log H...

Page 179: ...uide Error Handling refer to the machine s Operation Guide Measurement refer to the machine s Operation Guide Low Toner Alert refer to the machine s Operation Guide Keyboard Layout refer to the machine s Operation Guide USB Keyboard Type refer to the machine s Operation Guide Format SD Card refer to the machine s Operation Guide Display Status Log Display FAX Log page 8 6 Show Power Off Massage pa...

Page 180: ...h Print page 8 8 Rings Normal page 8 8 Rings Answering Machine page 8 8 Rings FAX TEL page 8 8 Reception Mode page 8 8 Remote SW Dial page 8 8 Encrypted Reception page 5 21 ECM RX page 8 8 RX Start Speed page 8 8 TX RX Restriction page 8 10 Forward Settings page 5 2 New Destination Entry FAX page 8 9 Application refer to the machine s Operation Guide Internet refer to the machine s Operation Guide...

Page 181: ...y Sleep Timer refer to the machine s Operation Guide EnergySaver RecoveryLevel refer to the machine s Operation Guide Power Off Rule models for Europe refer to the machine s Operation Guide Power Off Timer models for Europe refer to the machine s Operation Guide Auto Error Clear refer to the machine s Operation Guide Error Clear Timer refer to the machine s Operation Guide Unusable Time page 8 18 ...

Page 182: ...o 2 A5 R Paper orientation is different from the received document The image is printed after being rotated 90 automatically Folio A4 A4 The document is printed on this paper when the length of the document received is 351 to 380 4 mm and the cassette set as the Folio size is empty 3 A4 B5 Images shorter than the A4 vertical length 297 mm are received and then reduced and printed on B5 paper horiz...

Page 183: ...ction of the paper feed Paper Size 1 Statement Letter Legal Letter Legal 2 Statement R Paper orientation is different from the received document The image is printed after being rotated 90 automatically Legal Letter Letter The document is printed on this paper when the length of the document received is 376 6 to 379 3 mm and the cassette set as the Legal size is empty indicates print output on two...

Page 184: ...on 5 30 Duplex 3 16 Duplex Printing 4 7 8 8 E ECM RX 8 9 ECM TX 8 7 E mail Notice Job Finish Notice 3 17 Reporting FAX Receipt Result 7 9 Encryption Communication 5 21 Changing Registration Contents of Encryption Key 5 23 Deleting Registration Contents of Encryption Key 5 23 Encryption Box No 5 21 Encryption Key 5 22 Encryption Key No 5 21 Registering an Encryption Key 5 22 Setting the Encrypted R...

Page 185: ... 8 12 Change Deletion 8 12 Registration 8 11 Permit ID No Change 8 16 Deletion 8 16 Registration 8 15 Polling Communication 5 15 Checking 5 20 Deleting Originals in a Polling Box 5 20 Polling Reception 5 17 Polling Transmission 5 15 Printing from a Polling Box 5 19 Sub Address Bulletin Board Communication 5 17 Precautions When Turning Power OFF 9 3 Q Quick No Search key 2 6 Using the Speed Dial ke...

Page 186: ...w to Register 5 9 Printing Originals from Sub Address Box 5 11 Sub Address Box List 5 13 Sub Address Bulletin Board Reception 5 17 Sub Address Communication 5 8 Sub Address 5 8 Sub Address Password 5 8 Sub Address Transmission 5 14 T Telephone Line 2 7 8 7 Time 2 9 Touch Panel 2 5 Transmission Restriction 8 10 Communication Establishing Requirements 8 10 Permit FAX No 8 11 Permit ID No 8 15 Prereq...

Page 187: ......

Page 188: ...First edition 2016 6 2S5GEEN500 ...

Reviews: