—
24
—
9. BATTERY REPLACEMENT
When the display shows the low battery indication, (
), disconnect the test
leads from the instrument. Remove the battery cover and the batteries.
Replace with eight (8) new 1.5 V R6 or LR6 batteries, taking care to observe
correct polarity. Replace the battery cover.
Note: The instrument is sometimes powered on when connecting a battery.
But when the instrument isn't connected with the main power and the
test button is also not pressed, the instrument is automatically powered
off in about 1 minute.
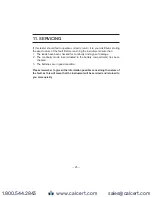
10. FUSE REPLACEMENT
The continuity test circuit is protected by a 600V 0.5A HRC ceramic type fuse
of less than 1Ω resistance situated in the battery compartment, together with a
spare. If the instrument fails to operate in the continuity test mode, first
disconnect the test leads from the instrument. Next remove the battery cover,
take out the fuse and test its continuity with another continuity tester. If it has
failed, replace it with a spare, before refitting the battery cover. Do not forget to
obtain a new fuse and place it in the spare position.
If the instrument will not operate in the loop impedance and RCD modes, it
may be that the protective fuses fitted on the printed circuit board have blown.
If you suspect that the fuses have failed, return the instrument to your
distributor for service - do not attempt to replace the fuses yourself.
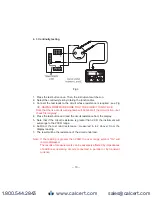
Fig 11
www.calcert.com
sales@calcert.com
1.800.544.2843
0
5
10
15
20
25
30

