background image

THE  FINEST  RADIO  CONTROL  MODELS

R

※製品改良のため、予告なく仕様を変更する場合があります。

SPECIFICATIONS  ARE  SUBJECT  TO  CHANGE  WITHOUT  NOTICE.

No. 31001

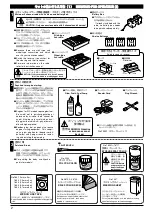
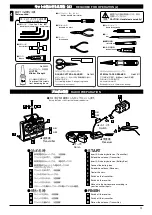
●キットの他にそろえる物 

REQUIRED FOR OPERATION

●プロポの準備    

RADIO PREPARATION

●組立て前の注意 

BEFORE YOU BEGIN

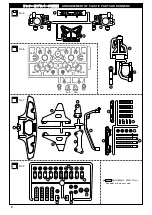
●ランナー付プラパーツ配置図 

ARRANGEMENT OF PLASTIC PARTS ON RUNNERS

●本体の組立て 

ASSEMBLY

●セッティングガイド 

ADJUSTMENT

●取扱いの注意 

OPERATING YOUR MODEL SAFELY

●スペアパーツ・オプションパーツリスト 

SPARE PARTS & OPTIONAL PARTS

●分解図 

EXPLODED VIEW

 3

3

 5

 6

 26

27
28

29 

 31 

32 

 33

目 次 

INDEX

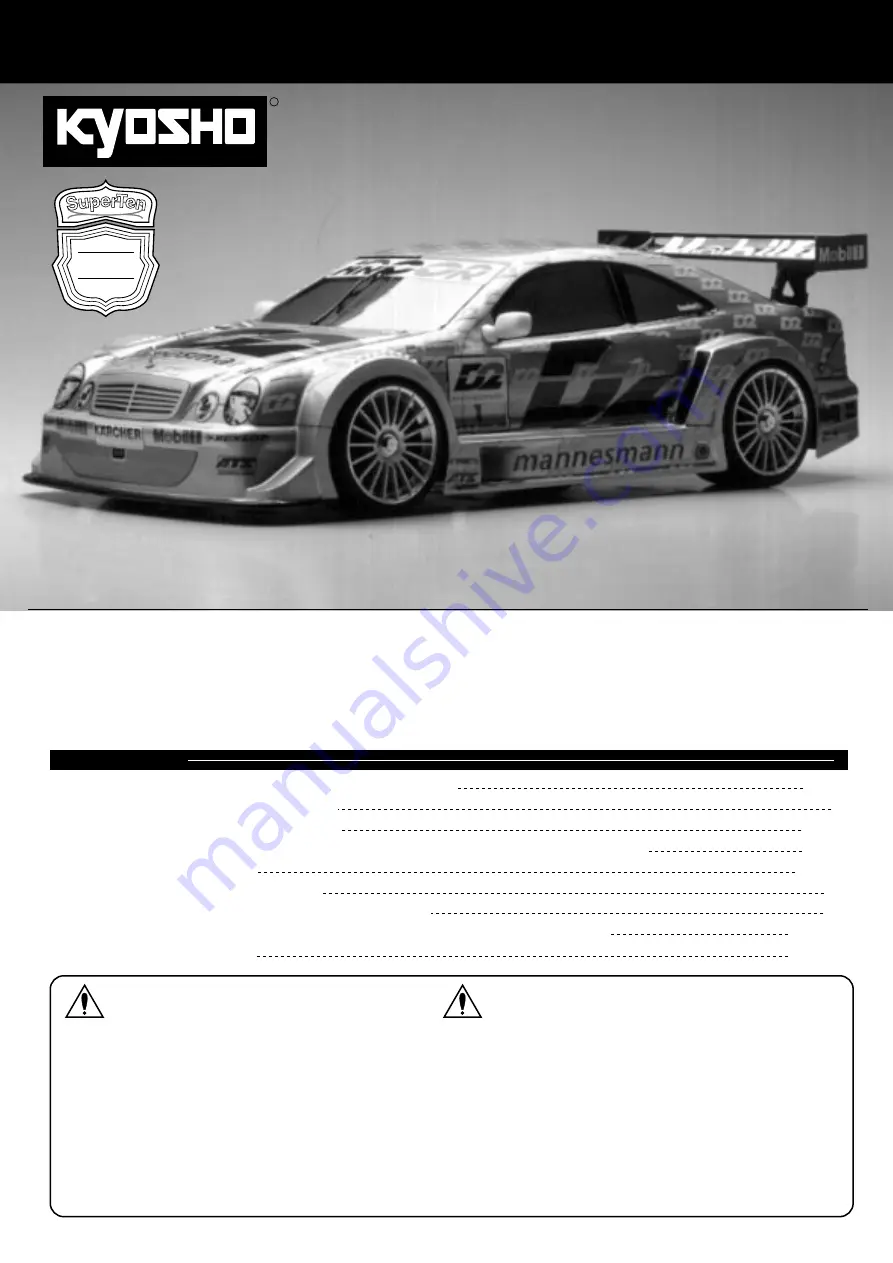
D2 AMG メルセデス CLK

INSTRUCTION MANUAL

組立/取扱説明書

安全のための注意事項

SAFETY PRECAUTIONS

This radio control model is not a toy.

この無線操縦模型は玩具ではありません!

●この商品は高い性能を発揮するように設計されています。
 組立てに不慣れな方は、模型を良く知っている人にアド
 バイスを受け確実に組立ててください。
●小さい部品があるので、組立て作業は、幼児の手がとど
 かない所で必ず行ってください。
●動かして楽しむ場所は万一の事故を考えて、安全を確認
 してから責任をもってお楽しみください。
●組立てた後も、説明書がいつでも見られるように大切に
 保管してください。

First-time builders should seek the advice of experienced modellers 

before commencing assembly and if they do not fully understand 

any part of the construction. 

Assemble this kit only in places out of children's reach!

Take care before operating this model.  

You are responsible for this model's assembly and safe operation!

Always keep this instruction manual ready at hand for quick

reference, even after completing the assembly.

Size

GP 4WD

D2 AMG Mercedes CLK

© 2000 KYOSHO

/禁無断転載複製

※ご使用前にこの説明書を良くお読みになり十分に理解してください。

Before commencing assembly, please read these instructions thoroughly!

Radio Controlled .15 Engine Powered Touring Car Series 

SuperTen GP FW-04 4WD

Summary of Contents for D2 AMG Mercedes CLK

Page 1: ...な方は 模型を良く知っている人にアド バイスを受け確実に組立ててください 小さい部品があるので 組立て作業は 幼児の手がとど かない所で必ず行ってください 動かして楽しむ場所は万一の事故を考えて 安全を確認 してから責任をもってお楽しみください 組立てた後も 説明書がいつでも見られるように大切に 保管してください First time builders should seek the advice of experienced modellers before commencing assembly and if they do not fully understand any part of the construction Assemble this kit only in places out of children s reach Take care before operatin...

Page 2: ...3点 を セットにしました 2 Because there are stick type and wheel type transmitters use which ever fits your convenience best Switch the reverse transmitter for the steer ing and throttle control For more information on the radio refer to its instruction manual 筆 PAINT BRUSH 3 塗料と筆 Paint and Brush ポリカカラー POLYCA COLOR No 2230 Micron Line Tape KYOSHO ミクロンラインテープ MICRON LINE TAPE マスキング 細部デザイン用伸縮自在テープです No 1841 1...

Page 3: ...1 12 Insert AA size dry batteries Transmitter Connect the battery box START FINISH 5 4 3 8 ON OFF 10 送信機 Transmitter 受信機 Receiver スイッチ Switch サーボ Servo 使用する工具の取扱いには 充分 注意してください CAUTION Handle tools carefully 注意 3 REQUIRED FOR OPERATION 2 キットの他にそろえる物 2 ロックタイト 中強度 LOCTITE Midium Strength No 94402 ビスの緩みを防ぎます To prevent the screws from becoming loose キットに入っている工具 TOOLS INCLUDED カッターナイフ Sharp Hobby Knif...

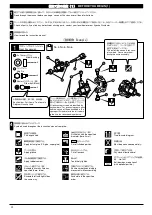
Page 4: ...ws are identified by key numbers For purchasing spare parts find the key no of the part needed in the spare part list and refer to the left column to look up the corresponding order no 説明書に使われているマーク Symbols used throughout the instruction manual comprise 4 瞬間接着剤で接着する Apply instant glue CA glue super glue グリスを塗る Apply grease 2セット組立てる 例 Assemble as many times as specified here twice x2 左右同じように組立てる A...

Page 5: ...s kit contains screws and hardware in different metric sizes and shapes Before using them check the screws on the true to scale diagrams on the left side in each assembly step Some screws are extras 5 ビスの種類 SCREWS ビス Screw キャップビス Cap Screw 3x12mm サラビス F H Screw TPビス Self tapping TP Screw TPサラビス TP F H Screw セットビス Set Screw 小物部品のサイズ例 OTHER HARDWARE 3x12mm ビス Screw 3mm 12mm 3mm 12mm サラビス Flat Head F...

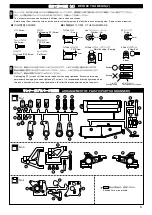
Page 6: ...0 139 105 141 145 104 121 135 133 132 136 137 113 140 87 88 89 86 G 1 G 1 G 6 G 6 G 4 G 4 G 5 G 5 G 10 G 3 G 3 71 70 63 62 64 85 74 ランナー付プラパーツ配置図 ARRANGEMENT OF PLASTIC PARTS ON RUNNERS Shaded Parts are not used 部分の部品は 使用しません ...

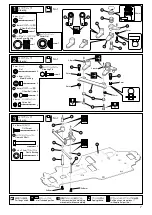
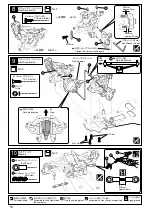
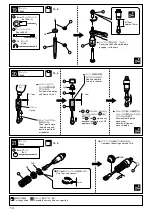
Page 7: ... 6mm Nylon Nut 1902 1902 1 2 3 4 5 6 9 9 9 8 10 11 12 12 13 14 13 13 13 144 15 3mm 3mm 3mm 3mm 3mm 2 6mm 2 6mm 3x8mm 3x8mm Apply grease Ensure smooth non binding movement while assembling Cut off shaded portion 1901 Ball bearings are optional with optional part no 1 5 Servo Saver Spring 6 1 Saver Nut 24mm 1 2 使用する袋詰 ステアリング ステアリング ステアリング メタル ユニクランクシャフト サラビス プラメタル ナット ナット ステアリングピン ピロボール 銀 ピロボール 銀 ナイ...

Page 8: ...m 3x10mm 3x10mm 5mm 5mm x1 x1 Firmly tighten the set screws onto the flat spots Firmly tighten the set screws onto the flat spots Gear Differential For Front Front For Rear Rear 20 21 20 17 16 21 17 18 19 18 16 24 23 22 26 22 27 28 23 25 23 Apply threadlocker screw cement x2 Assemble as many times as specified Apply grease 使用する袋詰 デフギヤ ギヤボックス Oリング TPビス 銀 セットビス ベアリング ベアリング ワッシャー Eリング TPビス シャフト 平らな面に...

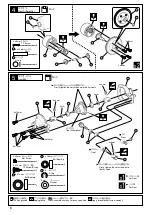
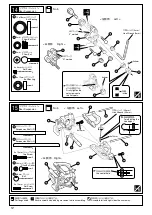
Page 9: ...marked 4x4mm 4x4mm 3x3mm 3x10mm Inside 1mm 2 5mm For adjusting the ride height 1mm Ensure smooth non binding movement while assembling Assemble left and right sides the same way Right Right Hex Wrench 2 5mm 2 146 E3 E ring Firmly tighten the set screws onto the flat spots 2 41 Suspension Shaft E 2 42 Suspension Shaft D 4 35 11mm Pillow Ball Nut R 使用する袋詰 ベアリング セットビス ピロボール 銀 ピロボール ベアリング セットビス セットビス ...

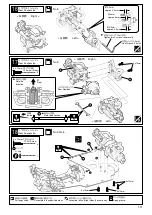
Page 10: ...42 Hex Wrench 2 5mm 3x10mm Tighten this 2 screws reciprocally Left Right 2 3 x 10mm TP Screw Silver Assemble left and right sides the same way True to scale diagram approx 5 5mm approx 5mm 4 3 x 12mm TP F H Screw x2 Assemble as many times as specified 30 approx 8mm Apply grease 使用する袋詰 フロントサスペンション ステアリング ボールエンド L セットビス Oリング 内側 フロントギヤボックス 向きに注意 前 向きに注意 フロントサスペンション 六角レンチ 2 5mm 交互に少しずつねじ込む 左側用 右側用 TPビ...

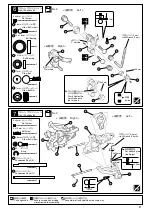
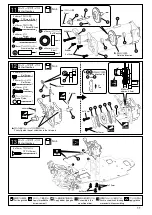
Page 11: ...pots 6mm Top Note the direction for and 59 60 3x6mm Apply threadlocker screw cement Apply rubber type glue 55 3x12mm 3x12mm 54 55 23 56 57 58 59 59 60 60 3x3mm 4x4mm 4x4mm No 4 13 Center Gearbox 1 2 3 61 3x12mm 3x12mm 4 3 x 12mm TP F H Screw Assemble in the specified order Note the direction approx 5 5mm Ensure smooth non binding movement while assembling Apply grease 使用する袋詰 セットビス セットビス ビス ブレーキピスト...

Page 12: ... 2 72 Hex Wrench 2 5mm Left Right Suspension Shaft C Suspension Shaft F Ensure smooth non binding movement while assembling Assemble left and right sides the same way 6 68 9mm Pillow Ball Nut 31 32 33 67 67 67 68 68 68 36 36 Hex Wrench 5mm Left 4x4mm 4x4mm Inside Right Firmly tighten the set screws onto the flat spots 66 65 L marked R marked 使用する袋詰 キャップビス サスシャフト C ベアリング ベアリング ボール セットビス セットビス ピロボール...

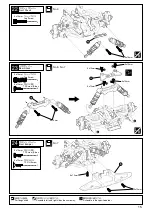
Page 13: ...sion Hex Wrench 2 5mm Tighten this 3 screws reciprocally Left Left Right Right approx 4mm approx 4 5mm approx 4 5mm Note the direction Assemble in the specified order Assemble left and right sides the same way Inside Note the direction Front Apply grease 使用する袋詰 Oリング TPビス 銀 リヤサスペンション リヤサスペンション リヤギヤボックス TPサラビス リヤサスペンション 左側用 左側用 右側用 右側用 六角レンチ 2 5mm 交互に少しずつねじ込む 約4mm 約4 5mm 約4 5mm 向きに注意 番号の順に組立てる 左右同じよ...

Page 14: ...ot move smoothly Piston Oil 81 79 80 79 45 79 81 80 4 45 5 8mm Ball End L 8 77 E2 5 E ring 4 78 Shock Shaft Compress the spring and install G6 G5 G6 G4 82 83 No 6 19 Shock x4 x4 78 77 77 Pull down the piston and slowly fill in oil Use 1mm size spacer x4 Assemble as many times as specified 1mm approx 13mm 使用する袋詰 ボール ダンパー ダンパー スプリングを縮めてG6を入れる スムーズに動くか確認する スムーズに動かないときは オイルを入れ直す もう一度図の位置 までオイルを足す ピストン...

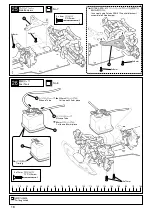
Page 15: ...2 3x10mm 3x10mm 3x10mm 3x10mm 3x14mm 3x14mm Front Shock No 5 No 7 23 Rear Shock 2 3 x 14mm Cap Screw 4 3 x 10mm TP Screw Silver 2 3 x 14mm Cap Screw 2 1 3 3 1 2 Assemble in the specified order Assemble left and right sides the same way 使用する袋詰 TPビス 銀 TPサラビス フロントバンパー フロントダンパー リヤダンパー 左右同じように組立てる キャップビス TPビス 銀 キャップビス 番号の順に組立てる ...

Page 16: ...0 150 160 170 180 110 100 90 80 70 60 50 40 30 20 10 0 No 7 2 4 3 x 8mm F H Screw 25 Side Bumpers 3x8mm 3x8mm 3x8mm 3x8mm 2 3 x 12mm TP F H Screw 88 In case of using Futaba SRN 31F control block unit assemble left side bumper 89 使用する袋詰 燃料タンク 80mmにカットする 220mmにカットする バリを取る シリコンチューブ シリコンチューブ サラビス サイドバンパー TPサラビス FUTABA SRN 31F コントロールブロックを使用する 時のみ取付ける ...

Page 17: ...mm F H Screw 27 Engine 92 91 Silicone Tube 80mm Tighten the screws with one sheet of paper inserted between both gears Engine Assembly 3x8mm 3x8mm 3x8mm F H 3x8mm F H 3mm Cut off excess True to scale diagram Assemble muffler hke picture Front View 使用する袋詰 キャップビス 座付ナット セットビス TPサラビス エンジン ビス サラビス エンジン シリコンチューブ 80mm 紙1枚分のすき間をつくって 固定する エンジンアッセンブリー 余分をカットする 原寸図 燃料タンクと マフラーが 接触しないように取り付ける 90 97 前から見た図 ...

Page 18: ...low Ball Silver 1 3mm Nut 1 7 5 8mm Pillow Ball Black 2 2 6mm Nut 29 Radio 7 In case of using servo horn which come with transmitter FUTABA SANWA KO JR HITEC 2 6mm Steering Servo 3mm 15 16mm H S F 9 100 102 101 Ensure smooth non binding movement while assembling Cut off shaded portion Must be purchased separately 90 2 6 x 8mm TP Screw 2 6 x 8mm Screw 3 x 8mm Screw Use the same type of screw as sup...

Page 19: ...ew Silver 32 Radio 112 113 114 3x10mm 3x10mm Antenna Receiver Receiver Battery Box Connect as per radio instruction manual If receiver and battery move in the box Add sponge or some others for holding True to scale diagram Must be purchased separately 1 114 Hook Pin Pay close attention here 90 F 90 使用する袋詰 ボールエンド L アジャスタブルロッド ステアリング 約15mm この部分のねじこみ量を調整して図のようにする ビス TPビス 銀 シャシー TPビス 銀 プロポ アンテナ 受信機 受信...

Page 20: ...d bottom 2x10mm 3x3mm 3x3mm 116 117 118 118 119 120 2mm 2mm Holes used 1 2mm Nylon Nut Neutral Cut off excess Tentatively tighten Ensure smooth non binding movement while assembling Cut off shaded portion Drill holes with the specified diameter 2mm True to scale diagram Must be purchased separately Note the direction 121 1 2 x 10mm Screw approx 16mm approx 10mm 使用する袋詰 シリコンチューブ サーボ付属 テーパーワッシャー プロポ ...

Page 21: ...ck for rear 125 thin for front 126 thick for rear 127 thin for front 128 thick for rear x2 x2 For Front For Front For Rear For Rear Front Rear Cross Wrench Apply rubber type glue x2 Assemble as many times as specified Assemble left and right sides the same way Apply instant glue CA glue super glue 使用する袋詰 ボディマウント 広げて入れる の向きに注意して 各2つずつ作る 132 タイヤ ピッタリはめてからタイヤとホイールのつなぎ目に 瞬間接着剤を流し接着する ホイールを回しながら半分くらいタイ...

Page 22: ... Body Mounts 42 Body Shell 136 137 3x15mm 3x10mm 2x8mm 2x8mm Front Rear Cut off shaded portion Assemble left and right sides the same way Drill holes with the specified diameter 3mm 3mm 3mm 3mm 6mm 3mm 3mm 3mm 6mm 3mm 使用する袋詰 TPビス 銀 TPビス TPビス ボディマウント ボディ フロント リヤ をカットする 左右同じように組立てる 3mmの穴をあける 例 ...

Page 23: ...ver Chrome Silver Yellow Mask Mask Yellow No 76304 Chrome Silver No 76302 Black No 76401 Do not overtighten the nuts 8 3 x 8mm TP Screw 3 x 6mm TP Screw 4 3mm Nut 11 3mm Washer Double sided Tape 4 B 7 A 2 A 1 Double sided Tape 3x6mm 3mm 3x8mm 3mm 3mm 3mm 3mm 3mm 3mm 3mm 3mm 3x6mm 3x8mm 3mm 3mm 3x8mm 3x8mm B 1 B 1 B 2 A 10 A 1 A 2 B 6 B 7 B 2 使用する袋詰 塗装 プラパーツ 注意して組立てる所 ブラック クロームシルバー クロームシルバー クロームシルバ...

Page 24: ...s The decal numbers between brackets are only for the opposite side 27 28 65 66 67 68 24 25 63 64 69 70 20 21 18 19 22 23 52 4 57 6 53 56 55 7 54 1 55 56 5 53 3 57 39 34 56 37 55 9 36 77 79 9 38 55 56 40 35 51 2 2 58 11 60 17 16 9 9 8 8 12 12 10 61 59 72 71 30 29 13 62 15 15 32 31 9 9 14 78 79 80 26 74 73 75 33 76 ボディ 番号の順に組立てる 走行上の注意 走行時は 必ずボディを装着してください 下記の場所での走行は 故障の原因になりますのでおやめください シャシーにからむような草...

Page 25: ... M No 39308 Shock Spacer G5 Shock Spacer Holder G10 Installation of Fuel Filter Shock Spacer Installation of 39641 Cooling Fan Set Must be purchased separately 140 Transponder Stay 3x10mm TPビス TPビス 燃料フィルター M ダンパースペーサー ダンパースペーサーホルダー 燃料フィルターの取付 ダンパースペーサー 39641クーリングファンセットを取付ける場合 別購入品 トランスポンダーステー ...

Page 26: ... bottom 1 Tapered Washer 121 1 2mm Nylon Nut 145 Supplied with the servo 2x10mm 3x3mm 2mm 119 118 117 120 138 139 Tentatively tighten Ensure smooth non binding movement while assembling Cut off shaded portion True to scale diagram Must be purchased separately Drill holes with the specified diameter 2mm Neutral approx 40mm 121 使用する袋詰 TPビス ビス ボールエンド セットビス ストッパー スプリング ロッド スイッチカバー フタバSRN 31Fユニット サーボホー...

Page 27: ...S Yellow Orange Green Spring stiffness Hard Soft Steering characteristics Sharp Mild Front Rear Grip gets lower Grip gets higher Hard Soft 142 142 Ride height becomes lower Ride height becomes higher Increasing G5 shock collar width Decreasing G5 shock collar width 1 Shock 1 2 Shock 2 3 Caster 4 Camber Rear Suspension Front Suspension Spring Shock Oil Front Rear 92491 43 Toe Angle Rear toe angle g...

Page 28: ...e fuel ONLY in cool dry and dark places out of children s reach Tightly shut the cap 3 Do NOT dispose of empty fuel cans into a fire There is danger of explosion 燃料は 飲んだり 目に入れたりしない 万一 事故が起きた場合は 吐かせる 洗眼する等をした後 すぐに医師の診察を受けてください NEITHER swallow fuel NOR let it into your eyes Immediate measures should be taken if fuel is swallowed in duce vomit ing If fuel gets into eyes rinse them and consult an orph...

Page 29: ...61 x 1 47 x 1 42 146 x 2 FZ 67 サスシャフト E Suspension Shaft E 41 x 2 FZ 68 サスシャフト F Suspension Shaft F 72 x 2 43 x 2 54 55 57 x 1 31 x 2 131 x 4 36 x 4 67 x 3 68 x 3 35 x 2 90 x 1 1100 FM 222 クラッチベル 15T Clutch Bell 15T 157 x 1 153 x 2 154 x 4 118 x 3 130 FD 33 テールパイプ Tail Pipe 147 x 1 AB 15 クラッチシュー Clutch Shoe 29 400 250 300 580 600 300 750 200 380 350 1000 200 500 700 700 200 500 800 200 1200 600 12...

Page 30: ...ting Kit 4サイクルエンジン搭載用 When Mounting 4 Cycle Engines ハードメインシャシー Hard Main Chassis カーボンアッパーデッキ Carbon Upper Deck ユニバーサルスイングシャフト Universal Swingshaft フロントスタビライザーセット Front Stabilizer Set リヤスタビライザーセット Rear Stabilizer Set 2スピードオートマチックトランスミッションセット 2 Speed Automatic Transmission Set リコイル付エンジンには使用できません Not available with Pull Start Engine 2000 FZW 60 ローハイトエンジンマウント Low Height Engine Mount 1800 FZW 61 ハイバランス...

Page 31: ... 3x8 3x10 3x12 3x14 3x15 3x16 3x18 3x20 3x25 3x30 3x35 2 6x14 2 6x15 2 6x16 2 6x18 Bind Self Tapping Screw フランジ付キャップビス Screw サラ小丸ビス セットビス 1140 1141 1142 1143 2 6x6 2 6x8 2 6x10 2 6x12 3x6 3x8 3x10 3x12 3x14 3x15 3x16 3x18 3x20 4x10 4x15 4x18 品番 No サイズ mm Size mm 品番 No 入数 各 QUANTITY 入数 各 QUANTITY 1165 3x20 3x25 3 each 品番 No サイズ mm Size mm 入数 各 QUANTITY サラタッピングビス Flat Head Self Tapping Screw 径 mm SC...

Page 32: ...D 65 104 FD 65 105 FZ 60 140 FZ 61 109 FZ 61 107 FZ 61 111 1795 91 74901 12 92 FZ 60 88 92922 102 101 100 92922 1 92921 92922 92922 3 1284 9 FZ 14 8 5 6 13 14 13 2 FZ 61 106 FZ 61 108 104 105 FZ 13 28 76 75 118 118 120 119 FZ 58 52 1911 22 FZ 62 48 FZ 58 50 FZ 64 47 FZ 62 49 FZ 64 19 FZ 70 54 FD 65 121 FZ 70 55 1795 1911 22 92972 94 92972 94 92601 95 1701 96 92971 97 1700 124 39645 122 39645 123 1...

Page 33: ...R THE FINEST RADIO CONTROL MODELS 京商株式会社 243 0034 神奈川県厚木市船子153 ユ ザ 相談室直通 TEL 046 229 4115 お問い合わせは 月曜 金曜 祝祭日を除く 10 00 18 00 PRINTED IN JAPAN 63010011 1 メーカー指定の純正部品を使用して 安全にR Cを楽しみましょう ...

Reviews: