background image

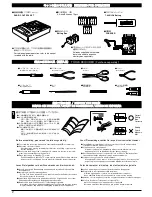
キットの他にそろえる物


REQUIRED FOR OPERATION

●プロポの取扱いは、プロポに付属の説明書を
 参考にしてください。

For radio equipment operation, refer to the manual 

    included with the radio.

■カッターナイフ

Sharp Hobby Knife

■単3乾電池 12本

AA-size Batteries  12pcs.

■+ドライバー(大、中、小)

Phillips Screw Driver (L.M.S)

■ラジオペンチ

Needle Nose Pliers

■キリ

Awl

■ハサミ

Scissors

AA

AA

AA

AA

AA

AA

2

■ニッパー

Wire Cutters

Epoxy A

Epoxy B

■瞬間接着剤

Instant Glue

■エポキシ接着剤

Epoxy Glue

■充電器

CHARGER

■7.2Vニカドバッテリー

7.2V Ni-Cd Battery

■無線操縦機(プロポ)セット

RADIO CONTROL SET

KYOSHO CORPORATION  JAPAN

7.2V-1300mAh SCR 

充電式ニカドバッテリー

R

THE  FINEST  RADIO  CONTROL  MODELS

Ni-Cd BATTERY

Rechargeable

組立に必要な工具(別購入品)

  TOOLS REQUIRED

  (Purchase separately!)

7.5

DELTA PEAK AUTO-CUTOFF

W

A

R

N

IN

G

 H

O

T

W

A

R

N

IN

G

 H

O

T

For 7.2-8.4V

600-1100mAh

Ni-Cd BATTERY

FUSE

7.5A

CHA

RGE

STA

RT

■電池ボックス

Battery Box

●プロポセットに付いているときは

必要ありません。

If already supplied with the radio, 
there is no need to purchase 
a battery box separately.

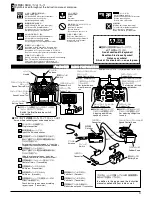
組立て前の注意 / 

BEFORE YOU BEGIN 

BEVOR SIE BEGINNEN / AVANT DE COMMENCER / ANTES DE EMPEZAR

1

組立ての前に下記のことに注意してください。

●この説明書を良く読み、構造を理解する。
●キットの内容を確かめる。

※万一不良、不足がありましたら、お買い求めの販売
店か、当社「ユーザー相談室」までご連絡ください。

●小さな部品の形やサイズを間違えないようにする。図を

参考にして確認しながら組立てる。

TP

ビス締めるときは・・・

締めこみが固くても部品が固定されるまで締めてくだ
さい。
ただし、部品が変形するまで締めるとビスがきかなく
なります。

Lesen Sie folgendes vor dem Zusammenbau aufmerksam durch:

Lesen Sie zuerst die Bauanleitung ganz durch und verstehen Sie den Aufbau 

Ihres Modelles.

†berprŸfen Sie den Verpackungsinhalt.

Sollten Teile fehlen, wenden Sie sich direkt an Ihren FachhŠndler oder an den 

Kyosho-Vertreiber in Ihrem Land.

Verwechseln Sie Schrauben sowie kleine Bauteile nicht!  Vergleichen Sie sie vor dem 

Einbau mit den Darstel-lungen in Originalgrš§e in den Baustufen.

Beachten Sie beim Festziehen einer Treibschraube folgendes:

Schrauben Sie solange, bis das anzubringende Teil sicher und fest sitzt.  Achten 

Sie jedoch darauf, da§ Sie den Gewindegang im Material nicht Ÿberdrehen!

Before assembling, please read the following carefully:

First, read this instruction manual and understand the modelÕs con-struction.

Check the contents of this kit.

Should parts be missing, immediately contact the retail shop or your nearest 

Kyosho distributor.

Do not take the wrong screw or small part.  Compare it to the true-to-scale dia--

gram in each assembly step, then install it.

When tightening a self-tapping (TP) screw:

Even if feeling hard, tighten a TP screw until the part will be securely attached.  

However, do not overtighten it as the plastic thread inside the part may strip!

Avant lÕassemblage, veuillez lire les points suivants attentivement:

Lisez dÕabord compl tement cette notice; ainsi vous aurez un aper u du d 

roulement et pourrez mieux vous orienter.

V rifiez ensuite le contenu du kit.

Si jamais il y a des pi ces manquantes, adressez-vous directement ˆ votre 

magazin sp cialis  ou au distributeur Kyosho dans votre pays.

Ne confondez pas les vis et les petites pi ces!  V rifiez-les ˆ lÕaide des illus--

trations dans chaque plage de montage, puis assemblez les.

Lorsque vous serrez une vis autotaraudeuse:

Serrez jusquÕˆ ce que la pi ce ˆ monter soit bien install e.  Pourtant, veillez ˆ 

ne pas trop la serrer puisque vous risquez dÕab”mer le filet dans la pi ce.

Antes de comenzar el montaje, lea atentamente lo siguiente:

Lea, en primer lugar, este manual para obtener una idea general.

Compruebe la conformidad de todas las piezas.

      Si faltara alguna pieza, contacte con la tienda donde lo adquiri—.  
      No se admitir‡n reclamaciones en modelos en proceso de montaje.

Antes de colocar las piezas y tornillos, asegurese mirando la tabla en cada paso.

A la hora de apretar Tornillos Autorroscantes(TP):

  Apri telos firmemente en la pieza donde corresponda.

      No intente apretarlos demasiado, ya que podr’an deformar la pieza. 

Correct
Richtig
Bon
Correcto

Wrong
Falsch
Mauvais
Mal

Summary of Contents for viper-r

Page 1: ... modelo de Radio Control no es un juguete Si vous tes d butant dans le mod le r duit prenez conseils aupr s de mod listes con firm s afin dÕutiliser votre mod le dans des conditions optimales Assemblez ce kit en dehors de la port e de jeunes enfants Prenez des pr cautions lors de lÕutilisation Vous seul tes responsable des volutions de votre mod le La soci t KYOSHO ou son distributeur ne peuvent e...

Page 2: ...Achten Sie jedoch darauf da Sie den Gewindegang im Material nicht Ÿberdrehen Before assembling please read the following carefully First read this instruction manual and understand the modelÕs con struction Check the contents of this kit Should parts be missing immediately contact the retail shop or your nearest Kyosho distributor Do not take the wrong screw or small part Compare it to the true to...

Page 3: ...l Stick スピードコントロール トリム Speed Control Trim バッテリーカバー Battery Cover ハンドル Handle アンテナ Antenna 電源スイッチ Switch 本説明書のプロポイラストは Futaba取扱説明書より転載しました スロットル側のリバーススイッチを リバースにしてください Switch the throttle reverse switch transmitter 2 説明書に使われているマーク Symbols used throughout the instruction manual comprise グリスを塗る Apply grease Fetten Graissez Apriete temporalmente 2mm 重要な注意事項があるマークです 必ずお読みください Do not overlook this symbo...

Page 4: ...rystal of your frequency into the Personal Fre quency Monitor As soon as you switch it on you ll know for sure through an interference signal and LED lamps whether somebody else is on your fre quency or not PERSONAL BAND MONITOR 27MHZ OFF ON KYOSHO CORPORATION No 80591 JRMSA 08 KYOSHO CORPRATION No 80590 27MHz No 80591 40MHz 専用クリスタル別売 Special crystals are available at Kyosho ...

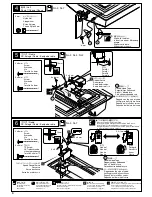
Page 5: ...pegamento epoxy Parts bag used Verwendeter Teilebeutel Sachet utilis Bolsa utilizada Apply instant glue CA glue super glue Verwenden Sie Sekundenkleber Collez avec de la colle cyanoacrylate Aplique pegamento cianoacrilato Assemble in the specified order Bauen Sie die Stufen in der angegebenen Reihenfolge Assemblez dans lÕordre indiqu Realice el montaje en el orden se alado Hull Rumpf Coque Casco 船...

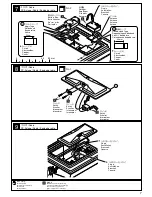
Page 6: ...vos se mueven proporcionalmente a los movimientos de la emisora 3 mm Nylon Nut Stoppmutter Ecrou Nylstop Tuerca Nylon 3 mm 1 1 1 Pay close attention here Vorsicht Wichtiger Hinweis Attention Avis important Preste atenci n 2 x 6mm Screw Schraube Vis Tornillo 2 x 6mm 2 x 6mm Screw Schraube Vis Tornillo 2 x 6mm Screw Schraube Vis Tornillo 3 x 6mm 3 x 6mm 1 2 3 x 8mm TP Screw LK Treibschraube Vis auto...

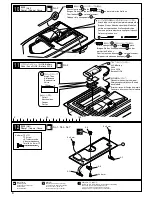
Page 7: ...r Interruptor Switch Schalter Interrupteur Interruptor Switch Schalter Interrupteur Interruptor 14 Plug in Anschlie en Branchez Conecte Plug in Anschlie en Branchez Conecte 0 50 40 mm No 2 7 Radio RC Anlage Radio Equipo de radio No 1 8 9 Must be purchased separately Teil ist nicht im Bausatz enthalten Doit tre achet s parement Debe comprarse por separado Parts bag used Verwendeter Teilebeutel Sach...

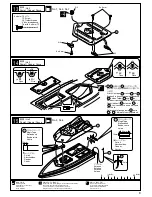
Page 8: ...r une parfaite etancheite appliquer l adhesif Colocar cinta adhesiva Attach clear tape 15 to the place Bringen Sie das transparente Klebeband 15 an der markierten Stelle an Fixer l adhesif 15 a cet emplacement Coloque cinta transparente 15 en Attach sponge tape 16 to the place Bringen Sie das Schaumstoffband 16 an der markierten Stelle an Fixer la mousse adhesive 16 a cet emplacement Coloque cinta...

Page 9: ...sco 船体 9 18 A 3 A 2 3 x 8 mm 3 x 8 mm A 1 Open Close Attach clear tape 15 around 17 and 18 Bringen Sie das transparente Klebeband 15 an den Teilem 17 und 18 an um die entsprechenden Stellen abzudichten Fiexer l adhesif 15 autour du 17 et 18 ceci contribuera a une meilleure etancheite Colocar cinta transparente 15 entre 17 y 18 Mejorar la estanqueidad Open Close 10mm 50mm 10mm 10mm 19 20 20 13 Magi...

Page 10: ...low Bringen Sie die Aufkleber wie unten beschrieben an Placez les autocollants comme cl dessous Coloque los adhesivos como muestra el dibujo RACING BOATS DANGER DA NG ER DA NG ER RACING BOATS RACING BOATS 20 21 18 19 3 22 23 24 25 4 2 5 10 11 12 15 14 1 RACIN G BOATS デカール 下図を参考にデカールをはってください ...

Page 11: ...atteries 同じバンドの無線操縦模型がそばにいるとき Also make sure that nobody is using the same frequency as you do at the same time 船の動きがおかしい とき when the boat behaves or operates strangely 不要になったニカドバッテリーは捨てずに販売店にお 戻しください Do not dispose of Ni Cd batteries Return them to the retail shop R Cボートは 湖や河川などの水辺で楽しむものです 操縦する方や同行の方が思わぬ事故に合わないように 注意し安全な場所で走航させてください With R C boats discover a new world of pleasure Wheth er you run...

Page 12: ...ントローラーがプロポの スティックの動きとあっているか確認 Make sure the speed controller operates according to your inputs on the transmitter 走航場所が安全であることを確認 Make sure the running area is safe ニカドバッテリーのコネクターをつなぐ Connect the Ni Cd battery 送信機の電池をチェック Check the transmitter batteries 走航用のバッテリーを充電 Fully charge the Ni Cd battery OFF ON ON CH 2 CH 1 BATT OFF ON OFF ON 3 1 2 5 4 10 6 7 8 9 走行が終わったら AFTER RUNNING 船を回収する After finish...

Page 13: ...e Replace with new motor ニカドバッテリーの容量不足 サーボが動かない コネクターの接触不良 配線をまちがえている 新しいものに交換する プロポの説明書をよく読んでコネクターを 接続する ニカドバッテリーを充電する コネクターのはめこみをきつくする 送 受信機のスイッチを入れる 送 受信機のスイッチがはいっていない 送信機の電池がない モーターがまわらない 配線をまちがえている 説明書をよく読んで配線する 回転部分にゴミやホコリがつまっている ゴミやホコリを取り除きグリスを塗っておく スクリューを手でまわすと重い またはまわらない スピードコントロールスティ ックをはなしても船がとまら ない リンケージの調整不良 プロポのトリムで調整する このとき 全開に入らないようなら説明書 を読んでリンケージをもう一度調整する モーターはまわるが走らない ジョイントがついていな...

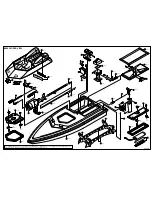
Page 14: ...ad VIPER R 5 4 16 16 17 12 12 12 10 11 14 13 15 18 30 19 20 8 6 9 2 3 1 13 13 13 13 VP 31 90497 90497 22 96551L VP 32 VP 30 A 2 94755 A 3 94755 21 94551 25 23 94713 31 90497 A 1 94755 94450 24 94722 26 94713 27 94713 28 94713 29 94753 94752 90497 96441 96441 96441 VP 32 94754 94751 94582 94751 94582 94427 VP 32 A 2 94755 A 1 94755 A 3 94755 1705 90497 94450 94582 JA 3 JA 3 JA 3 ...

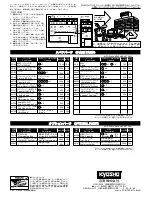
Page 15: ...注文は お受けできませんのでご了承下さい カラーアンテナ 白 Color Antenna White モータースイッチ L Motor Switch L 94551 防水ロッドブーツ Waterproofing Rod Boots 750 270 R THE FINEST RADIO CONTROL MODELS 京商株式会社 243 0034 神奈川県厚木市船子153 ユ ザ 相談室 直通TEL 0462 29 4115 お問い合わせは 月曜 金曜 祝祭日を除く 10 00 18 00 PRINTED IN TAIWAN TELマ クは 地域によって送料が異なりますので ユーザー相談室 宛 電話にてお問い合わせ下さい TELマ クは 地域によって送料が異なりますので ユーザー相談室 宛 電話にてお問い合わせ下さい 品番 パーツ名 内容 No Part Names Description ...

Reviews: