K1_RM_EN_2-0
w w w . l - a c o u s t i c s . c o m
31
31
31
31
8.
Lower the array until the K1-CHARIOT
four wheels
are laid on
the ground.
Stop lowering the array at the exact moment when
all four bottom enclosure front angles have collapsed.
9.
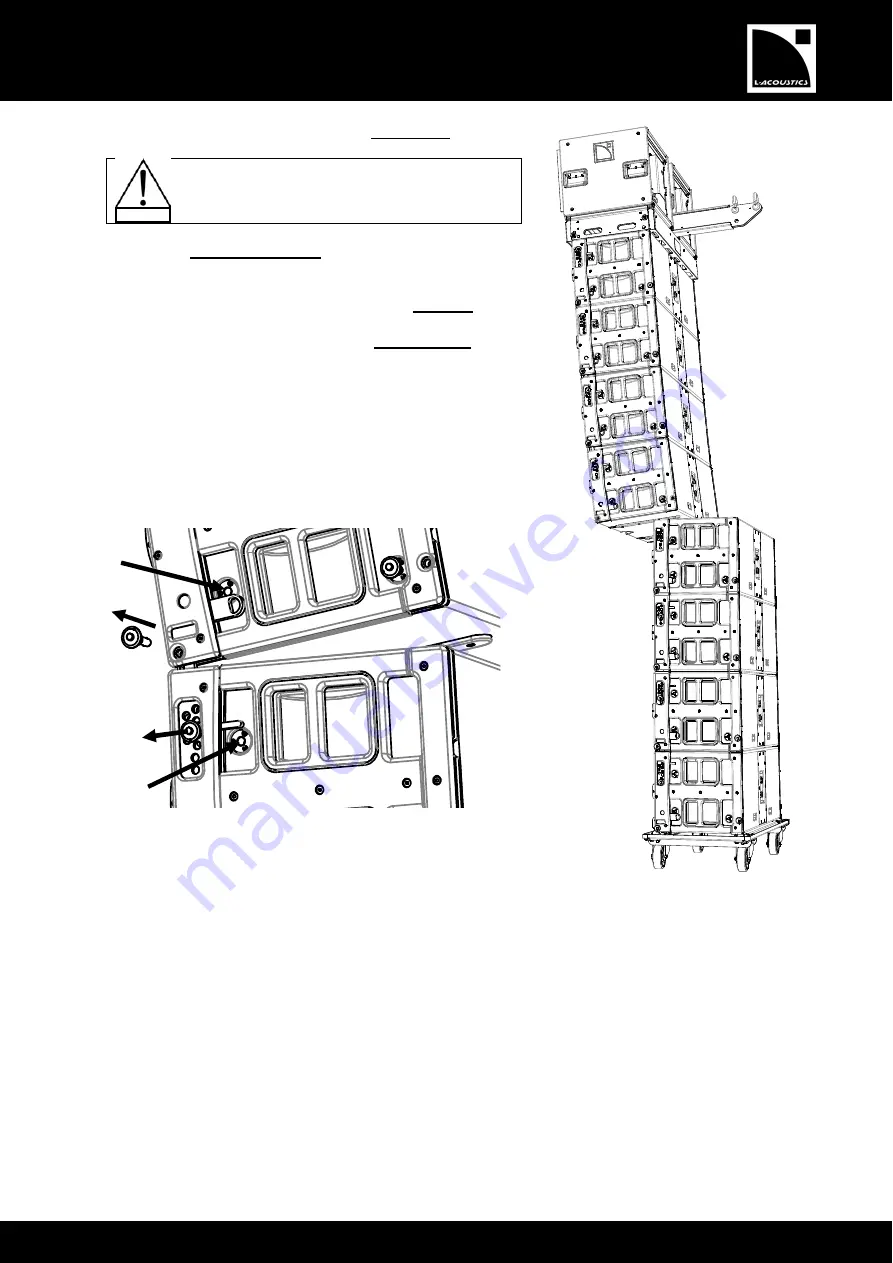
Detach the
front rigging points
between enclosures #4 and #5
as described below:
a.
On both sides of enclosure#4, remove the
front top
R-BLP.
b.
On enclosure#5, remove both
front bottom
R-BLP
simultaneously (to prevent the array from twisting) and put
them in their storage locations: both angle arms should
automatically slide in.
c.
On both sides of enclosure#4, put the front top R-BLP in its
storage location: the angle arm is locked in shipping position.
Figure 26: Detaching the front rigging points
10.
Remove TOWER#2 from the rigging location.
11.
For arrays of more than 8 enclosures repeat steps 3 to 10 until all TOWERS (but TOWER#1) composing the
array are derigged.
12.
Lower TOWER#1 at 0.5 m/1.5 ft height and attach a K1-CHARIOT to the bottom enclosure as described in step
4.
13.
On both sides of each enclosure of TOWER#1 select the ‘‘variable’’ setting as described in step 7.
WARNING
a.
L
b.
L
c.
L
Summary of Contents for K1
Page 2: ...w w w l a c o u s t i c s c o m ...
Page 68: ...w w w l a c o u s t i c s c o m ...
Page 69: ...w w w l a c o u s t i c s c o m ...
Page 70: ...w w w l a c o u s t i c s c o m ...


