KARA
i
_RM_EN_1-1
w w w . l - a c o u s t i c s . c o m
29
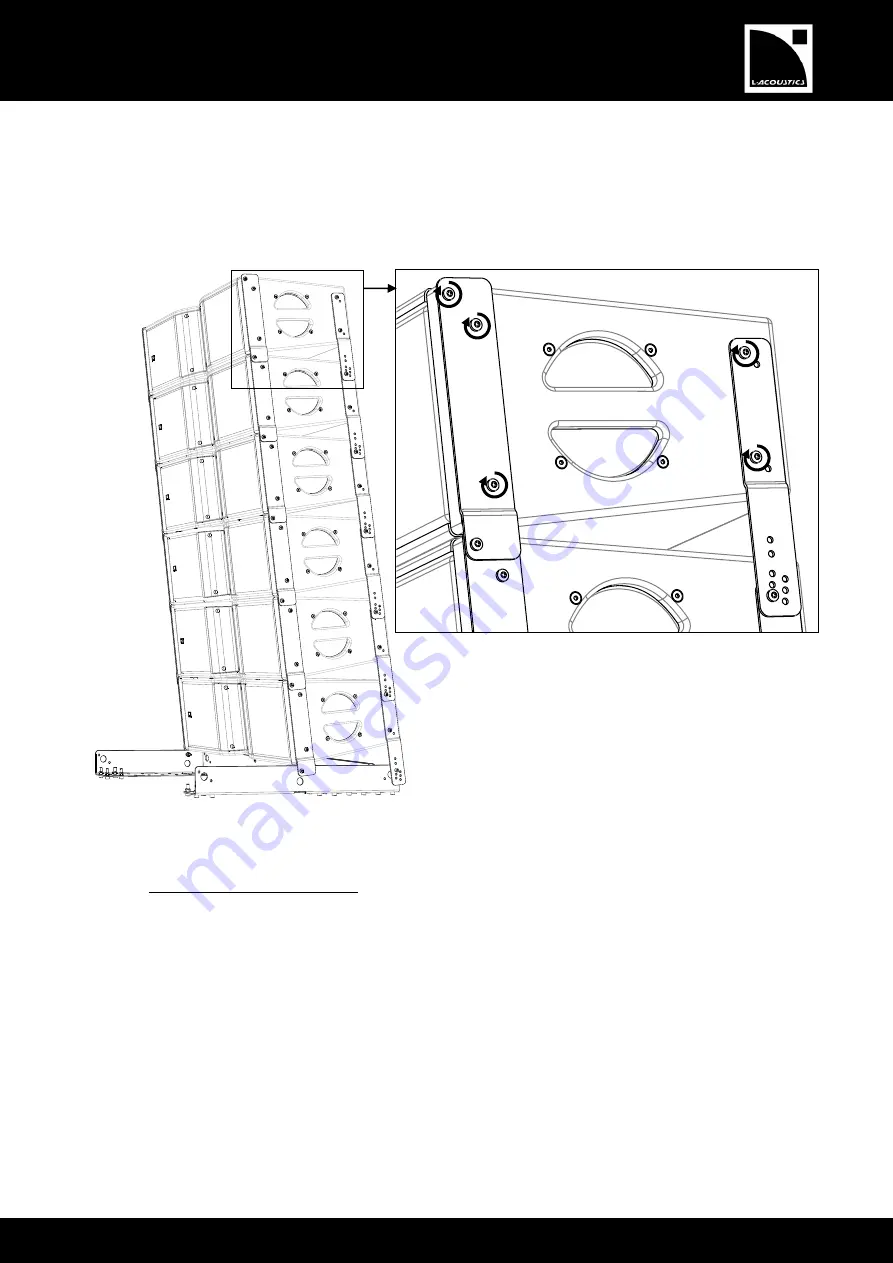
7.
Repeat steps 5 and 6 until all KARAi enclosures composing the array are assembled.
8.
Secure the fixation points on the top KARAi as follows (repeat on both enclosure sides):
a.
Drive a 35 mm Torx
®
screw into the front top hole (T30 bit, 5 N.m/45 in.lb
f
).
b.
Drive a 55 mm Torx
®
screw into the rear top hole (T30 bit, 5 N.m/45 in.lb
f
).
c.
Fully drive the three remaining Torx
®
screws (T30 bit, 5 N.m/45 in.lb
f
).
Figure 24: Example of KARAi standalone array
6.3.3
Array disassembling procedure
Apply the above procedure in the reversed sequence.
b.
Top
KARAi
c.
c.
c.
a.
Summary of Contents for KARAi
Page 1: ...KARAi rigging manual EN ...