KARA
i
_RM_EN_1-1
w w w . l - a c o u s t i c s . c o m
25
Procedure
1.
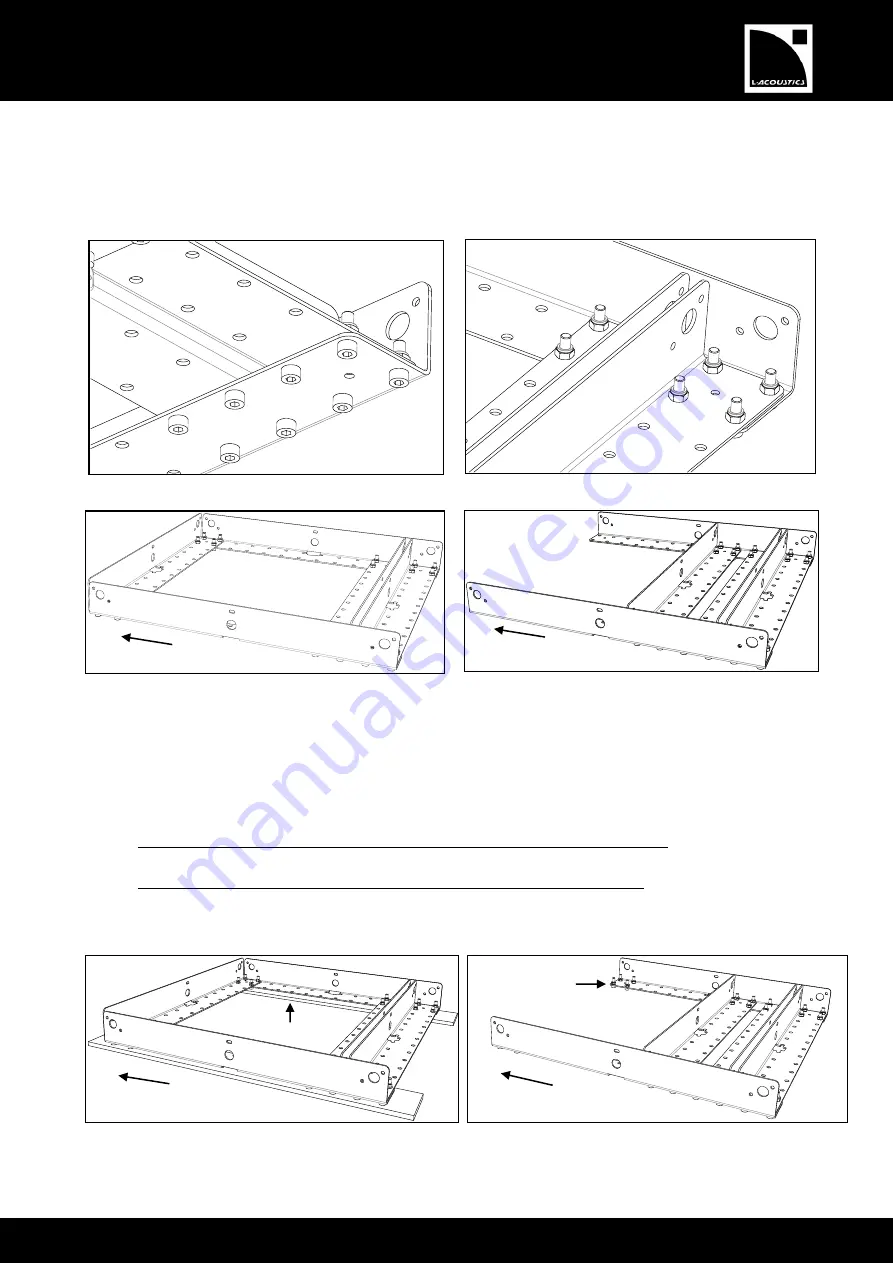
After having selected a platform configuration [9.2.1], assemble an M-BUMPi as follows:
a.
Assemble the bars by slightly driving the self-locking M8 hex bolts (by groups of four on each bar end) as
shown in both top boxes of Figure 19 (6 mm hex bit, 13 mm hex key).
b.
Fully drive all screws (5 N.m/45 in.lb
f
) while ensuring that the frame shape remains square.
Figure 19: Assembling the M-BUMPi platform
2.
Position the piece of carpet at the stacking location and position the M-BUMPi on it by applying the following
recommendations:
a.
Respect the final orientation as shown in the bottom left or right box of Figure 19.
b.
If the bottom KARAi site angle is intended to be 0° (see the left box of Figure 20), raise the platform to
approximately 10 mm (support material not included).
c.
In case of M-BUMPi front extension configuration (see the right box of Figure 20), drive four self-locking M8
hex bolts to both platform front ends to keep it in horizontal position (bolts included in the M-BUMPi package,
6 mm hex bit, 13 mm hex key, 5 N.m/45 in.lb
f
).
d.
Firmly fix the platform to the ground (fixing material not included).
Figure 20: Positioning the stacking platform
Configuration for array site angle 0°
Front extension configuration
Support (x2)
Four bolts
driven to a
platform front
end (x2)
Towards audience
Towards audience
Driving bolts (bottom view)
Rear extension configuration
Front extension configuration
Driving bolts (top view)
Towards audience
Towards audience
Summary of Contents for KARAi
Page 1: ...KARAi rigging manual EN ...


