


KARA
i
_RM_EN_1-1
w w w . l - a c o u s t i c s . c o m
37
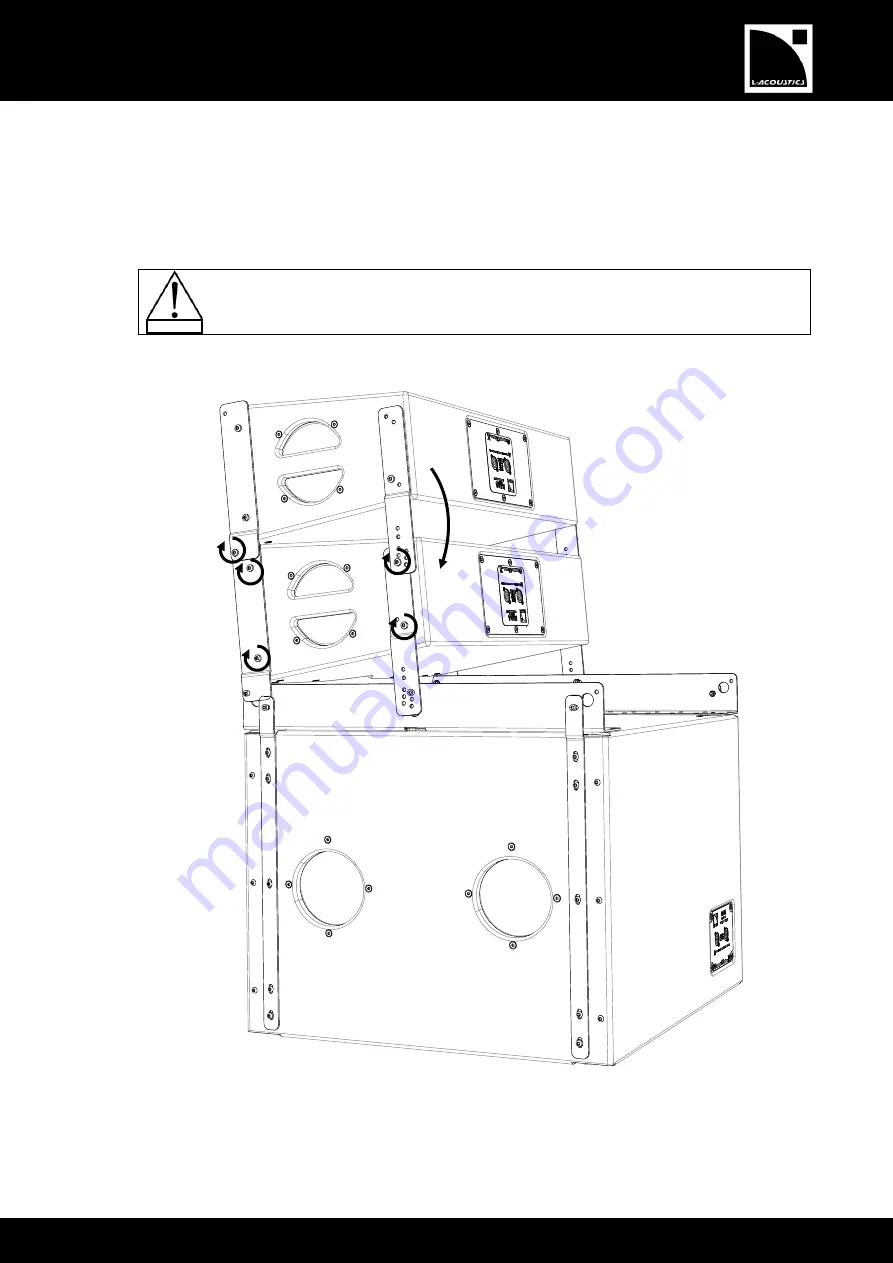
8.
Prepare the second KARAi (hereafter designated as KARAi#2) by applying step 6.
9.
Turn KARAi#2 arms downwards and fix it to KARAi#1 as follows:
a.
Position both KARAi#2 front bottom link holes face to both KARA#1 front top link holes and secure each pair
by slightly driving a 35 mm Torx
®
screw (T30 bit).
b.
Rotate KARAi#2 so as to position its rear bottom link holes with both KARAi#1 rear top link holes and secure
each pair by slightly driving a 55 mm Torx
®
screw (T30 bit).
On both angle arms, select the holes corresponding to the angle intended to be set (refer to
Figure 32 shows the example of angle 0° (KARAi#1 and KARAi#2 front faces parallel).
c.
Fully drive the ten Torx
®
screws on KARAi#1 (T30 bit, 5 N.m/45 in.lb
f
).
Figure 32: Attaching KARAi#2 to KARAi#1
IMPORTANT
b. c. Angle 0°
a. c.
KARAi#1
KARAi#2
b.
c.
c.
c.
Summary of Contents for KARAi
Page 1: ...KARAi rigging manual EN ...


