KIVA-SB15
m
_RM_EN_1.1
w w w . l - a c o u s t i c s . c o m
9
3.2
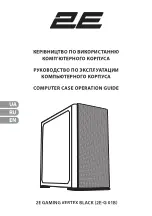
Flying
KIVA
Place a KIBU-SB on the ground with its KIVA side facing up.
Attach a KIVA enclosure to the KIBU-SB.
Refer to
PROCEDURE B.
Turn the KIVA/KIBU-SB assembly upside down.
Attach a bow shackle WLL 1 t or a CLAMP250 on the KIBU-SB.
Refer to
PROCEDURE B.
Raise the array so you are comfortable lifting and attaching additional
enclosures under the first one.
Attach a KIVA enclosure under the first one.
Refer to
PROCEDURE B.
Repeat the two previous steps until the array is complete.
Always check that the yellow label on the locking tabs is fully covered to ensure that they are fully engaged.
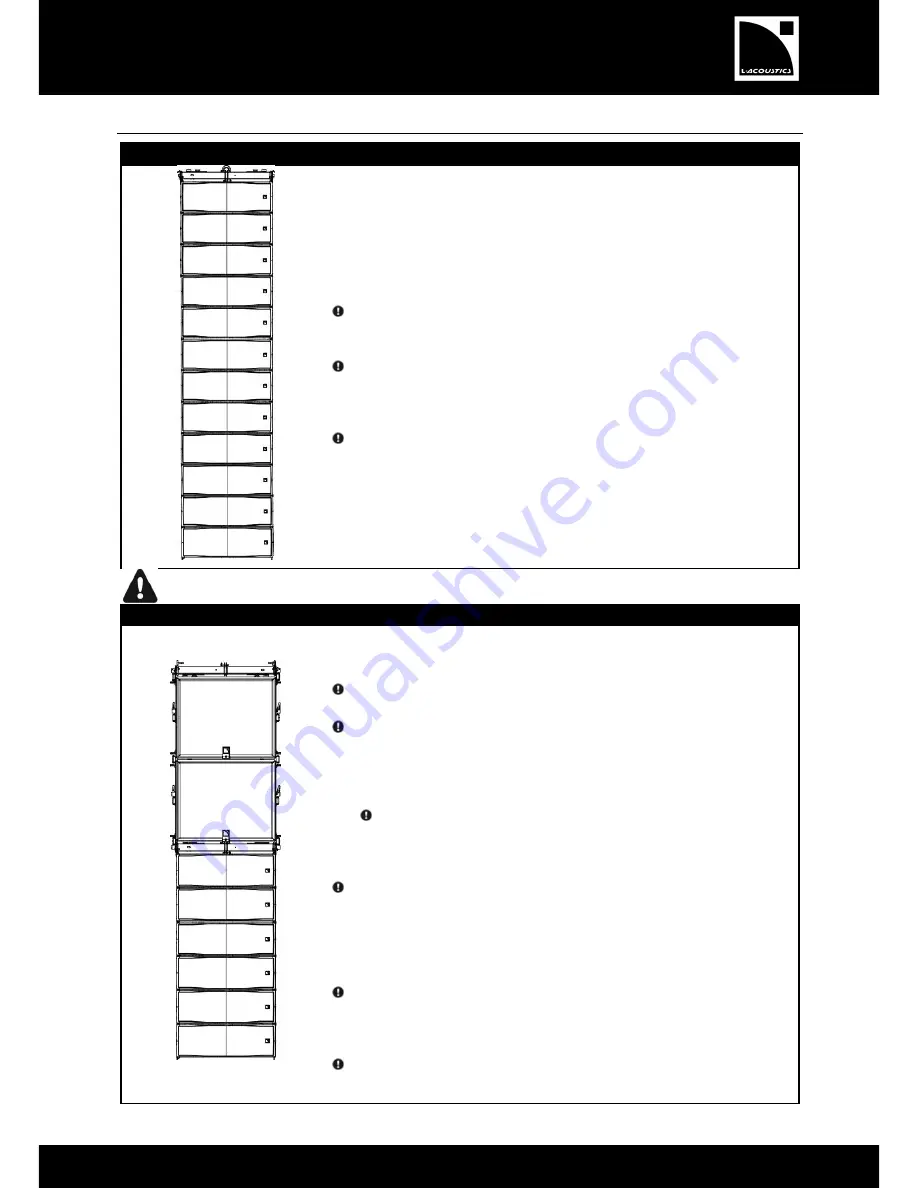
KIVA + SB15m
Position one SB15m (logo down) on the ground.
Remove the rigging bars from the KIBU-SB.
On the subwoofer, place and attach a KIBU-SB with its KIVA side facing up.
Refer to
PROCEDURE A.
Attach a bow shackle WLL 1 t or a CLAMP250 on the KIBU-SB.
Refer to
PROCEDURE B.
If more than one SB15m is needed
, raise the array so you can position another
SB15m under it.
Lower the array so it rests on the enclosure.
Attach the enclosure to the bottom of the array.
Refer to
PROCEDURE A.
Repeat the three previous steps until the SB15m array is completed.
Place a KIBU-SB on the ground with its KIVA side facing up.
Attach a KIVA enclosure to the KIBU-SB.
Refer to
PROCEDURE B.
Turn the KIVA/KIBU-SB assembly upside down.
Raise the SB15m array so you are comfortable lifting and attaching the
KIVA/KIBU-SB assembly under the bottom enclosure.
With the rigging bar in one hand, lift and attach the KIVA/KIBU-SB assembly
to the bottom enclosure of the array.
Refer to
PROCEDURE A.
Raise the array so you are comfortable lifting and attaching additional
enclosures under the first one.
Attach a KIVA enclosure under the array.
Refer to
PROCEDURE B.
Repeat the two previous steps until the array is completed.