Be sure that guides (4) are not damaged to allow the hopper door to slide freely
Check agitator wire on a daily basis. If wire is not present, product will run the risk of
building up prior to reaching hopper door and not spreading evenly.
SECTION 4
SNOWRATOR OPERATIONS
4.1 Operations
Upon turning the key on to start the unit, apply full choke. The manual Choke is located
just above the “Fuel Shut Off” on the engine (picture # 1). Push Choke lever away from
the operator and toward the front of the machine. Once the unit is started, push the Choke
lever back toward the operator to shut choke off (picture #2) . Once unit has started,
move the Throttle lever (
always turn down Throttle to the lowest position before
starting and before turning off the unit
) to a desired position for operations.
(picture #1)
(picture #2)
Push Joy Sticks forward (equally) to have the unit move straight. Should you want to unit
to back up in the reverse direction, pull back on the Joy Sticks. If a turn is desired, push
opposite Joy Stick of the direction you want the unit to head forward (if wanting to turn
left, push the right lever forward while keeping the left lever slightly back of the right
thus allowing the right tire to turn more than the left. Push more on the left lever if you
desire to turn the unit to the right). Be cautious as turn radiuses change with the speed
you are going and the amount each Joy Stick is positioned forward or backward
positions.
Page 12
Summary of Contents for Snowrator Zx4
Page 2: ......
Page 9: ...Page 6 ...
Page 10: ...Page 7 ...
Page 11: ...Page 8 ...
Page 12: ...Page 9 ...
Page 13: ...Page 10 ...
Page 19: ...SECTION 5 PARTS 5 1 Part Number Pictorial Serial SR4320 2015 001 to SR3620 2016 085 Page 16 ...
Page 20: ...5 1 Part Number Pictorial Serial SR3620 2016 086 to current Page 17 ...
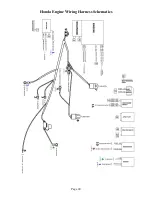
Page 27: ...Honda Engine Wiring Harness Schematics Page 24 ...
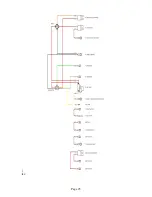
Page 28: ...Page 25 ...


