background image

INSTALLATION

Check the appliance is electrically safe and gas sound when you have finished.

20

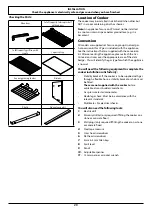
Checking the Parts:

Location of Cooker

The cooker may be installed in a kitchen/kitchen diner but 

NOT in a room containing a bath or shower.
Note: An appliance for use on LPG must not be installed 

in a room or internal space below ground level, e.g. in a 

basement.

Conversion

All models are supplied set for use on group H natural gas. 

A conversion kit for LP gas is included with the appliance. 

See the instructions that are supplied with the conversion 

kit. After converting the appliance, please attach the Gas 

Conversion sticker over the appropriate area of the data 

badge – this will identify the gas type for which the appliance 

is now set.

You will need the following equipment to complete the 

cooker installation satisfactorily:

• 

Stability bracket: If the cooker is to be supplied with gas 

through a flexible hose, a stability bracket or chain must 

be fitted. 

These are not supplied with the cooker but are 

available at most builders’ merchants.

• 

Gas pressure tester/manometer.

• 

Flexible gas hose: Must be in accordance with the 

relevant standards.

• 

Multimeter: For electrical checks.

You will also need the following tools:
1. 

Electric drill

2. 

Masonry drill bit (only required if fitting the cooker on a 

stone or concrete floor)

3. 

Wall plugs (only required if fitting the cooker on a stone 

or concrete floor)

4. 

Steel tape measure

5. 

Cross head screwdriver

6. 

Flat head screwdriver

7. 

4 mm & 3 mm Allen keys

8. 

Spirit level

9. 

Pencil

10. 

Adjustable spanner

11. 

13 mm spanner or socket wrench

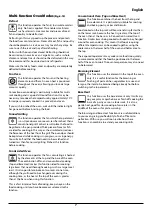
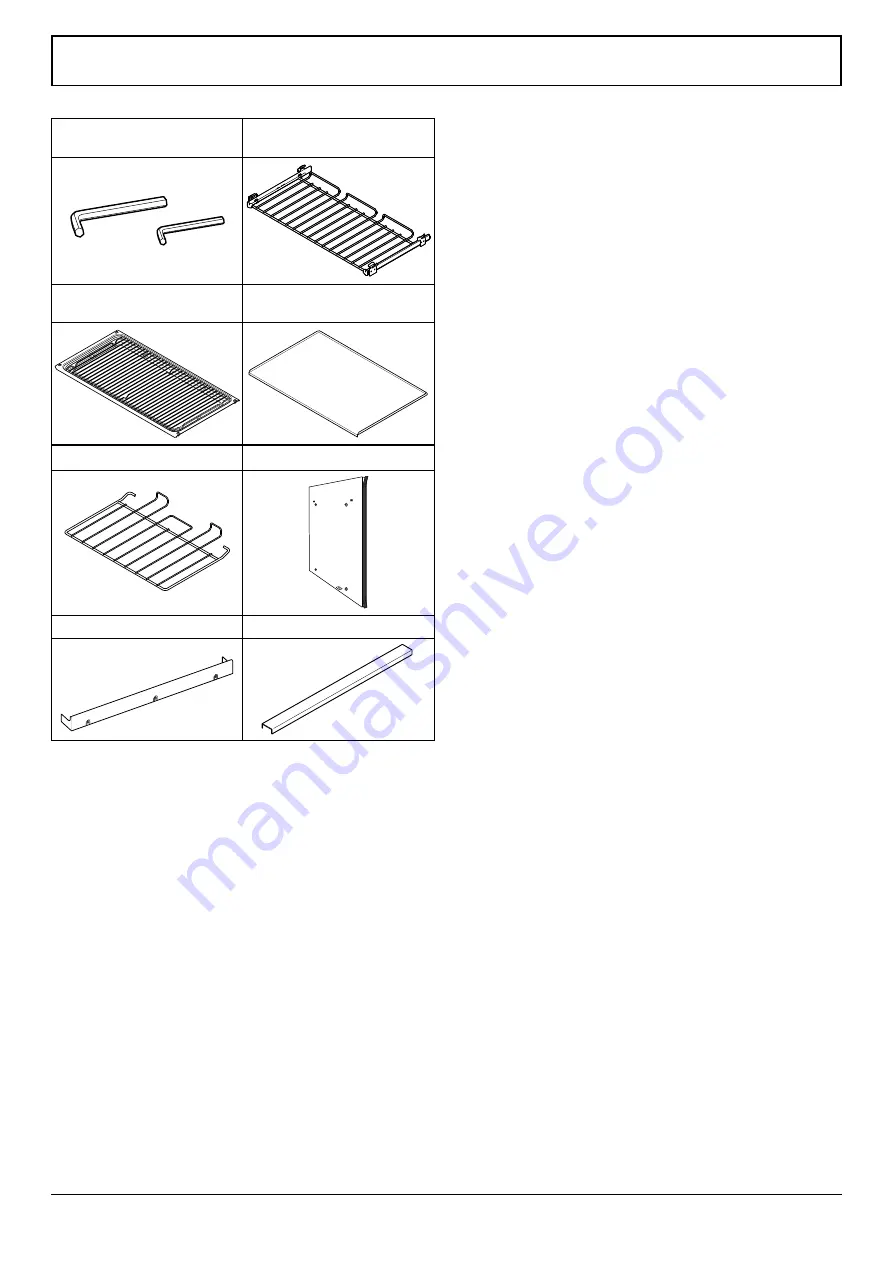
Allen keys

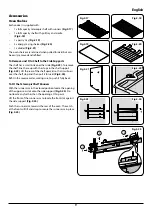
1x full capacity telescopic shelf 

with runners

1x full capacity grill tray with 

cradle

1x pastry tray

ArtNo.326-0005 - Pastry tray

3x energy saving shelves

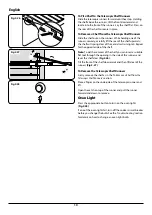
Divider 

ArtNo.281-0028 - Albertine divider

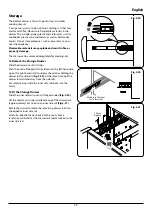
Plinth

Side extension kit

ArtNo.350-0008 - 90 SC plinth

ArtNo.351-0001 - Side extension
panel USA

Summary of Contents for AlberTine 90

Page 1: ...AlberTine 90 Dual Fuel Cooker Gamme Combustible Mixte User Guide Installations Service Instructions Mode d Emploi Instructions d Installation et d Entretien U109958 11 AlberTine ...

Page 2: ...ss Steel Main Top 17 Control Panel and Oven Doors 17 Oven and Divider 17 Cleaning Table 18 7 Installation 19 Dear Installer 19 Provision of Ventilation 19 Location of Cooker 20 Conversion 20 Positioning the Cooker 21 Moving the Cooker 21 Levelling 22 Fitting the Flue Grille 22 Fitting the Stability Bracket or Chain 23 Side Panel Extension Kit Optional Extra 23 Gas Connection 24 Pressure Testing 24...

Page 3: ...d vacate the area for this brief period 1 Before You Start If You Smell Gas DO NOT turn electric switches on or off DO NOT smoke DO NOT use naked flames DO turn off the gas at the meter or cylinder DO open doors and windows to get rid of the gas DO keep people away from the area affected Call your gas supplier If you are using natural gas in the UK ring the National Grid on 0800 111 999 Ventilatio...

Page 4: ...a surface unit by covering the pan completely with a well fitting lid or baking tray If available use a multi purpose dry chemical or foam type fire extinguisher Take care that no water seeps into the appliance Only certain types of glass glass ceramic earthenware or other glazed containers are suitable for hotplate cooking others may break because of the sudden change in temperature n n This appl...

Page 5: ...and light the gas When a cooktop burner knob is pressed in sparks will be made at every burner this is normal Do not attempt to disassemble or clean around any burner while another burner is on An electric shock could result If when you let go of the control knob the burner goes out the safety device has not held in Turn the control to the OFF position and wait one minute then try again this time ...

Page 6: ...m for the centre burner DO NOT use cooking vessels that may overlap the edges of the hotplate If after lighting a cooktop burner s flame goes out turn it off and leave it for one minute before relighting it Igniting Cooktop Burners without Electricity If there is a power failure the cooktop burners can be lit with a match 1 Hold a burning match 1cm from the burner head keeping your hand as far hor...

Page 7: ... in the glass can cause stress and may cause the door to fail Removing the Divider n n Make sure the cooker is cool before attempting to remove the divider Fully open the door and remove the oven shelves When removing the divider tilt it slightly upwards and grip the underside to prevent the metal base making contact with the door glass Fig 2 10 and Fig 2 11 We recommend that you place a tea towel...

Page 8: ...on modes The multi function oven has many varied uses We suggest you keep a careful eye on your cooking until you are familiar with each function Remember not all functions will be suitable for all food types ArtNo 326 0009 Albertine SC MF oven elements EU C A B Fig 2 12 A Grill elements B Convection elements C Base heat elements ArtNo 280 117 MF Knob Symbols F E D C B A G Fig 2 13 A Defrost B Fan...

Page 9: ... circulating air heated by the elements at the top and the base of the oven The combination of fan and conventional cooking Top and Base Heat makes this function ideal for cooking large items that need thorough cooking such as a large meat roast It is also possible to bake on two racks at one time although they will need to be changed over during the cooking time as the heat at the top of the oven...

Page 10: ... oven heating light will glow until the oven has reached the temperature you selected It will then cycle on and off during cooking as the oven maintains the selected temperature Fig 2 16 Your oven has many varied uses We suggest you keep a careful eye on your cooking until you are familiar with each function Remember not all functions will be suitable for all food types ArtNo 280 0012 MF knob Fan ...

Page 11: ... of the shelf upward so that it will pass over the shelf stop and then pull it forward Fig 2 24 Refit in the reverse order making sure to push it fully back To Fit the Telescopic Shelf Runners With the runner arm in the closed position locate the opening of the upper rear slot onto the side support Fig 2 25 Do not locate any further than the opening at this point Lift the front of the runner arm t...

Page 12: ... To aid the removal of the shelf you can insert a suitable flat tool through the opening in the side of the runners and lever the shelf clear Fig 2 26 Tilt the front of the shelf downwards and then lift clear of the runners Fig 2 27 To Remove the Telescopic Shelf Runners Firstly remove the shelf as in the To Remove a Shelf from the Telescopic Shelf Runners section Place a finger on the underside o...

Page 13: ...ing etc To Remove the Storage Drawer Slide the drawer out until it stops Push the ends of the plastic clips down on the left hand side up on the right hand side to release the catches holding the drawer to the side rails Fig 2 29 At the same time pull the drawer forward and away from the side rails For safety reasons slide the inner side rails back into the cavity To Fit the Storage Drawer Slide t...

Page 14: ...owning of the food may occur When the oven is on do not leave the door open for longer than necessary otherwise the knobs may get very hot Always leave a finger s width between dishes on the same shelf This allows the heat to circulate freely around them To reduce fat splashing when you add vegetables to hot fat around a roast dry them thoroughly or brush lightly with cooking oil Where dishes may ...

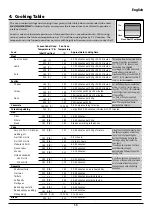
Page 15: ...xture 2 2 hours Up to 3 hours 80 90 minutes 15 25 minutes 10 15 minutes 20 30 minutes 30 40 minutes 20 30 minutes on a preheated tray 35 45 minutes 10 20 minutes according to size 20 40 minutes according to size 2 3 hours 45 60 minutes 40 45 minutes 2 to 3 hours 20 30 minutes Conventional Oven Temperature C Shelf Position 160 C 200 C 160 C 200 C 160 C 200 C 160 C 200 C 160 C 200 C 160 C 200 C 140 ...

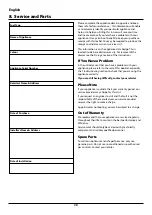
Page 16: ...ded cleaning materials n n We do not recommend corrosive or caustic cleaners as these may damage your cooker 5 Troubleshooting The knobs get hot when I use the oven can I avoid this Yes this is caused by heat rising from the oven and heating them up Do not leave the oven door open If there is an installation problem and I don t get my original installer to come back to fix it who pays You do Servi...

Page 17: ... the bulb cover by turning counter clockwise It may be very stiff Fig 5 2 Taking care to protect your fingers in case the bulb should shatter unscrew the old bulb Screw in the new bulb screw back the bulb cover Turn on the circuit breaker and check that the bulb now lights The door is misaligned The cooker has not been levelled correctly To level the cooker adjust the feet and rear rollers Use a s...

Page 18: ...ur with at most a slight yellowish fringe On LP gas the flames may be softer The cooktop burner flames may have a slight yellowish tip If the flame burns with a long white tip you should call for service Note Use af aluminium pans may cause metallic marking of the pan supports This does not effect the durability of the enamel and may be cleaned off with metal polish During use the appliance become...

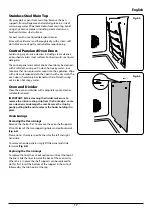
Page 19: ...ith a soft cloth wrung out in clean hot soapy water Oven and Divider Clean the oven and divider with a proprietary oven cleaner suitable for enamel IMPORTANT Before cleaning the divider make sure to remove the silicon sealing strip from the front edge some oven cleaners can damage the seal Remove the strip by gently pulling both ends to release the hooks holding it in place Oven Linings Removing t...

Page 20: ...ose cloth supermarket Sides and plinth Painted surface Hot soapy water soft cloth Splashback rear grille Enamel or stainless steel Hot soapy water soft cloth Cream cleaner with care if necessary Control panel Paint enamel or stainless steel Warm soapy water Do not use abrasive cleaners on lettering Control knobs handles trims Plastic chrome copper or lacquered brass Warm soapy water soft cloth Bra...

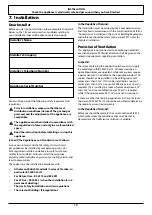
Page 21: ...IEE regulations In the Republic of Ireland The installation must be carried out by a competent person and installed in accordance with the current edition of IS 813 Domestic Gas Installations the current Building Regulations and reference should be made to the current ETCI rules for electrical installation Provision of Ventilation This appliance is not connected to a combustion products evacuation...

Page 22: ...ity bracket If the cooker is to be supplied with gas through a flexible hose a stability bracket or chain must be fitted These are not supplied with the cooker but are available at most builders merchants Gas pressure tester manometer Flexible gas hose Must be in accordance with the relevant standards Multimeter For electrical checks You will also need the following tools 1 Electric drill 2 Masonr...

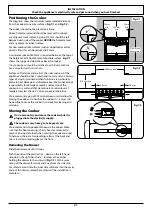
Page 23: ...use of the cooker to any material that de laminates or discolours at temperatures less than 65 C above room temperature We recommend a gap of 905mm between units to allow for moving the cooker Do not box the cooker in it must still be possible to move the cooker in and out for cleaning and servicing Moving the Cooker n n On no account try and move the cooker while it is plugged into the electricit...

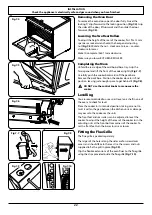
Page 24: ...y push the cooker backwards off the pack base Remove the pack base Position the cooker close to its final position leaving just enough space to get behind it Fig 7 8 n n DO NOT use the control knobs to manoeuvre the cooker Levelling You are recommended to use a spirit level on a shelf in one of the ovens to check for level Place the cooker in its intended position taking care not to twist it withi...

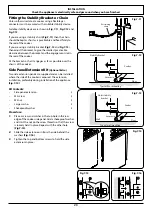
Page 25: ...f the cooker Fit the bracket so that it engages as far as possible over the chassis of the cooker Side Panel Extension Kit Optional Extra Two side extension panels are supplied and can be installed where the side of the cooker is exposed The extension installation preferably during installation of the appliance Fig 7 14 Kit Contents Side panel extension 2 M5 screw 4 M5 nut 4 Large washer 4 Shakepr...

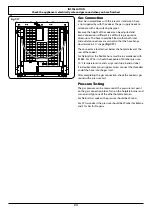
Page 26: ...just below the hotplate level at the rear of the cooker For Natural Gas the flexible hose must be in accordance with BS669 For LP Gas it should be capable of 50mbar pressure 70 C temperature rise and carry a red stripe band or label If in doubt contact your supplier Screw connect the threaded end of the hose into the gas inlet After completing the gas connection check the cooker is gas sound with ...

Page 27: ...to the correct electrical supply as stated on the voltage label on the cooker through a suitable cooker control unit incorporating a double pole switch having a contact separation of at least 3mm in all poles n n The cooker MUST NOT be connected to an ordinary domestic power point The total electrical load of the appliance is approximately 3 6kW The cable size used should be suitable for this load...

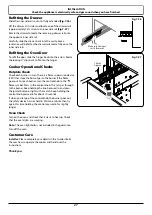
Page 28: ...ng the second friction cup making sure that you do not scratch or damage the first end piece and the that the two end pieces are lined up correctly Fit the assembled handrail to the projecting mounting studs on the control panel and fix it in place by tightening the grub screws The grub screws should be on the underside Installing the Door Handle Assemble the door knob to the door knob base and sc...

Page 29: ...ere is a flame supervision device FSD that stops the flow of gas to the burner if the flame goes out For each burner turn the control knob to the flame symbol Press in the control knob This lets gas through to the burner Keep holding the knob pressed in and press the igniter button or light with a match Keep holding the control knob pressed in for about 10 seconds If when you let go of the control...

Page 30: ... using the appliance correctly If you are still having difficulty contact your retailer Please Note If your appliance is outside the 3 year warranty period our service provider may charge for this visit If you request an engineer to visit and the fault is not the responsibility of the manufacturer our service provider reserves the right to make a charge Appointments not kept by you may be subject ...

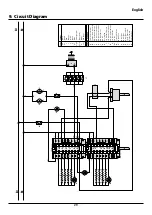
Page 31: ... F G H I J K L M N O P Q R S T U Description Function controller Temperature controller RH bottom element RH top outer element RH top inner element RH fan element RH fan Cooling fan LH bottom element LH top outer element LH top inner element LH fan element LH fan T stat protection Oven neon Oven light Oven light Oven light switch Spark generator Divider switch Tap switches Code bk br r o y g bl v ...

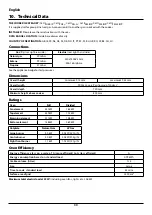
Page 32: ...ance badge for test pressures Dimensions Overall height minimum 915 mm maximum 942 mm Overall width 900 mm see Positioning of Cooker Overall depth 720 mm Minimum height above cooker 800 mm Ratings Oven Full Divided Fan element 3 31kW 1 65kW Top element 3 49kW 1 75kW Browning element 2 11kW 1 06kW Bottom element 1 38kW 0 69kW Hotplate Natural Gas LP Gas Large burner 4 0kW 5 0kW 357g h Centre burner...

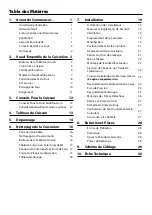
Page 33: ...neau de Commande et Porte de Four 17 Four et la Plaque de Séparation 17 Tableau Nettoyage 18 7 Installation 19 A l Intention de l Installateur 19 Mesures et Reglements de Sécurité 19 Ventilation 19 Emplacement de la Cuisinière 19 Modification 19 Positionnement de la Cuisinière 21 Déplacement de la Cuisinière 21 Retirer du Tiroir de Stockage 21 Mise à Niveau 22 Montage de la Grille d Évacuation 22 ...

Page 34: ...nt ce temps 1 Avant de Commencer Si Vous Sentez une Odeur de Gaz N actionnez aucun interrupteur électrique ni pour allumer ni pour éteindre Ne fumez pas N utilisez pas de flammes nues Coupez le gaz au compteur ou au niveau de la bouteille de gaz Ouvrez portes et fenêtres pour évacuer le gaz Appelez votre fournisseur de gaz Ventilation n n AVERTISSEMENT L utilisation d un appareil de cuisson à gaz ...

Page 35: ...ne soulevez jamais un récipient de cuisson qui a pris feu Eteignez la cuisinière et étouffez un récipient qui a pris feu sur une table de cuisson en le recouvrant complètement avec un couvercle de taille appropriée ou une plaque de cuisson Si possible utilisez un extincteur à poudre chimique ou à mousse de type polyvalent Veillez à prévenir toute infiltration d eau dans l appareil Seuls certains t...

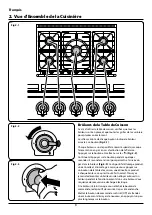
Page 36: ... brûleur Fig 2 3 Le dispositif d allumage produit une étincelle et allume le gaz Lorsque vous appuyez sur un bouton de la table de cuisson une étincelle se produit à chaque brûleur ce qui est tout à fait normal N essayez jamais de démonter un brûleur ni de nettoyer autour d un brûleur pendant le fonctionnement d un autre brûleur Vous risqueriez de recevoir une décharge électrique Si le brûleur s é...

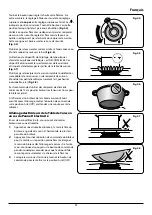
Page 37: ...e casseroles à lait pocheuses individuelles etc Fig 2 8 Il est recommandé d utiliser des récipients de diamètre minimum de 12cm pour les brûleurs extérieurs et 16cm pour le brûleur central Si la flamme d un brûleur de la table de cuisson s éteint aussitôt après l allumage mettez le bouton de commande sur la position Arrêt Off et attendez une minute avant de rallumer Allumage des Brûleurs de la Tab...

Page 38: ... porte Des éraflures peuvent provoquer une charge et faire casser la porte Retrait de la Séparation n n Assurez vous que la cuisinière a refroidi avant d essayer de retirer la séparation Ouvrez en grand la porte du four et ôtez les grilles Pour retirer la séparation inclinez légèrement cette dernière vers le haut et maintenez fermement son côté inférieur pour éviter tout contact entre la base en m...

Page 39: ...nctions Le four est un four multifonctions Fig 2 12 Outre le ventilateur de four et l élément du ventilateur le four est doté de deux éléments chauffants supplémentaires l un visible dans la voûte et l autre sous la sole Veillez à ne pas toucher l élément supérieur et le déflecteur de l élément lors de l insertion ou du retrait des plats dans le four Le four multifonctions a trois fonctions de cui...

Page 40: ...échauffage avant la cuisson Four Ventilé Mixte ArtNo 030 0014 Top Bottom Fan Symbol Cette fonction commande les ventilateurs et brasse l air chauffé par les éléments chauffants de la voûte et de la sole du four Cette fonction qui combine la cuisson ventilée et la cuisson conventionnelle chaleur supérieure et inférieure est un moyen de cuisson idéal pour les aliments volumineux gros rôti par exempl...

Page 41: ...r pour le mettre sur la température requise Le voyant du four restera allumé jusqu à ce que le four atteigne la température requise Il s allumera et s éteindra pendant la cuisson pendant que le thermostat du four maintient la température requise Fig 2 16 N oubliez pas toutes les cuisinières sont différentes les températures de vos nouveaux fours peuvent être différentes de celles de votre ancienne...

Page 42: ...evez le support vers le haut afin qu il passe sur la butée de la plaque et ensuite tirez le vers l avant Fig 2 24 Montez le à nouveau dans l ordre inverse en vous assurant de le repousser complètement Installation des Glissières Télescopiques pour Étagères Le bras de glissière en position fermée placez l ouverture de la fente arrière supérieure sur le support latéral Fig 2 25 N allez pas plus loin...

Page 43: ...rait du plateau vous pouvez insérer un outil plat adapté par l ouverture du côté des glissières et levez la grille Fig 2 26 Inclinez l avant de la grille vers le bas et la soulevez ensuite les glissières Fig 2 27 Retirer les Glissières Télescopiques pour Étagères Tout d abord enlevez l étagère conformément aux consignes fournies dans la section Retirer une étagère des glissières télescopiques pour...

Page 44: ...etirer le Tiroir de Rangement Tirez sur le tiroir jusqu à la butée Poussez les extrémités des attaches en plastique vers le bas du côté gauche et vers le haut du côté droit pour relâcher les taquets qui retiennent le tiroir sur les rails latéraux Fig 2 29 En même temps tirez le tiroir hors des rails latéraux Pour des raisons de sécurité les rails latéraux à l intérieur s enfoncent dans la cavité P...

Page 45: ... pas la porte du four ouverte plus longtemps que nécessaire afin de prévenir une surchauffe des boutons de commande Laissez toujours un doigt de largeur entre des plats placés sur une grille de four Ceci afin de faciliter la circulation de chaleur autour des plats Pour réduire les projections grasses lorsque vous ajoutez des légumes dans la graisse chaude autour d un rôti séchez soigneusement les ...

Page 46: ...nutes Volaille Poulet 160 C 150 20 25 minutes par 500g 20 25 minutes 200 C 190 15 20 minutes par 500g 15 20 minutes Dinde 160 C 150 25 30 minutes par 500g 25 30 minutes 200 C 190 20 minutes par 500g 20 minutes Canard 160 C 150 25 30 minutes par 500g 200 C 190 20 minutes par 500g Plat braisé 140 150 C 130 140 2 4 heures selon la recette Poisson 190 C 180 Filet 15 20 minutes Morceau entier 15 20 min...

Page 47: ...ur est bruyant Le bruit du ventilateur peut changer pendant le chauffage du four ceci est tout à fait normal 5 Dépannage Quels sont les produits de nettoyage recommandés pour la cuisinière Reportez vous à la section Nettoyage pour en savoir plus sur le matériel recommandé pour le nettoyage n n N utilisez jamais de produits nettoyants caustiques ou abrasifs qui abimeront la surface Les boutons de c...

Page 48: ...verte par la garantie dans un magasin d accessoires électriques Demandez une ampoule à culot vissable Edison 15W 230V POUR FOURS Cette ampoule doit pouvoir résister à une température de 300 C Fig 5 1 Avant de retirer l ampoule usagée mettez la cuisinière hors tension et assurez vous que le four a refroidi Ouvrez la porte du four et retirez les grilles du four Dévissez le couvercle de l ampoule en ...

Page 49: ...de ventilation de la cuisinière ne soit pas entravée par exemple par une accumulation de graisse Dans le cas du gaz naturel les flammes des brûleurs doivent avoir une couleur bleutée avec au plus une légère bordure jaunâtre Dans le cas du gaz de pétrole liquéfié GPL les flammes peuvent être plus douces Les flammes des brûleurs de la table de cuisson peuvent avoir une pointe légèrement jaunâtre Si ...

Page 50: ...liquide Le panneau et les boutons de commande doivent être nettoyés uniquement avec un chiffon doux imbibé d eau savonneuse chaude Veillez à prévenir toute infiltration d eau dans l appareil Essuyez avec un chiffon humide propre puis lustrez à l aide d un chiffon sec Les portes des fours doivent être nettoyées uniquement avec un chiffon doux imbibé d eau savonneuse chaude Four et la Plaque de Sépa...

Page 51: ...linthe Surface peinte Eau savonneuse chaude chiffon doux Dosseret Grille arrière Email ou acier inoxydable Eau savonneuse chaude chiffon doux Nettoyez soigneusement avec un produit nettoyant semi liquide si nécessaire Panneau de commande Peinture émail ou acier inoxydable Eau savonneuse tiède N utilisez pas de produits nettoyants abrasifs sur les caractères Boutons de commande poignées et garnitur...

Page 52: ...ation incorrecte n engage ni la responsabilité ni la garantie du fabricant et peut donner lieu à des poursuites n n Cet appareil peut être modifié afin d être utilisé avec d autres types de gaz Ventilation Cet appareil n est pas raccordé à un dispositif d évacuation des produits de combustion Prêtez particulièrement attention à la réglementation en vigueur concernant la ventilation Emplacement de ...

Page 53: ...ltimetre Pour les contrôles électriques Vous aurez aussi besoin des outils suivants 1 Perceuse électrique 2 Foret à maçonnerie nécessaire seulement pour montage sur sol en pierre ou en béton 3 Chevilles Rawlplugs nécessaires seulement pour montage sur sol en pierre ou en béton 4 Mètre en acier 5 Tournevis cruciforme 6 Tournevis à lame plate 7 Niveau à bulle 8 Crayon 9 Clé réglable 10 Clé polygonal...

Page 54: ... toute responsabilité pour des dommages résultant d une utilisation normale de la cuisinière et subis par des matériaux qui se décollent ou se décolorent à des températures de moins de 65 C au dessus de la température ambiante Nous recommandons de laisser un espace de 905mm entre les unités pour permettre le déplacement de la cuisinière La cuisinière ne doit pas être encastrée elle doit pouvoir êt...

Page 55: ...lage Poussez la cuisinière près de sa position finale en laissant juste assez de place pour pouvoir avoir accès à l arrière Fig 7 8 n n N utilisez pas les poignées de portes ou les boutons de commande pour déplacer la cuisinière Mise à Niveau Nous vous recommandons d utiliser un niveau à bulle placé sur une des grilles de four pour vérifier le niveau Placez la cuisinière à l emplacement prévu pour...

Page 56: ...de façon à avoir le moins de dégagement possible entre l équerre et le rail de prise à l arrière de la cuisinière Fixez l équerre de sorte qu elle s encastre le plus loin possible dans le châssis de la cuisinière Trousse de Rallonge de Panneau Latéral En option supplémentaire La cuisinière est livrée avec deux panneaux de rallonge Ils s installent sur la face latérale visible de la cuisinière La r...

Page 57: ...dans l admission de la cuisinière en serrant à la main A l aide de deux outils appropriés l un placé au niveau de l admission située sur la cuisinière pour veiller à en assurer stabilité et l autre sur le raccord vissez le raccord dans l admission Couple minimum 15Nm Couple maximum 20Nm Raccordement du tuyau flexible au connecteur Vous pouvez utiliser un tuyau flexible de 900mm mais un tuyau de 12...

Page 58: ...ERRE Remarque La cuisinière doit être raccordée à l alimentation électrique correcte indiquée sur l étiquette de tension sur l appareil par le biais d une unité de commande de cuisinière appropriée à interrupteur bipolaire avec une séparation de contact de 3mm au minimum entre les pôles n n Cette cuisinière ne doit pas être raccordée à une prise d alimentation domestique ordinaire La charge électr...

Page 59: ...prend deux embouts avec vis d arrêt deux coupelles de friction et la barre elle même Fig 7 23 Tenez une coupelle de friction par les languettes sur une extrémité de la barre Placez un embout sur la barre et insérez le sur la barre au dessus de la coupelle Fig 7 24 Retournez la barre et insérez l autre embout avec l autre coupelle en prenant soin de ne pas rayer ni endommager le premier embout et e...

Page 60: ... en cas d extinction de la flamme En appuyant sur le bouton le brûleur est mis en marche par le biais d un système d allumage par étincelle Pour chaque brûleur appuyez sur un bouton et mettez le sur le symbole Le système d allumage produit une étincelle et allume le gaz Continuez d appuyer sur le bouton pendant quelques secondes pour permettre l arrivée du gaz dans le brûleur Si le brûleur s étein...

Page 61: ... votre fournisseur Remarque Si votre appareil n est plus couvert par la garantie de trois ans notre fournisseur de services d entretien peut vous facturer cette visite Si vous devez faire appel à un technicien d entretien et si le défaut n est pas la responsabilité du fabricant notre fournisseur de services d entretien se réserve le droit de facturer son intervention Les rendez vous non respectés ...

Page 62: ...égulateur thermique Elément inférieur droit Elément supérieur extérieur droit Elément supérieur intérieur droit Elément de ventilateur droit Ventilateur droit Ventilateur de refroidissement Elément inférieur gauche Elément supérieur extérieur gauche Elément supérieur intérieur gauche Elément de ventilateur gauche Ventilateur gauche Protection thermostat Voyant de four Eclairage de four Eclairage d...

Page 63: ... contrôle reportez vous au badge technique de l appareil Dimensions Hauteur hors tout minimum 915 mm maximum 942 mm Largeur hors tout 900 mm Voir Positionnement de la Cuisinière Profondeur hors tout 720 mm Emplacement prévu pour fixation Voir Positionnement de la Cuisinière Espace minimum au dessus de la table de cuisson 800 mm Puissances Four Totalité Moitié Elément de ventilateur 3 31kW 1 65kW E...

Page 64: ...14 ...
Reviews: