background image


U

S

A

 &

 C

ANADA


Le Château

®

 165


D

ESCRIPTION


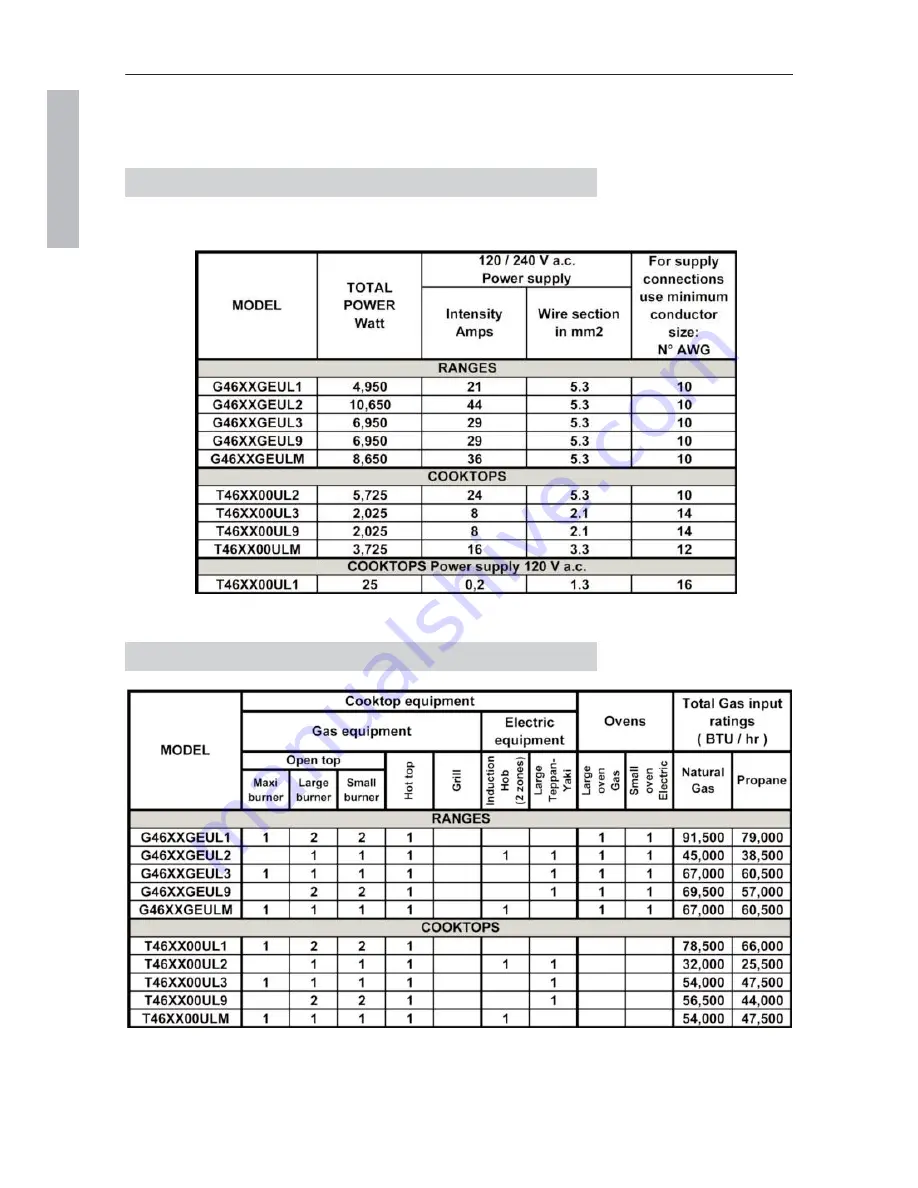
For each gas type and for each model, the tables below summarize the total electric power (W) and the 
input ratings (BTU/hr).


E

LECTRIC SUPPLY INFORMATION


G

AS SUPPLY INFORMATION


Page 

18


Installation Guide Château G4 - USA Canada


LA CORNUE


08NOTINSG4/ULC-1


Summary of Contents for Chateau 120

Page 1: ...ion Operation and Maintenance MANUAL G 4 S E R I E S RANGES COOKTOPS G4 Grand Palais 180 Château 165 Château 150 Château 135 WD Château 120 Château 120 WD Château 90 Château 75 ANSI CGA Standard Designation 85K ...

Page 2: ...ance WHAT TO DO IF YOU SMELL GAS Do not try to light any appliance Do not touch any electrical switch Do not use any phone in your building Immediately call your gas supplier from a neighbor s phone Follow the gas supplier s instructions If you cannot reach your gas supplier call the fire depart ment Installation and service must be performed by a qualified installer service agency or the gas supp...

Page 3: ...n a risk of electric shock or fire Proper Installation Be sure your appliance is properly installed and grounded by a qualified technician The installation of your La Cornue appliance must conform with local codes or in the absence of local codes in the USA with the National Fuel Gas Code ANSI Z223 1 NFPA 54 latest edition and in Canada with the Natural Gas and Propane Installation Code CSA B149 1...

Page 4: ...s on the range cooktop The hot air from an oven vent may ignite flammable items and may increase pressure in closed containers which may cause them to burst Many aerosol type spray cans are EXPLOSIVE when exposed to heat and may be highly flammable Avoid their use or storage near an appliance Many plastics will burn and most are damaged by heat Keep plastic items away from parts of the range that ...

Page 5: ...ithout blower systems since every installation is unique The individual requirements are best handled by a professional ventilation specialist Adequate clearance must be provided for air openings into the combustion chamber Minimum clearances to combustible construction see item 1 2 page 35 Adequate clearance must be provided for proper operation and servicing of the appliance A manual valve must ...

Page 6: ...bags after unpacking the range Never allow children to play with packaging material Wear Proper Apparel Loose fitting or hanging garments should never be worn while using the appliance User Servicing Do not repair or replace any part of the appliance unless specifically recommended in the manual All other servicing should be referred to a qualified technician Use Proper Pan Size This appliance is ...

Page 7: ...ange with wet hands Never Leave Surface Units Unattended at High Heat Settings Boilover causes smoking and greasy spillovers that may ignite Make Sure Reflector Pans or Drip Bowls Are in Place Absence of these pans or bowls during cooking may subject wiring or components underneath to damage Glazed Cooking Utensils Only certain types of glass glass ceramic ceramic earthenware or other glazed utens...

Page 8: ...o not allow anyone to climb stand or hang on any part of the range Wear Suitable Clothing Never wear loose fitting or hanging clothes while using the range Be careful when reaching for items stored in cabinets over the cooktop Flammable material could be ignited if brought in contact with a burner flame or hot surface and may cause severe burns Important Safety Notice and Warning The California Sa...

Page 9: ...S AREAS NEAR UNITS HEATING ELEMENTS OR INTERIOR SURFACES OF OVEN Surface units and heating elements may be hot even though they are dark in color Areas near surface units and interior surfaces of an oven may become hot enough to cause burns During and after use do not touch or let clothing or other flammable materials contact surface units areas near units heating elements or interior surfaces of ...

Page 10: ...ces made for some components such as brass for the burners and cast iron for the gas simmering plate are the result of criteria of technicality and professional performance which are not attainable with other materials or protective treatments We are very much attached to the authenticity of our stoves and we are convinced that you will appreciate them even more as you use them In order to make su...

Page 11: ...ustment 47 4 Gas chimney protection installation 48 CONNECTIONS 48 1 Nameplate label 49 2 Electrical connection 49 3 Gas connection 52 OPERATION 54 1 Tests 54 2 Starting with the cooktop elements 54 3 Starting with the ovens 56 4 Warming drawers 61 MAINTENANCE 62 IMPORTANT INFORMATION 62 1 Adjustment of the low flame settings 62 2 Fuel conversion 63 3 Converting for High Altitude 65 4 Gas Pressure...

Page 12: ...s for each kind of burner BTU hr Electrical power supplied by each heating element W USA C ANADA LA CORNUE Installation Guide Château G4 USA Canada Page 11 08NOTINSG4 ULC 1 Power 3 700 W 2 000 W Floor Baking 1 500 W Vault Broiling 1 175 W Forced Heat Convection 2 500 W Floor Baking 1 300 W Vault Broiling 1 175 W Forced Heat Convection 2 500 W 2 350 W 1 300 W 25 W 25 W 25 W 25 W Warming drawers wid...

Page 13: ...e rear 2 gas burners small burner at the rear 1 gas hotplate N9 1 large electric teppan yaki 1 induction hob 2 zones 2 gas burners small burner at the rear 1 gas hotplate NM 1 maxi burner 1 large electric teppan yaki 2 gas burners small burner at the rear 1 gas hotplate 2 gas burners small burner at the rear 1 gas lava rock grill 1 large electric teppan yaki 2 gas burners small burner at the rear ...

Page 14: ...70 7 8 1 800 mm 70 7 8 1 800 mm Weight 617 to 705 lbs 220 to 286 lbs according to the models 280 to 320 kg 100 to 130 kg Depth to the wall Front 26 1 8 665 mm Rail 31 785 mm Hob edge 27 1 2 700 mm Thickness 1 5 8 40 mm Range model G48 Cooktop model T48 USA C ANADA Dimensions in mm LA CORNUE Installation Guide Château G4 USA Canada Page 13 08NOTINSG4 ULC 1 ...

Page 15: ...ESCRIPTION For each gas type and for each model the tables below summarize the total electric power W and the input ratings BTU hr ELECTRIC SUPPLY INFORMATION Page 14 Installation Guide Château G4 USA Canada LA CORNUE 08NOTINSG4 ULC 1 ...

Page 16: ...DESCRIPTION Le Grand Palais 180 GAS SUPPLY INFORMATION LA CORNUE Installation Guide Château G4 USA Canada Page 15 USA C ANADA 08NOTINSG4 ULC 1 ...

Page 17: ...ONS L1 L2 L3 2 gas burners small burner at the rear 1 gas hotplate 1 maxi burner 2 gas burners small burner at the rear 2 gas burners small burner at the rear 1 gas hotplate 1 large electric teppan yaki 1 induction hob 2 zones 2 gas burners small burner at the rear 1 gas hotplate 2 gas burners small burner at the rear 1 gas lava rock grill 2 round electric plates L9 LM 2 gas burners small burner a...

Page 18: ...h 65 1 650 mm 65 1 650 mm Weight 573 to 639 lbs 198 to 286 lbs according to the models 260 to 290 kg 90 to 130 kg Depth to the wall Front 26 1 8 665 mm Rail 31 785 mm Hob edge 27 1 2 700 mm Thickness 1 5 8 40 mm Range model G46 Cooktop model T46 USA C ANADA Dimensions in mm LA CORNUE Installation Guide Château G4 USA Canada Page 17 08NOTINSG4 ULC 1 ...

Page 19: ... each gas type and for each model the tables below summarize the total electric power W and the input ratings BTU hr ELECTRIC SUPPLY INFORMATION GAS SUPPLY INFORMATION Page 18 Installation Guide Château G4 USA Canada LA CORNUE 08NOTINSG4 ULC 1 ...

Page 20: ...ear 1 gas hotplate 1 large electric teppan yaki 1 induction hob 2 zones 2 gas burners small burner at the rear 1 gas hotplate 2 gas burners small burner at the rear 1 induction hob 2 zones 2 gas burners small burner at the rear 1 gas hotplate 2 gas burners small burner at the rear 1 large electric teppan yaki K5 K6 KH KM 2 gas burners small burner at the rear 1 gas hotplate 2 gas burners small bur...

Page 21: ... 260 mm Width 59 1 500 mm 59 1 500 mm Weight 550 to 617 lbs 176 to 220 lbs according to the models 250 to 280 kg 80 to 100 kg Depth to the wall Front 26 1 8 665 mm Rail 31 785 mm Hob edge 27 1 2 700 mm Thickness 1 5 8 40 mm Range model G45 Cooktop model T45 Dimensions in mm Page 20 Installation Guide Château G4 USA Canada LA CORNUE 08NOTINSG4 ULC 1 ...

Page 22: ... each gas type and for each model the tables below summarize the total electric power W and the input ratings BTU hr ELECTRIC SUPPLY INFORMATION USA C ANADA LA CORNUE Installation Guide Château G4 USA Canada Page 21 08NOTINSG4 ULC 1 ...

Page 23: ...USA C ANADA Le Château 150 DESCRIPTION GAS SUPPLY INFORMATION Page 22 Installation Guide Château G4 USA Canada LA CORNUE 08NOTINSG4 ULC 1 ...

Page 24: ... small burner at the rear H0 1 gas hotplate 2 gas burners small burner at the rear 2 gas burners small burner at the rear H1 1 maxi burner 2 gas burners small burner at the rear 2 gas burners small burner at the rear H2 1 gas hotplate 1 large electric teppan yaki 2 gas burners small burner at the rear H3 1 gas hotplate 1 maxi burner H6 HC HF 2 gas burners small burner at the rear 1 gas hotplate 2 ...

Page 25: ...60 mm Width 53 1 8 1 350 mm 53 1 8 1 350 mm Weight 440 to 485 lbs 176 to 220 lbs according to the models 200 to 220 kg 80 to 100 kg Depth to the wall Front 26 1 8 665 mm Rail 31 785 mm Hob edge 27 1 2 700 mm Thickness 1 5 8 40 mm Range model G43 Cooktop model T43 Dimensions in mm Page 24 Installation Guide Château G4 USA Canada LA CORNUE 08NOTINSG4 ULC 1 ...

Page 26: ...r each gas type and for each model the tables below summarize the total electric power W and the input ratings BTU hr ELECTRIC SUPPLY INFORMATION USA C ANADA LA CORNUE Installation Guide Château G4 USA Canada Page 25 08NOTINSG4 ULC 1 ...

Page 27: ...USA C ANADA Le Château 135 WD DESCRIPTION GAS SUPPLY INFORMATION Page 26 Installation Guide Château G4 USA Canada LA CORNUE 08NOTINSG4 ULC 1 ...

Page 28: ...E0 1 gas hotplate 2 gas burners small burner at the rear 2 gas burners small burner at the rear E1 1 maxi burner 2 gas burners small burner at the rear 2 gas burners small burner at the rear E2 1 gas hotplate 1 gas lava rock grill 2 gas burners small burner at the rear E4 1 gas hotplate 1 induction hob 2 zones E5 ED EF 2 gas burners small burner at the rear 1 gas hotplate 1 large electric teppan y...

Page 29: ... mm Width 47 1 4 1 200 mm 47 1 4 1 200 mm Weight 440 to 485 lbs 176 to 220 lbs according to the models 200 to 220 kg 80 to 100 kg Depth to the wall Front 26 1 8 665 mm Rail 31 785 mm Hob edge 27 1 2 700 mm Thickness 1 5 8 40 mm Range model G42 Cooktop model T42 Dimensions in mm Page 28 Installation Guide Château G4 USA Canada LA CORNUE 08NOTINSG4 ULC 1 ...

Page 30: ... each gas type and for each model the tables below summarize the total electric power W and the input ratings BTU hr ELECTRIC SUPPLY INFORMATION USA C ANADA LA CORNUE Installation Guide Château G4 USA Canada Page 29 08NOTINSG4 ULC 1 ...

Page 31: ...USA C ANADA Le Château 120 DESCRIPTION GAS SUPPLY INFORMATION Page 30 Installation Guide Château G4 USA Canada LA CORNUE 08NOTINSG4 ULC 1 ...

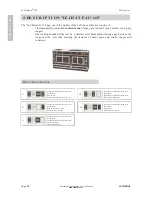
Page 32: ...ll vaulted oven gas or electric and 1 electric war ming cupboard on the right with 2 warming drawers One cooktop bounded at the rear by a stainless steel backsplash creating a gap between the range and the wall thus ensuring the removal of burnt gases and smells HOB CONFIGURATIONS See page 27 Château 120 USA C ANADA LA CORNUE Installation Guide Château G4 USA Canada Page 31 08NOTINSG4 ULC 1 ...

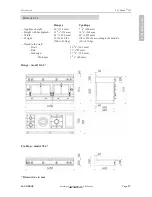
Page 33: ...height 36 914 mm Width 47 1 4 1 200 mm Weight 440 to 485 lbs US A 200 to 220 kg Depth to the wall Front 26 1 8 665 mm Rail 31 785 mm Hob edge 27 1 2 700 mm Thickness 1 5 8 40 mm Range model G41 Dimensions in mm Page 32 Installation Guide Château G4 USA Canada DESCRIPTION LA CORNUE 08NOTINSG4 ULC 1 ...

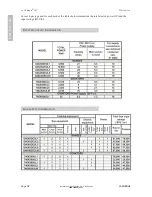
Page 34: ...type and for each model the tables below summarize the total electric power W and the input ratings BTU hr ELECTRIC SUPPLY INFORMATION GAS SUPPLY INFORMATION USA C ANADA LA CORNUE Installation Guide Château G4 USA Canada Page 33 08NOTINSG4 ULC 1 ...

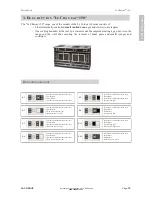
Page 35: ...us ensuring the removal of burnt gases and smells ranges and cooktops HOB CONFIGURATIONS C1 C2 C3 2 gas burners small burner at the rear C5 1 maxi burner 2 gas burners small burner at the rear 1 small gas hotplate CC 2 gas burners small burner at the rear 2 gas burners small burner at the rear 1 small gas hotplate 1 gas lava rock grill 2 gas burners small burner at the rear 1 small gas hotplate 1 ...

Page 36: ...35 1 2 900 mm 35 1 2 900 mm Weight 220 to 330 lbs 154 to 220 lbs according to the models 100 to 150 kg 70 to 100 kg Depth to the wall Front 26 1 8 665 mm Rail 31 785 mm Hob edge 27 1 2 700 mm Thickness 1 5 8 40 mm Range model G49 Cooktop model T49 USA C ANADA Dimensions in mm LA CORNUE Installation Guide Château G4 USA Canada Page 35 08NOTINSG4 ULC 1 ...

Page 37: ...RIPTION For each gas type and for each model the tables below summarize the total electric power W and the input ratings BTU hr ELECTRIC SUPPLY INFORMATION Page 36 Installation Guide Château G4 USA Canada LA CORNUE 08NOTINSG4 ULC 1 ...

Page 38: ...DESCRIPTION Le Château 90 GAS SUPPLY INFORMATION LA CORNUE Installation Guide Château G4 USA Canada Page 37 USA C ANADA 08NOTINSG4 ULC 1 ...

Page 39: ...p between the range and the wall thus ensuring the removal of burnt gases and smells ranges and cooktops 2 HOB CONFIGURATIONS B1 2 gas burners small burner at the rear BA 1 maxi burner B2 2 gas burners small burner at the rear BB 2 gas burners small burner at the rear 1 induction hob 2 zones 1 induction hob 2 zones 1 induction hob 2 zones 1 large electric teppan yaki B3 2 gas burners small burner ...

Page 40: ...29 1 2 750 mm 29 1 2 750 mm Weight 220 to 286 lbs 130 to 176 lbs according to the models 100 to 130 kg 60 to 80 kg Depth to the wall Front 26 1 8 665 mm Rail 31 785 mm Hob edge 27 1 2 700 mm Thickness 1 5 8 40 mm Range model G47 Cooktop model T47 USA C ANADA Dimensions in mm LA CORNUE Installation Guide Château G4 USA Canada Page 39 08NOTINSG4 ULC 1 ...

Page 41: ...RIPTION For each gas type and for each model the tables below summarize the total electric power W and the input ratings BTU hr ELECTRIC SUPPLY INFORMATION Page 40 Installation Guide Château G4 USA Canada LA CORNUE 08NOTINSG4 ULC 1 ...

Page 42: ...DESCRIPTION Le Château 75 GAS SUPPLY INFORMATION LA CORNUE Installation Guide Château G4 USA Canada Page 41 USA C ANADA 08NOTINSG4 ULC 1 ...

Page 43: ... The minimum horizontal distances between overhead cabinets is not less then the nominal width of the appliance A To eliminate the risk of burns or fire by reaching over heated surface units cabinet storage space located above the surface units should be avoided Any element either an extraction hood or cabinet situated directly above the range must be made of non combustible material and placed at...

Page 44: ...at on the appliance the gas inlet is located On the left hand side of the appliance approximately 2 1 2 60 mm from the edge 24 620 mm above the floor for the ranges NOTE Make sure that the supply line is clear of burrs and metal particles in order to avoid damage to the gas controls once the gas is turned on The pipe connections can then be made When your La Cornue appliance is installed between k...

Page 45: ...ur people Complete cooker 1 In order to lighten the cooker remove and set aside the drawers the drip trays the backsplash the handrail the oven accessories the pan supports the solid top and any other accessories 2 Remove oven doors by engaging the latches on the hinges and by pulling the door back and up 3 Remove the plinthes toe kicks using a standard screwdriver USA C ANADA Full view of element...

Page 46: ...Twist the harness and tilt the cooker to place the harness 6 When lifting up stairs the straps of the handlers at the bottom should be shorter so the cooker stays level The back of the cooker should always face the inside side of the ramp Page 46 Installation Guide Château G4 USA Canada LA CORNUE 08NOTINSG4 ULC 1 ...

Page 47: ...justable legs so the height of the cooktop can vary from 910 mm 35 82 in to 920 mm 36 22 in Remove the drawers and plinthes toe kicks set the cooker in place screw up the central legs so the cooker rests on the outside legs and adjust the height Once the cooker is resting at the right height and is level screw down the central legs to balance the weight USA C ANADA LA CORNUE Installation Guide Châ...

Page 48: ...alled Remove all packing material and literature from oven before connecting gas and electrical supply to range Side view All Ranges Rear view Ranges Château 90 and Château 75 Château 120 WD and Châteaux 135 WD Gas Inlet Male 1 2 NPT connection 2 1 2 60 mm mm Electrical 620 connection Terminal Block 24 Rear view Ranges Grand Palais 180 Château 165 Château 150 and Château 120 Electrical connection ...

Page 49: ...al codes or in the absence of such codes with the latest edition of the National Electrical Code ANSI NFPA 70 in the USA and CSA C22 1 Canadian Electrical Code in Canada Disconnect all the power supply circuits before accessing the junction boxes This appliance must be supplied with 240 Volt or 120 Volt for some cooktops and 60 Hz frequency and connected to an individual properly grounded branch c...

Page 50: ...utlet Because range terminals are not accessible after range is in position flexible service conduit or cord must be used at least 4 ft 1 2 m length The range can then be easily disconnected for servicing The La Cornue appliance is supplied with a connection terminal block accessible by unscrewing the stainless steel protection plate on the backside Terminal block ranges with two ovens Terminal bl...

Page 51: ...al white wire to N the L1 and L2 red and black wire to L1 and L2 the ground to T yellow green NOTE Make sure the wires are completely inserted into the terminals and secure connections are made 6 Re install the protection plate for the range or the cover for the cooktop 7 Make sure that everything is properly secured REMINDER connections to main power supply preferably suppose to be hardwired into...

Page 52: ...d LP installer must convert it We recommend that the range be converted before installation For proper operation the pressure of natural gas supplied to the regulator must be between 6 and 10 of water column 1 49 and 2 49 kPa For LP gas the pressure supplied must be between 12 and 13 of water column 3 and 3 24 kPa When checking for proper operation of the regulator the inlet pressure must be at le...

Page 53: ...sition range to permit connection at the shut off valve When all connections have been made make sure all range controls are in the off position and turn on the main gas supply valve Use a liquid leak detector at all joints and connections to check for leaks in the system Use a product specifically manufactured for leak detection Leak testing of the appliance shall be conducted in accordance to th...

Page 54: ... press the reset button G until air is also displaced in the oven and the flame goes on 2 STARTING WITH THE COOKTOP ELEMENTS The gas burners on the stoves of the La Cornue line are fitted with safety thermocouples should a burner extinguish the gas supply to this burner is automatically cut off 2 1 Gas hobs with electric ignition smal l large and maxi burner The thermocouple should not be activate...

Page 55: ...OOLED COMPLETELY As long as the symbol H of residual heat is on do not touch the cooking zones and do not place anything sensitive to heat on the ceramic glass Risk of burns and fire The 220 x 180 mm cooking zone fits and automatically recognizes the diameter of the pan used 120 250 mm and therefore evenly distributes the heat in the pan thus ensuring that all of the food is cooked at the same tem...

Page 56: ... to 338 F 170 C position 5 to 410 F 210 C and position 6 to 480 F 250 C Those temperatures are given as an reference and are relating to the center of the grill The grill is hotter in the center than on the edge The edge can be used to keep the food warm of the cook deeply WARNING AFTER USE EVEN WHEN THE THERMOSTAT IS SET TO 0 THE SURFACE MAY NOT HAVE COOLED COMPLETELY Do not touch the cooking zon...

Page 57: ...rmostat B switches on the gas burner for bake C The simmerstat and the thermostat are coupled to ON indicator lights E and D As soon as you turn the thermostat or simmerstat the corresponding indicator light comes on A To ignite the gas burner turn the oven thermostat B to the desired temperature In addition to indicator light D the burner ON light F also comes on D F The burner ON light F remains...

Page 58: ... the bottom element and will enable you to brown the bottom of your pizza or your quiche or finish cooking the base of a cake on a bottom grill It also provides a gentle heat perfect for warming plates or reheating dishes The Conventional Heat function enables you to finish your dishes to perfection Floor Vault Combination Function This function combines the heat supplied by the top and bottom ele...

Page 59: ...y thawed before cooking 3 3 Gril l Function gas and electric ovens Your oven is equipped with an electric grill controlled separately from the heating element on the oven floor The grill element has 1 power circuit 2350 W maximum To activate the grill mode turn the simmerstat clockwise to the right as far as the max symbol In this position the grill will reach maximum power 2350 W By turning back ...

Page 60: ... racks in the large tray Therefore by using this system one makes the most of the natural air convection allowing for the air flow to travel round and under the food to place to roast directly onto the rack in the large tray The roast will remain seasoned as well as remai ning medium rare or rare if you desire By using the spit concept the hot air envelopes the entire piece of meat regardless of i...

Page 61: ...pboard is equipped with a large warming drawer 1 with a sliding shelf 2 and a warming drawer below 3 Depending on use you can remove the sliding shelf to increase the size of the large drawer You may use the lower level of the large drawer which is slightly warmer for your dishes and the upper level sliding shelf for your plates The thermostat B has a dual function of switch and temperature contro...

Page 62: ...NTS OF THE TOP BURNER LOW FLAME SETTINGS Open top hot top open top broiler or griddle Only the low settings for the burners of the open tops hot top open top broiler or griddle can be adjusted by means of the A following procedure 1 Turn gas burner on and set to lowest setting small flame 2 Remove the control knobs A and knob bezel by unscrewing the allen screw to access the by pass screw 3 Rotate...

Page 63: ...ap of the burner orifice gas burner Note Gas pressure regulator setting must also be adjusted when changing fuel type Orifices of gas burner and hotplate are replaced by means of this sequence 1 Remove the brisk heat grill then the pan 2 Remove the cap of the burner 3 Unscrew the orifice from the top using a standard 7 mm box spanner Install the new orifice and screw it down completely 4 Place the...

Page 64: ...here is too much air 5 Then lock the adjusting cone 2 with the locking washer 3 Back of the cooker Front of the cooker Orifice Orifice Access is gained to the oven orifice either from the back of the cooker or from the front by removing the drawer It is easier to change the orifice by accessing it from the rear Once you have changed the orifices it is a good idea to adjust the low settings for the...

Page 65: ...date any warranty or liability claims and lead to prosecution When servicing or replacing gas carrying components disconnect from gas before commencing operation Use the correct orifices for high altitude given by La Cornue service only for your appliance When you have completed the changes check the appliance is gas sound CAUTION DO NOT USE A FLAME TO CHECK FOR GAS LEAKS Do not use re conditioned...

Page 66: ...he oven door is opened Please note disconnect your stove before interfering with the light to prevent any risk of an electrical shock and to allow the appliance to cool down if necessary Remove the protection glass and then unscrew the damaged light Refit a new light and the protection glass Technical characteristics of the light 25W 230V 240V 300 C E14 base Your selection of LA CORNUE equipment i...

Page 67: ... all wires prior to disconnection when servicing controls Wiring errors can cause improper and dangerous operation Verify proper operation after servicing BURNER BURNER BURNER BURNER BURNER BURNER 14 kV 240 V a c USA C ANADA LA CORNUE Installation Guide Château G4 USA Canada Page 67 08NOTINSG4 ULC 1 ...

Page 68: ...bel all wires prior to disconnection when servicing controls Wiring errors can cause improper and dangerous operation Verify proper operation after servicing Range with 1 oven and Warming Drawers Range with 1 oven Range with 2 ovens Page 68 Installation Guide Château G4 USA Canada LA CORNUE 08NOTINSG4 ULC 1 ...

Page 69: ...GNITION CAUTION Label all wires prior to disconnection when servicing controls Wiring errors can cause improper and dangerous operation Verify proper operation after servicing USA C ANADA LA CORNUE Installation Guide Château G4 USA Canada Page 69 08NOTINSG4 ULC 1 ...

Page 70: ...RIC OVEN CAUTION Label all wires prior to disconnection when servicing controls Wiring errors can cause improper and dangerous operation Verify proper operation after servicing Page 70 Installation Guide Château G4 USA Canada LA CORNUE 08NOTINSG4 ULC 1 ...

Page 71: ...ice agency of Company except that such obligation to bear labor charges shall not apply to products or parts installed outside the United States and Canada Replacement part s must be supplied by La Cornue direct or through its dealer or qualified service agency and the defective part s returned to same intact This states the exclusive remedy against Company relating to the product s whether in con...

Page 72: ...ark Lane Brisbane CA 94005 USA Phone 800 457 1356 or 415 468 6620 Fax 415 358 4377 After sales Service of 7 00 a m and 4 00 p m Pacific Time Monday through Friday excluding national Holidays by calling 877 LACORNUE CANADA SOFA Galleries 6900 Airport Road Suite 205 Mississauga ONT L4V 1E8 Canada T 855 213 2785 F 905 678 4854 You can find these instructions on following web sites USA www lacornueusa...

Page 73: ......
Page 74: ...ont Z I les Béthunes 95310 Saint Ouen l Aumône FRANCE Postal address Adresse postale La Cornue SAS B P 99006 95070 Cergy Pontoise Cedex FRANCE Phone Tél 33 0 1 34 48 36 36 Fax 33 0 1 34 64 32 65 E mail a table la cornue com www lacornue com ...

Reviews: