40
Read all instructions before installing or using this appliance.
Installation Instructions
Save these instructions for future reference.
Anti-Tip Device
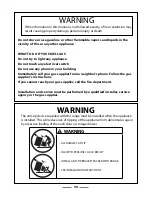
WARNING
Range must be secured by the Anti-Tip bracket
supplied. Unless properly installed, the range could
be tipped by leaning on the door. Injury might
result from spilled hot liquids or from the range
itself.
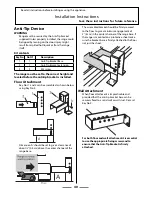
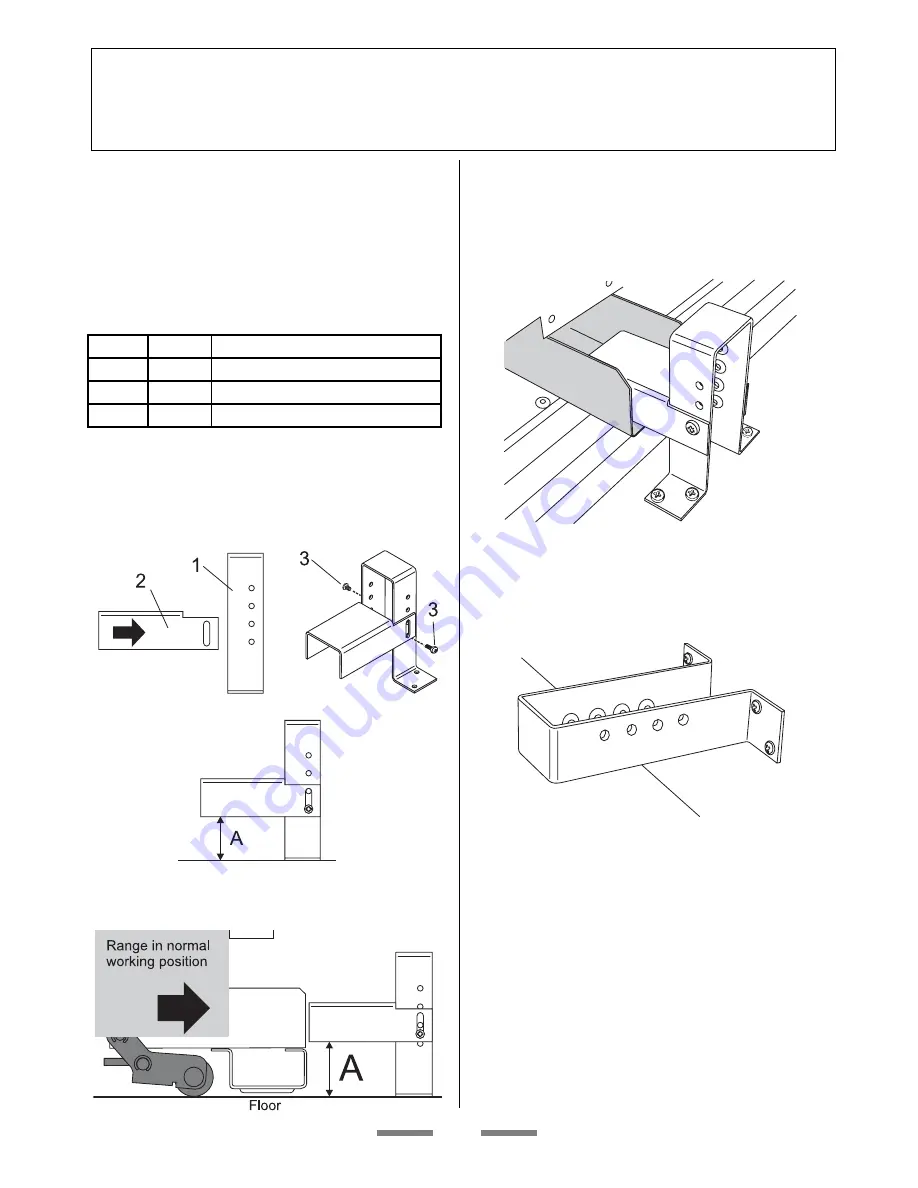
Kit contents
Key No
No Of
Description
1
1
Anti-Tip Bracket Base
2
1
Anti-Tip Bracket extension
3
2
M5 screw
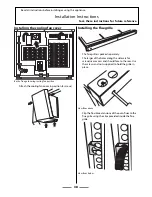
The range must be set to the correct height and
leveled before the anti-tip bracket is installed.
Floor Attachment
Key No’s 1 and 2 can be assembled as shown below
using Key No. 3.
Dimension ‘A’ should be set to give a clearance of
about ¼” (0.6 cm) above the center channel of the
range base.
The assembled bracket should be fi rmly secured
to the fl oor to give a minimum engagement of
2’’ (5 cm) in the center channel of the range base. If
the range is mounted on a protective sheet make
sure the bracket base is fi rmly attached to the fl oor
not just the sheet.
Wall Attachment
When fl oor attachment is impracticable and
provided that the anti-tip bracket base can be
securely fi xed to a solid wall or wall stud. Discard
Key No 2.
For both fl oor and wall attachment it is essential
to use the appropriate fi xing screws and to
ensure that the Anti-Tip Bracket is fi rmly
attached .

