background image

• The alarm is active when set. From normal time display, 
   press and release the ALARM button to deactivate or 
   activate the alarm. 

•  Alarm icon (bell) will show then active.

Activate | Deactivate Alarm

• When your alarm sounds, press the SNOOZE button to 
   silence alarm for 10 minutes. The alarm bell will flash.

• Press any button except SNOOZE to silence the alarm 
   for 24 hours.

Snooze

Sensor Reception & Search

•  If the signal is lost, your clock will display the LAST DATA 
    recorded from the sensor for 10 minutes. 
•  After that 10 minutes if the signal does not come back 
   dashes will show for outdoor temperature.
•  After 30 minutes, your clock will automatically search 
   for the sensor.
•  Hold the PLUS button for 3 seconds to manually search for 
    your outdoor sensor.
•  The sensor reception icon will flash while searching.
•  The icon will be solid when the sensor is connected.
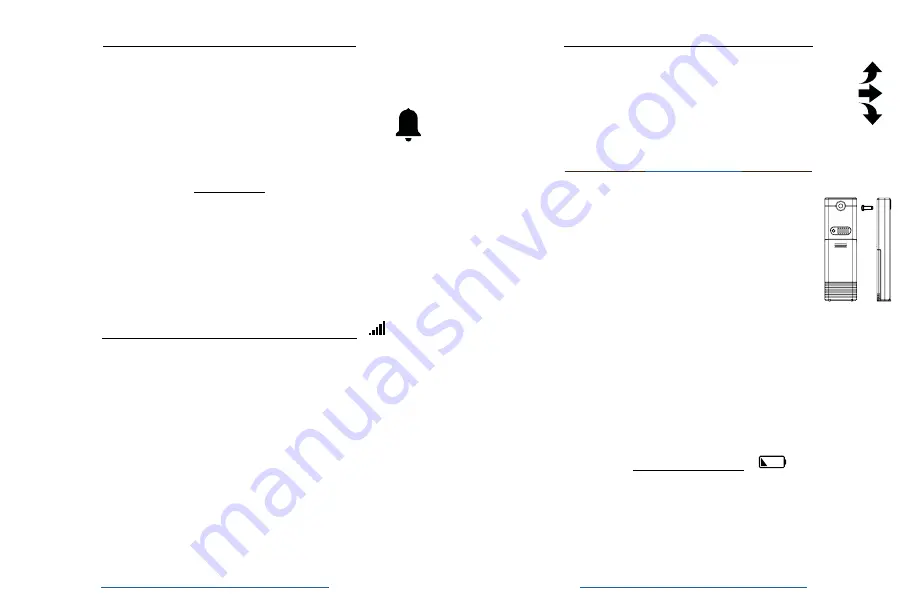
Position 

TX141-Bv3

 Sensor

• Mount your sensor with the hole at the top:   
   Either hang it from the back using a nail, or 
   insert one mounting screw through the front.
• Mount your sensor on a north-facing wall or 
   in any shaded area. Under an eave or deck 
   rail is preferred. 
• The maximum wireless transmission range 
   to your clock is over 330 feet (100 meters) 
   in open air, not including walls or floors.
• Be sure the sensor is mounted vertically, to 
   allow moisture to drain out properly.
• Watch sensor mounting video: 
   

http://bit.ly/TH_SensorMounting

•  The trend arrows indicate changes in your
    temperature (2°F, 1°C) over the past hour. 
•  They update every 15 minutes and compare 
    data from exactly one hour prior.

Temperature Trend Arrows

Low Battery

• When the low battery icon appears by the time, replace 
   the batteries in your clock.
• When the low battery icon appears by the outdoor 
   temperature, replace the batteries in your sensor.

Page | 7        

 www.lacrossetechnology.com/support 

       BBB86088v2

BBB86088v2    

 www.lacrossetechnology.com/support 

          Page | 8 

Summary of Contents for BBB86088v2

Page 1: ...Model BBB86088v2 Instruction Manual DC 102418 Atomic Digital Wall Clock with Indoor Outdoor Temperature ...

Page 2: ...nance Warranty and Support Specifications FCC Statement 2 3 4 5 5 6 6 7 7 7 8 8 8 9 9 9 10 11 AA AA AA AA 1 Insert 2 AA batteries into your sensor The red LED light will flash when your sensor transmits The TX button lets you manually transmit a signal LED TX Button 2 Insert 2 AA batteries into your clock 3 Configure basic settings 4 After 5 minutes place your sensor outside in a shaded location W...

Page 3: ...he F C button to confirm adjustments and move to the next item 4 Press the SNOOZE button at any time to exit Settings menu order Language English Español Francais Beep ON OFF Atomic ON OFF DST ON OFF Time Zone 12 24 Hour Format Hour Minutes Year Month Date Note When Español or Francais are selected the settings menu will continue in the language selected Language Beep ON OFF Atomic ON OFF DST ON O...

Page 4: ... for 3 seconds to manually search for the WWVB atomic time signal For information about WWVB visit http bit ly AtomicTime Daylight Saving Time DST Indicator The letters DST will show when your clock has received the atomic time signal and Daylight Saving Time is being observed Time Alarm 1 Hold the ALARM button 3 seconds to enter alarm mode 2 Press the or button to adjust the flashing values hold ...

Page 5: ...sensor is connected Position TX141 Bv3 Sensor Mount your sensor with the hole at the top Either hang it from the back using a nail or insert one mounting screw through the front Mount your sensor on a north facing wall or in any shaded area Under an eave or deck rail is preferred The maximum wireless transmission range to your clock is over 330 feet 100 meters in open air not including walls or fl...

Page 6: ...ted time warranty from date of purchase on this product relating to manufacturing defects in materials workmanship Before returning a product please contact our friendly customer support or visit our online help Phone 1 608 782 1610 Online www lacrossetechnology com support Warranty and Support BBB86088v2 www lacrossetechnology com support Page 10 Temperature Power Dimensions Indoor Range Outdoor ...

Page 7: ...connected Consult the dealer or an experienced radio TV technician for help This device must not be co located or operating in conjunction with any other antenna or transmitter Operation is subject to the following two conditions 1 This device may not cause harmful interference and 2 This device must accept any interference received including interference that may cause undesired operation Caution...

Reviews: