


1
03
04
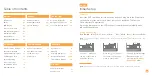
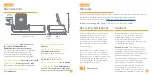
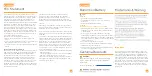
Buttons
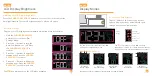
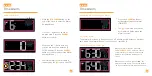
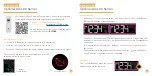
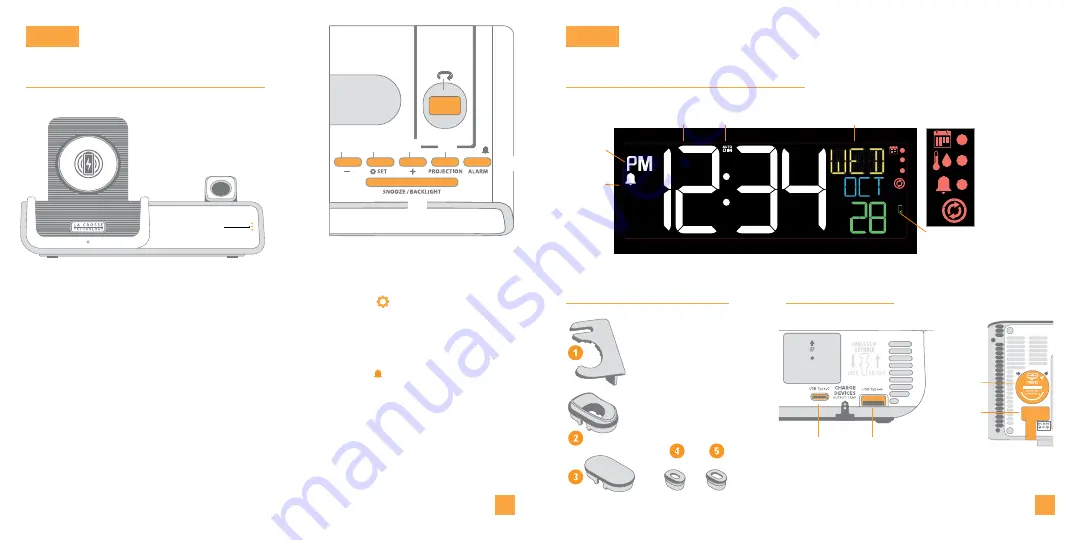
LCD Display
BASICS
BASICS
1. DISPLAY OPTION
4. PLUS +
7. SNOOZE/BACKLIGHT
2. MINUS -
5. PROJECTION
Tap to select LCD display
mode options
Scroll to rotate the projection
image (left or right)
Press to increase values,
hold to change values quickly
Press to activate/deactivate
alarm. Hold to enter alarm
settings
Press to adjust projection
intensity. Hold to change
projection mode*
Press to adjust backlight or
snooze a sounding alarm.
Hold for Auto-Dim Settings.
Hold to enter Settings
Menu
*An add-on sensor is required for additional projection options. See p.15 for details.
Press to decrease values,
hold to change values quickly
8. ROTATION WHEEL
3. SET
6. ALARM
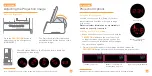
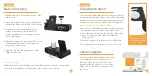
Accessories are stored in the bottom compartment of your clock. The Dock Cover is on the top.
AM/PM
Indicator
Alarm
Indicator
Time
Auto Dim
Indicator
Calendar
Display
Modes
Calendar
Temperature
Alarm
Auto-scroll
all modes
Low Battery
Indicator
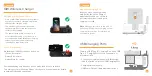
Accessories
Ports
Back View
Type C USB
Charging Port
Type A USB
Charging Port
Power
Jack
Bottom View
CR2032
Backup
Battery
Use,Organize & Store
1. Smart Watch Stand
2. Earbuds Dock
3. Dock Cover
4. Small Cable Fitting
5. Large Cable Fitting
Top View
2
3
5
6
7
8
4


