background image


Air pressure

histogram


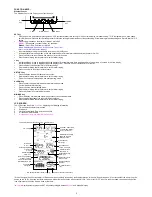
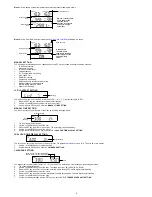
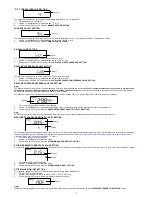
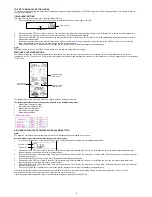
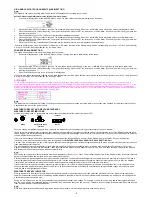
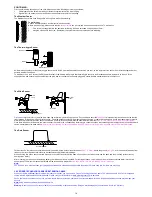
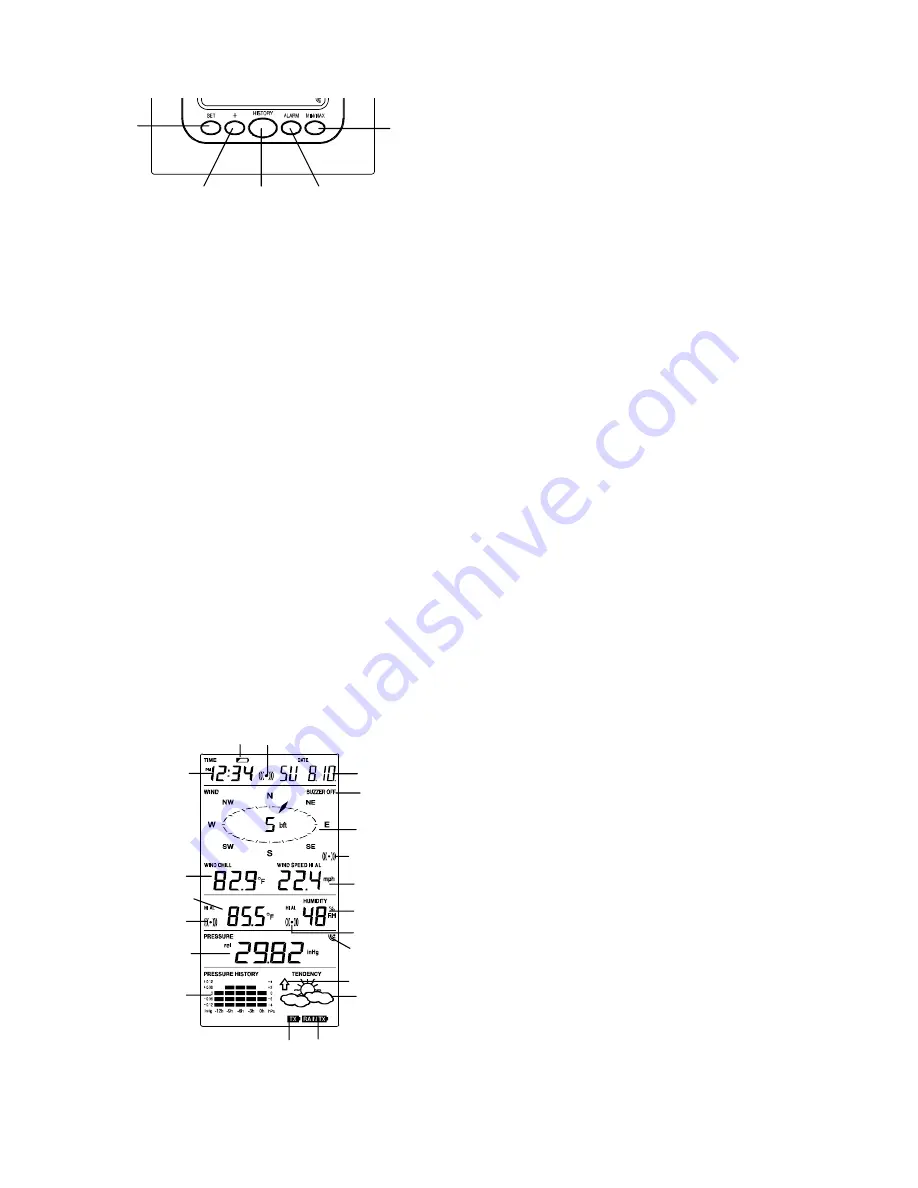
FUNCTION KEYS: 


Weather Center: 

The Weather Center has 5 easy-to-use function keys. 


SET key 


Press and hold to enter manual setting modes: LCD contrast, Manual time setting, 12/24 hour time display, Calendar setting, ºF/ ºC temperature unit, Wind speed 
unit, Rainfall unit, Pressure unit, Relative pressure reference setting, Weather tendency threshold setting, Storm warning threshold setting and Storm Alarm On/ Off 
setting 


Press to toggle between the display of Mode 1 or Mode 2: 

Mode 1:


"Wind speed + outdoor temp + rel. pressure" 

Mode 2:

 "Gust + Dew Point temp + rainfall" 

(Mode 2 displayed will be shown for 30 seconds. Then it will 

         return to normal display automatically.) 


In normal display mode, press and hold to switch on/ off the Buzzer 


In the weather alarm setting mode, press and hold to adjust different alarm value and switch the alarm On/ Off 


Press to activate the reset mode when max or min record is shown 


Stop the alarm during the time alarm or weather alarm ringing 


+ key


In display Mode 1, press to toggle between the display of Preset alarm time, date, w date, Indoor temp, or second in the time display 


In display mode 2, press to toggle between the display of Rel. Pressure, 24 hour rainfall and Total rainfall 


Press to adjust (increase) the level of different settings 


Stop the alarm during the time alarm or weather alarm ringing 


Press to confirm to reset the max/min record 


HISTORY key


Press to display the weather data history records 


Stop the alarm during the time alarm or weather alarm ringing 


Press to exit manual setting mode and alarm setting mode 


ALARM key 


Press to enter the time alarm and weather alarm setting mode 


Confirm particular alarm setting 


Press to exit the manual setting mode 


Stop the alarm during the time alarm or weather alarm ringing 


Press to exit max/ min record display mode 


MIN/MAX key 


Press to display minimum and maximum records of various weather data 


Press to adjust (decrease) the level of different settings 


Stop the alarm during the time alarm or weather alarm ringing 


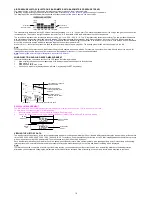
LCD SCREEN 

The LCD screen is split into 

5 sections 

displaying the following information: 

1. 

Time and date/ indoor temp/ second 

2. Wind 

data 

3. 

Outdoor temperature, Dew point and humidity, 

4. 

Air pressure, Rainfall data,  

5. 

Air pressure history and Weather forecast icon. 


* When the signal from the transmitter/ or Rain sensor is successfully received by the Weather Station, this icon will be switched on. (If not successful, the icon will not be 
shown on the LCD).  User can therefore easily see whether the last reception was successful (“ON” icon) or not (“OFF” icon). On the other hand, the short blinking of the 
icon shows that a reception is being done at that time. 
 
*In

 normal 

display user may press the SET key shortly to toggle between 

Mode 1 

and Mode 2 display: 


MIN/MAX 
key 

SET 
key 

+ key 

HISTORY key 

ALARM key 

Outdoor temperature 

or dew point 

in °F or ºC

Wind direction display 
and wind speed in 
Beaufort scale 

Calendar, indoor temp., 
or alarm time display

Weather tendency
indicator


Time display

Time alarm icon 

Outdoor relative 
humidity in % 

Weather forecast
icon

Relative air pressure 

display in inHg or 

hPa, or total and 24h 

rainfall display in inch 

Wind speed or 
gust in mph, km/h

Wind Chill 

in °F or °C

Wind speed Hi 
alarm icon

Outdoor Humidity 
alarm icon 

Outdoor temp. 

alarm icon

Low battery Indicator (rain sensor) 

Low battery Indicator (Thermo-hygro) 

Buzzer off indicator 

Transmitter signal 
reception icon 

Low battery Indicator (weather center) 

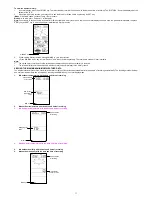
Summary of Contents for WS-1510-IT

Page 1: ...arm setting 6 Weather alarm operations 7 Hysteresis 9 Weather forecast and weather tendency 9 Wind direction and wind speed measurement 10 Rainfall measurement 10 Viewing history data 10 Viewing the min max weather data 11 Switch On Off buzzer 13 Outdoor transmission 915 MHz reception 13 Positioning 14 Care and Maintenance 15 Specification 15 Warranty Info 15 FAQ 16 ...

Page 2: ...ng Low High outdoor temperature and humidity alarm Relative air pressure displayed in inHg or hPa Air pressure tendency indicator for the past 12 hours bar graph format LCD contrast selectable Low battery indicator Wind direction displayed in 16 steps Wind speed and gust displayed in mph km h or m s and Beaufort scale Wind chill displayed in F of C High alarm function for wind speed Manual reset o...

Page 3: ...ow Once the batteries are installed all segments of the LCD will light up briefly and a short signal tone will be heard It will then display the time as 12 00 the date as 1 1 05 the weather icons and air pressure value will be shown for outdoor data 4 Afterwards the Weather Center will start receiving data from the transmitter The transmission reception icon will be blinking to indicate that the s...

Page 4: ...ver 3 Insert the batteries observing the correct polarity see the marking in the battery compartment 4 Replace the battery cover Note In the event of changing batteries in any of the units all units need to be reset by following the setting up procedures This is because a random security code is assigned by the thermo hygro sensor at start up and this code must be received and stored by the Weathe...

Page 5: ...ther alarm setting mode Confirm particular alarm setting Press to exit the manual setting mode Stop the alarm during the time alarm or weather alarm ringing Press to exit max min record display mode MIN MAX key Press to display minimum and maximum records of various weather data Press to adjust decrease the level of different settings Stop the alarm during the time alarm or weather alarm ringing L...

Page 6: ...rt flashing 4 Use the or MIN MAX key to set the minute 5 Confirm the time with the SET key and enter the 12 24 HOUR TIME DISPLAY SETTING 12 24 HOUR TIME DISPLAY SETTING The time can be set to view as 12 hour or 24 hour format The default time display mode is 12 h To set to 24 h time display 1 Use the or MIN MAX key to toggle the value 2 Confirm with the SET key and enter the CALENDAR SETTING CALEN...

Page 7: ...e pressure value will start flashing 2 Use the or MIN MAX key to increase or decrease the value Continually holding the key will allow the value to increase faster 3 Confirm with the SET key and enter the WEATHER TENDENCY SENSITIVITY VALUE SETTING Note This feature is useful for those who live at elevations above sea level but want their air pressure display to be based on sea level elevation WEAT...

Page 8: ... temperature alarm Low outdoor temperature alarm High outdoor humidity alarm Low outdoor humidity alarm High wind speed alarm Default alarm values Low 32 F Temperature High 104 F Low 45 Relative Humidity High 70 Wind speed High 62 0mph HIGH AND LOW OUTDOOR TEMPERATURE ALARM SETTING Note The High and Low outdoor temperature alarm can be set On Off independently according to your needs Set the Outdo...

Page 9: ...CONS Weather forecasting icons are displayed in any of the following combinations at the right bottom part of LCD For every sudden or significant change in the air pressure the weather icons will update accordingly to represent the change in weather Every time a new average pressure value has been obtained once per minute this value is compared with an internal reference value If the difference be...

Page 10: ...the LCD shows the following wind data Wind direction shown on the a compass scale of 16 divisions and wind speed gust in Beaufort scale Wind chill in F or C Wind Speed in km h mph or m s Gust in km h mph or m s displayed when in Mode 2 by pressing the SET key shortly RAINFALL MEASUREMENT The total rainfall and 24 hour rainfall measurement is displayed in the fourth section of the LCD in the unit o...

Page 11: ...red history records will not be retained after battery change or whenever battery is removed The total rainfall value will be exhibited in whole number no decimal place in the history record VIEWING THE MAXIMUM MINIMUM WEATHER DATA The weather station will record the maximum and minimum value of the various weather data with time and date of recording automatically The following stored maximum and...

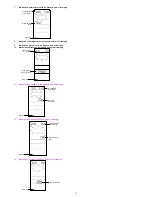
Page 12: ...f recording 11 Maximum wind speed with the date and time of recording 12 Maximum Gust with the date and time of recording 13 Max 24 hour rainfall with the date and time of recording MIN icon MIN wind chill value Time and date of recording MAX icon MAX relative pressure value Time and date or recording MAX icon MAX wind speed value Time and date of recording MAX icon MAX wind gust value Time and da...

Page 13: ...vely when the battery power is low It is recommended to replace the batteries in all units on an annual basis to ensure optimum accuracy of the system Note After battery change both the Weather Station and the transmitters need to be reset see note Setting up The History data record will be clear after the battery change OUTDOOR TRANSMITTER 915 MHz RECEPTION CHECK The outdoor temperature humidity ...

Page 14: ...e the wind sensor is fixed onto the mast connect the cable to the corresponding thermo hygro sensor socket so that operating power supply can be received and data can be transmitted to the base station Secure cord from blowing Do not use staples Using PVC pipe or metal as a mast may cause static Wood is recommended The Rain Sensor For best results the rain sensor should be securely mounted onto a ...

Page 15: ...ngs and any consequences that occur should an inaccurate reading take place This product is designed for use in the home only as indication of the temperature This product is not to be used for medical purposes or for public information The specifications of this product may change without prior notice This product is not a toy Keep out of the reach of children No part of this manual may be reprod...

Page 16: ...few general guidelines to remember when installing your sensors Place the Wind sensor as high as you can install it In most cases 4 6 ft above the peak of your roof or more is required for accurate readings Avoid tall trees or other obstructions that may block or reflect the wind Be sure to observe the Directions listed on the sensor The point of the vane will tell you where the wind is coming fro...

Page 17: ...tton Indoor Temperature is an optional display in the upper right hand corner In normal display mode press the PLUS button to toggle between Indoor Temperature Seconds counting Alarm Time or the Date in two different formats Indoor Temperature Displays as dashes or is missing Batteries Be sure you have good alkaline batteries for the base station This is almost always a power issue Indoor Temperat...

Page 18: ... indicate the directional changes during that same period Direction is fine but there is no Wind speed Check that the cups are there and spinning freely Please follow the Proper Restart listed above Minimum and Maximum Records The Weather Center will record the Minimum and Maximum value of Outdoor Temperature Dew Point Wind Chill and Relative Air Pressure with Time and Date of recording automatica...

Page 19: ...be 75 accurate The weather forecast is based solely upon the change of air pressure over time creating a necessity to disregard all weather forecasting for about 24 hours after the unit has been set up reset or moved from one altitude to another i e from one floor of a building to another floor In areas where the weather is not affected by the change of air pressure this feature will be less accur...

Reviews: