13
around the sensor unhindered from all directions (ideal mast size
should be from Ø0.63” – Ø1.3”).
Once the wind sensor is fixed onto the mast, connect the cable to the
corresponding thermo-hygro sensor socket so that operating power
supply can be received and data can be transmitted to the base
station.
Mounting with nylon straps
1. Unlock the mounting bracket from the remote wind speed sensor
leaving the wire going through the bracket.
2. Place two nylon straps through the slots on the mounting bracket.
3. Place the remote wind speed sensor in your desired location.
4. Fasten the two nylon straps securely around the mounting loca-
tion.
5. Slide the remote wind speed sensor onto the bracket making
sure to lock it in place.
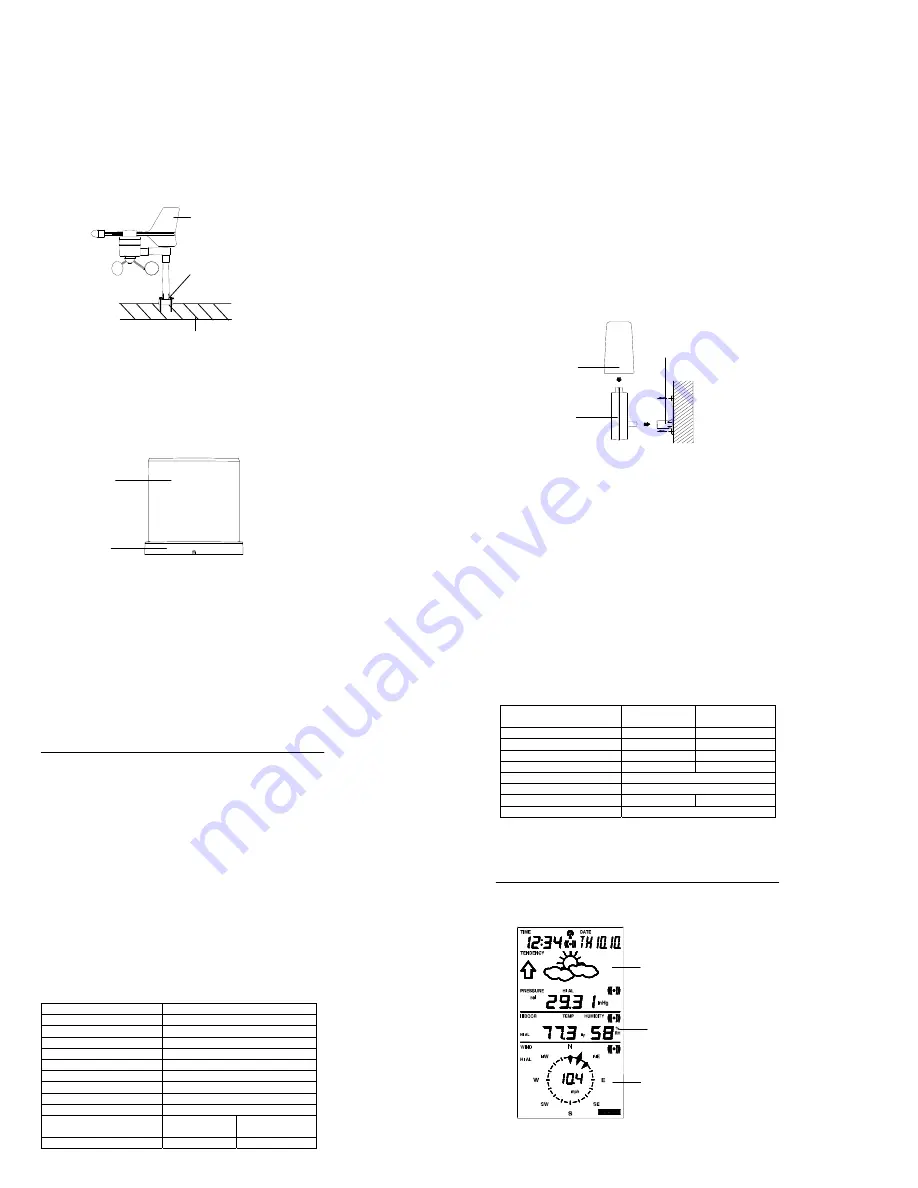
Mounting the Rain Sensor
Base portion
Funnel portion
Horizontal panel
Wind
vane
Fixed with
screw
14
For accurate results, the rain sensor should be securely mounted
onto a horizontal surface about 2-3ft above the ground and in an
open area away from trees or other coverings where rainfall may be
reduced causing inaccurate readings.
When securing into place, check that rain excess will not collect and
store at the base of the unit but can flow out between the base and
the mounting surface (test by pouring clean water).
After mounting the rain sensor, connect the cable to the thermo-hygro
sensor at the corresponding socket so power supply can be received
and data be transmitted to the base station
The rain sensor is now operable. For testing purposes, very slowly
pour a small amount of clean water into the rain sensor funnel. The
water will act as rainfall and will be received and displayed at the
base station after about 2 minutes delay i.e. when the reading interval
is reached (to clear this testing data on the base station, refer to the
section “
MIN/MAX Mode
” below).
Mounting the thermo-hygro Sensor
An ideal mounting place for the thermo-hygro sensor would be the
outer wall beneath the extension of a roof, as this will protect the
sensor from direct sunlight and other extreme weather conditions.
To wall mount, use the 2 screws to affix the wall bracket to the
desired wall, plug in the thermo-hygro sensor to the bracket and
secure both parts by the use of the supplied screw and ensure that
the cables from the wind and rain sensors are correctly plugged in
otherwise data transmission errors could occur.
Rain
Cover
Wall Bracket
Main Unit
15
NOTE: For best 433 MHz reception mount the thermo-hygro
sensor on an outside wall near the location of the base station.
10.
Resetting & factory settings
As previously mentioned, in the event of a power reset to the sensor
(for example a change of batteries), the base station has to
synchronize to the sensor again otherwise no weather data will be
received. To do this, simply press and hold the PLUS (+) key for 2
seconds and a short beep will sound to synchronize the base station
to the sensor. When the units are synchronized, the data will be
received again and the base station will return to normal operation
mode.
Do not remove batteries or unplug the AC adaptor of the base station
otherwise all 175 sets of recorded weather history data for
transferring to the PC will be lost (for full details of PC use, please see
PC user manual in the enclosed Heavy Weather CD-ROM).
However if you wish to make a full reset of the base station and return
to the original factory settings, simultaneously press and hold the
PRESSURE and WIND keys for about 5 seconds. The base station
will beep once and the entire LCD will light up for 5 seconds and go
back to the original factory settings. This process with clear all
previous user defined values and all weather history recordings.
Factory default settings:
The following table shows the factory default values of the weather
station:
Matter: Default
Setting:
Time 12:00
am
Date 01.01.2001
Time zone
-5 ET
Alarm time
12:00 am
Relative air pressure
29.91 inHg
Weather-picture threshold
0.09 inHg
LCD contrast level
5 (1-8 levels)
Rainfall per impulse
0.0204 inches
Storm alarm
0.09 inHg
Relative air pressure
alarm
28.34 inHg
(low)
30.71 inHg
(high)
Indoor temperature alarm
50ºF (low)
86ºF (high)
16
Outdoor temperature
alarm
32ºF (low)
104ºF (high)
Indoor humidity alarm
35%RH (low)
65%RH (high)
Outdoor humidity alarm
45%RH (low)
70%RH (high)
Wind chill alarm
50ºF (low)
86ºF (high)
Dew point alarm
32ºF (low)
68ºF (high)
Rainfall 24h alarm
1.96 inches
Rainfall 1h alarm
0.03 inches
Wind Speed
1.0 mph (low)
62 mph (high)
Wind direction alarm
None set
Note:
All alarm default values are deactivated at the start up and any alarm
must be activated by the user otherwise it will not sound.
11.
Function Description of the Weather Station
After setting up, the following data will be displayed in different
sections on the LCD. If this is not the case please observe the notes
on “
Interferences
” below.
LCD Section 1:
Time, date, seconds, time zone,
weather forecasting icons with
tendency arrows, air pressure,
and respective alarms sections
LCD Section 2
:
Indoor and outdoor temperature
and relative humidity, wind chill,
dew point, rainfall, and respec-
tive alarms sections
LCD Section 3:
Wind direction, wind speed, and
respective alarms sections


