


FEATURES & OPERATIONS
I) CHANGING DISPLAY MODE (DAY, SECONDS, AND TEMPERATURE)
There are three possible display modes to view the day, seconds, and temperature. The
month & date/ weekday/ indoor temperature is the
default.
To change the display:
1) Press and release the “+” button. The display should now show the
month & date/ weekday/ seconds.
2) Press and release the “+” button a second time and the display will now show the
month & date/ seconds/ indoor temperature.
3) Press and release the “+” button a third time and the display will return to the normal display.
II) INDOOR TEMPERATURE
The Indoor Temperature appears on the right side of the Date LCD. The temperature is checked every 10 seconds, and updated whenever
there is a change.
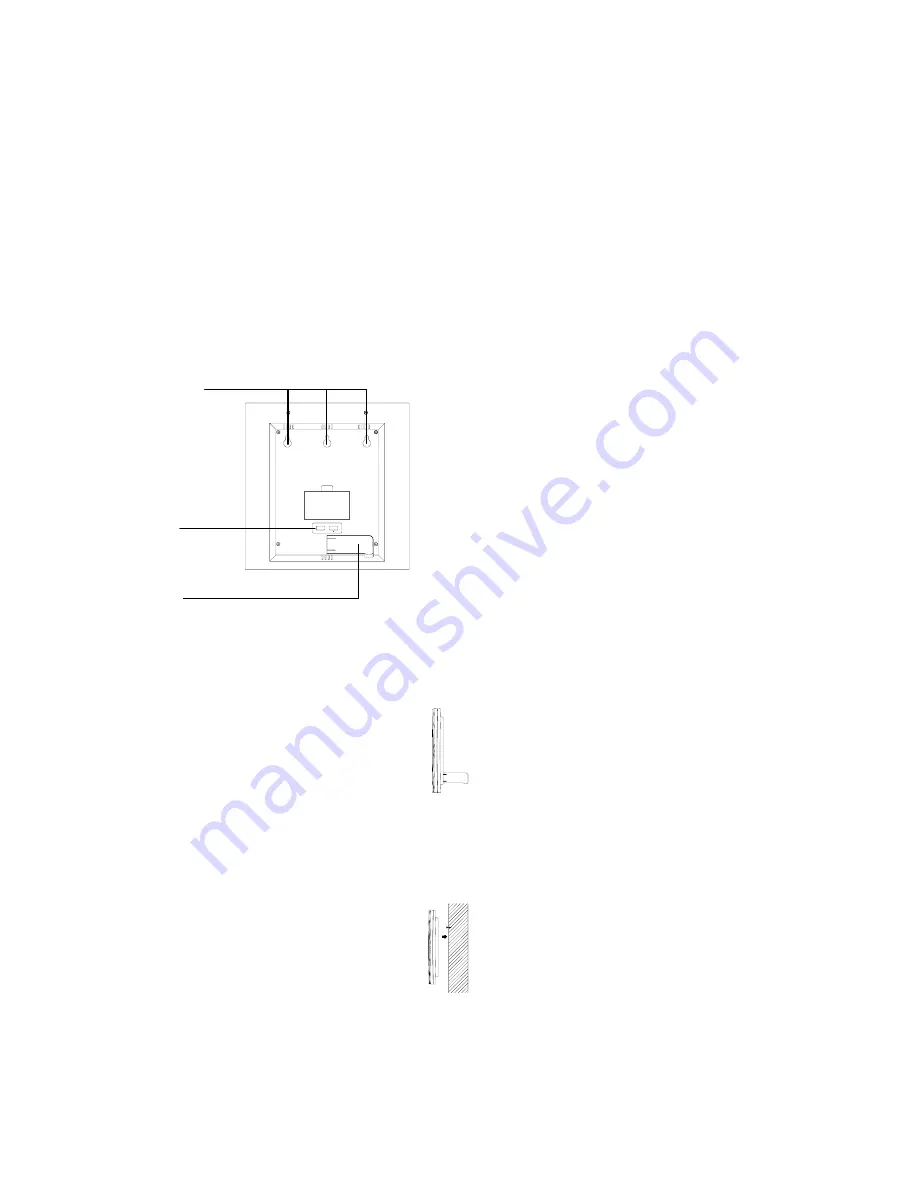
MOUNTING
There are two possible ways to mount the atomic clock:
•
use of the foldout table stands, or
SET
Function Buttons
Foldout Table Stands
Hanging Holes
•
wall mounting.
I) FOLDOUT TABLE STAND
The foldout table stand leg is located on the backside, directly
below the battery cover and function buttons. The hinge is
towards the center of the atomic clock, and the end (with no
hinge) needs to be folded in towards the center. Once the
foldout table stand is extended, place the atomic clock in an appropriate location.
II) WALL MOUNTING
1) Using a straightedge, horizontally space at 3-15/16 of an
inch (100.58mm) three screw positions on a wall.
2) Install three mounting screws (not included) into a wall
within transmission range—leaving approximately 3/16
of an inch (5mm) extended from the wall.
3)
Place the Atomic Clock onto the screws, using the
hanging holes on the backside. Gently pull the Atomic
Clock down to lock the screws into place.
5


