background image


35

signal is not received, relocate the units or move them slightly as this may help the signal reception. 
 
CARE AND MAINTENANCE:  


Extreme temperatures, vibration and shock should be avoided as these may cause damage to the 
unit and give inaccurate forecasts and readings. 


When cleaning the display and casings, use a soft damp cloth only. Do not use solvents or 
scouring agents as they may mark the LCD and casings. 


Do not submerge the unit in water. 


Immediately remove all low powered batteries to avoid leakage and damage. Replace only with 
new batteries of the recommended type. 


Do not make any repair attempts to the unit. Return them to their original point of purchase for 
repair by a qualified engineer. Opening and tampering with the unit may invalidate their 
guarantee. 


Do not expose the units to extreme and sudden temperature changes, this may lead to rapid 
changes in forecasts and readings and thereby reduce their accuracy. 

 
SPECIFICATIONS 


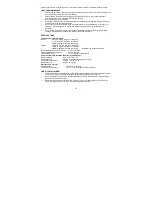
Temperature measuring range: 
Indoor 

-9.9ºC to +59.9ºC with 0.1ºC resolution  


14.2ºF to 139.8ºF with 0.2ºF resolution 


(“OF.L” displayed if outside this range) 

Outdoor 

-39.9ºC to +59.9ºC with 0.1ºC resolution  


-39.8ºF to +139.8ºF with 0.2ºF resolution 


(“OF.L” displayed if outside this range, “--.-“ displayed if no transmitter signal) 

Indoor temperature checking interval  :   every 16 seconds                                                                                                                             
Outdoor temperature reception 

:   every 4 seconds  

Transmission range 


:    up to 100 meters (open space) 

Power consumption (Alkaline batteries recommended): 
Weather station 

: 2 x C, IEC, LR14, 1.5V 

Battery life cycle   

: Approx. 12 months (depending on usage) 

Temperature transmitter 

: 2 x AAA, IEC, LR3, 1.5V 

Battery life cycle 


: Approx. 12 months  

Dimensions (L x W x H) 
Weather station 


153.6 x 35 x 142.5 mm 

Temperature transmitter  

36 x 16 x 102.6 mm (wall bracket excluded) 

  
LIABILITY DISCLAIMER: 


The electrical and electronic wastes contain hazardous substances. Disposal of electronic waste 
in wild country and/or in unauthorized grounds strongly damages the environment. 


Please contact your local and/or regional authorities to retrieve the addresses of legal dumping 
grounds with selective collection. 


All electronic instruments must from now on be recycled.  User shall take an active part in the 
reuse, recycling and recovery of the electrical and electronic waste. 

Summary of Contents for WS9251

Page 1: ...URES The weather station DCF radio controlled time with manual setting option Time reception ON OFF user selectable Time zone setting 2 to 5 hours 24 hour time display seconds displayed by pressing th...

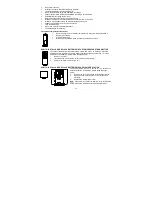
Page 2: ...nting case Mounting at a sheltered place Avoid direct rain and sunshine HOW TO INSTALL AND REPLACE BATTERIES IN THE TEMPERATURE TRANSMITTER The outdoor temperature transmitter uses 2 x AAA IEC LR3 1 5...

Page 3: ...the outdoor data reception test period is completed the DCF tower icon in the clock display will start flashing in the upper left corner This indicates that the clock has detected that there is a rad...

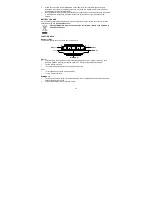
Page 4: ...See Specifications below Please participate in the preservation of the environment Return used batteries to an authorized depot FUNCTION KEYS Weather station The weather station has five easy to use...

Page 5: ...current readings To stop the alarm sound ALARM key To activate deactivate the alarm and display alarm time Press and hold for 2 seconds to enter the alarm setting mode To stop the alarm sound To exit...

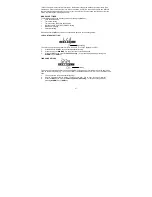
Page 6: ...he setting mode LCD CONTRAST SETTING The LCD contrast can be set within 8 levels from LCD 0 to LCD 7 Default is LCD 3 1 Press and hold the SET key until the digit starts flashing 2 Press the key or MI...

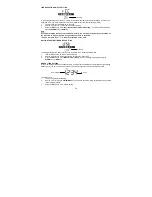
Page 7: ...ill not be displayed on the LCD DAYLIGHT SAVING TIME ON OFF SETTING The daylight saving time DST function can be set ON OFF Default setting is ON 1 ON will flash on the LCD with dSt displayed 2 Use th...

Page 8: ...e key to increase or MIN MAX key to decrease the value The range runs from 2011 to 2025 default is 2011 3 Press the SET key to enter the month setting mode 4 The month digit will be flashing Use the k...

Page 9: ...et time will be displayed in a few seconds 7 Press the SUN key twice to go back to normal date display ALARM SETTING To set the daily alarm 1 Press and hold ALARM key for 2 seconds until the alarm tim...

Page 10: ...constant altitude and therefore result in a more accurate forecast Common to weather forecasting absolute accuracy cannot be guaranteed The weather forecasting feature is estimated to have an accurac...

Page 11: ...each change 1 3 5 represents how high or low in hPa the past pressure was compared to the current pressure If the bars are rising it means that the weather is getting better due to the increase of ai...

Page 12: ...indicator will show on the LCD when the batteries of weather station or transmitter require changing TEMPERATURE TRANSMITTER The reception distance of the temperature transmitter may be affected by t...

Page 13: ...detachable stand that gives the option of table standing or wall mounting Before wall mounting please check that the outdoor data can be received from the desired locations To wall mount 1 Fix a scre...

Page 14: ...F to 139 8 F with 0 2 F resolution OF L displayed if outside this range Outdoor 39 9 C to 59 9 C with 0 1 C resolution 39 8 F to 139 8 F with 0 2 F resolution OF L displayed if outside this range dis...

Page 15: ...hat occur should an inaccurate reading take place This product is designed for use in the home only as indication of the temperature This product is not to be used for medical purposes or for public i...

Reviews: