background image


24

problems may occur. In the event of changing batteries in any of the units, all units need to be reset by 
following the setting up procedures. 


SETTING UP 


Note: This weather station receives only one outdoor transmitter.   


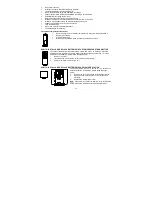
1. 

First, insert the batteries in the transmitter (see “How to install and replace batteries in the 
temperature transmitter
 above). 

2. 

Within 30 seconds of powering up the transmitter, insert batteries in the weather station (see 
How to install and replace batteries in the weather station above). Once the batteries are in 
place, all segments of the LCD will light up briefly and a short signal tone will sound. Then the 
indoor temperature and the time as 0:00 will be displayed. If these information are not displayed 
on the LCD after 60 seconds, remove the batteries and wait for at least 60 seconds before 
reinserting them. Once the indoor data is displayed user may proceed to the next step. 

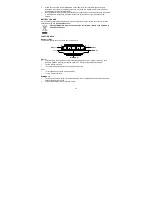
3. 

After the batteries are inserted, the weather station will start receiving data signal from the 
transmitter. The outdoor temperature should then be displayed on the weather station. If this does 
not happen after 60 seconds, the batteries will need to be removed from both units and reset from 
step 1. 

4. 

In order to ensure successful 868 MHz transmission, the distance between the weather station 
and the transmitter should be within 100 meters (see notes on “Positioning” and “868 MHz 
Reception
”). 

5. 

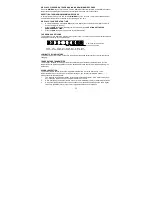
Once the outdoor data reception test period is completed, the DCF tower icon in the clock display 
will start flashing in the upper left corner. This indicates that the clock has detected that there is a 
radio signal present and is trying to receive it. When the time code is received, the DCF tower 
becomes permanently lit and the time will be displayed. 


DCF RADIO CONTROLLED TIME 
The time base for the radio controlled time is a Cesium Atomic Clock operated by the Physikalisch 
Technische Bundesanstalt Braunschweig which has a time deviation of less than one second in one 
million years. The time is coded and transmitted from Mainflingen near Frankfurt via frequency signal 
DCF-77 (77.5 kHz) and has a transmitting range of approximately 1,500 km. Your radio-controlled 
weather station receives this signal and converts it to show the precise time in summer or wintertime. 
The quality of the reception depends greatly on the geographic location. In normal cases, there should 
be no reception problems within a 1,500km radius of Frankfurt.  


DCF reception is done twice daily at 02:00 and 03:00 am. If the reception is not successful at 03:00 am, 
then the next reception takes place the next hour and so on until 06:00am, or until the reception is 
successful. If the reception is not successful at 06:00 am, then the next attempt will take place the next 
day at 02:00 am. 


If the tower icon flashes, but does not set the time or the DCF tower does not appear at all, then please 
take note of the following: 


Recommended distance to any interfering sources like computer monitors or TV sets is a 
minimum of 1.5 - 2 meters. 

Summary of Contents for WS9251

Page 1: ...URES The weather station DCF radio controlled time with manual setting option Time reception ON OFF user selectable Time zone setting 2 to 5 hours 24 hour time display seconds displayed by pressing th...

Page 2: ...nting case Mounting at a sheltered place Avoid direct rain and sunshine HOW TO INSTALL AND REPLACE BATTERIES IN THE TEMPERATURE TRANSMITTER The outdoor temperature transmitter uses 2 x AAA IEC LR3 1 5...

Page 3: ...the outdoor data reception test period is completed the DCF tower icon in the clock display will start flashing in the upper left corner This indicates that the clock has detected that there is a rad...

Page 4: ...See Specifications below Please participate in the preservation of the environment Return used batteries to an authorized depot FUNCTION KEYS Weather station The weather station has five easy to use...

Page 5: ...current readings To stop the alarm sound ALARM key To activate deactivate the alarm and display alarm time Press and hold for 2 seconds to enter the alarm setting mode To stop the alarm sound To exit...

Page 6: ...he setting mode LCD CONTRAST SETTING The LCD contrast can be set within 8 levels from LCD 0 to LCD 7 Default is LCD 3 1 Press and hold the SET key until the digit starts flashing 2 Press the key or MI...

Page 7: ...ill not be displayed on the LCD DAYLIGHT SAVING TIME ON OFF SETTING The daylight saving time DST function can be set ON OFF Default setting is ON 1 ON will flash on the LCD with dSt displayed 2 Use th...

Page 8: ...e key to increase or MIN MAX key to decrease the value The range runs from 2011 to 2025 default is 2011 3 Press the SET key to enter the month setting mode 4 The month digit will be flashing Use the k...

Page 9: ...et time will be displayed in a few seconds 7 Press the SUN key twice to go back to normal date display ALARM SETTING To set the daily alarm 1 Press and hold ALARM key for 2 seconds until the alarm tim...

Page 10: ...constant altitude and therefore result in a more accurate forecast Common to weather forecasting absolute accuracy cannot be guaranteed The weather forecasting feature is estimated to have an accurac...

Page 11: ...each change 1 3 5 represents how high or low in hPa the past pressure was compared to the current pressure If the bars are rising it means that the weather is getting better due to the increase of ai...

Page 12: ...indicator will show on the LCD when the batteries of weather station or transmitter require changing TEMPERATURE TRANSMITTER The reception distance of the temperature transmitter may be affected by t...

Page 13: ...detachable stand that gives the option of table standing or wall mounting Before wall mounting please check that the outdoor data can be received from the desired locations To wall mount 1 Fix a scre...

Page 14: ...F to 139 8 F with 0 2 F resolution OF L displayed if outside this range Outdoor 39 9 C to 59 9 C with 0 1 C resolution 39 8 F to 139 8 F with 0 2 F resolution OF L displayed if outside this range dis...

Page 15: ...hat occur should an inaccurate reading take place This product is designed for use in the home only as indication of the temperature This product is not to be used for medical purposes or for public i...

Reviews: