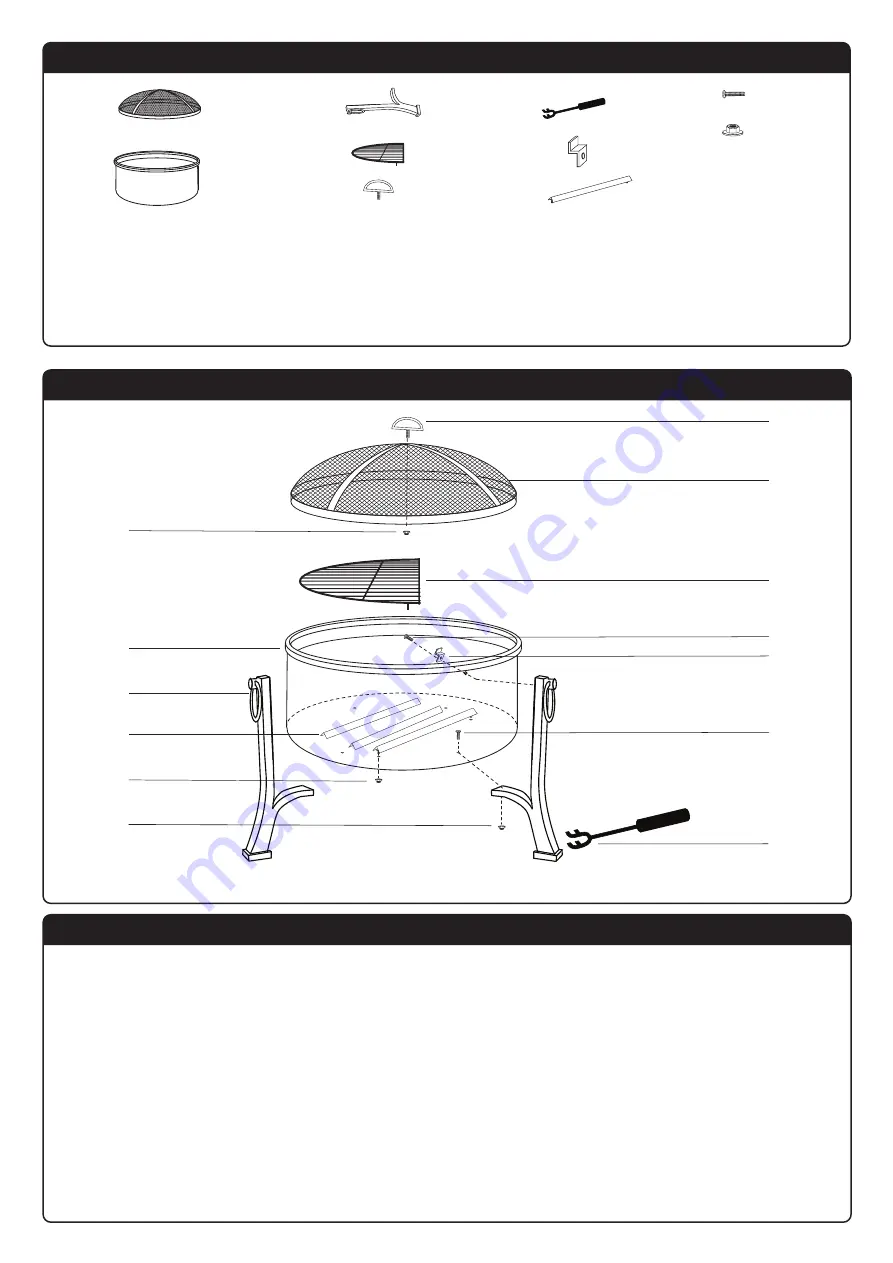
Parts list
4
1 (1x)
4 (1x)
7 (4x)
8 (3x)
6 (1x)
5 (1x)
5
1
4
WARNING! - DO NOT over tighten bolts; only tighten with moderate pressure to avoid damaging the bolts or
components of the product.
Assembly Instructions
IMPORTANT! - Remove any packaging before use but retain the safety instructions and store them with
this product.
ASSEMBLY-
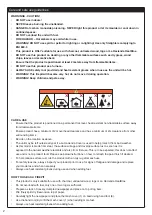
STEP 1 – Attach 3 x ash ridges (8) to the base of the firebowl (2) and secure using 2x nuts (B).
STEP 2 – Attach 4 x legs (3) to the bowl (2) using 1 x bolt (A) at the top of the leg insuring that the
support bars (7) is secured on the inside of the bowl.
STEP 3 – Fix the lower part of each leg (3) to the base of the bowl (2) using 1x bolt (A) and 1x.nut (B).
STEP 4 – Attach lid handle (5) to the mesh lid (1) using 1 x nut (B).
STEP 5 – Place cooking grill (4) onto the support bars (7) ensuring the grill pegs are located behind the
support bars, preventing the grill from sliding. Place mesh lid (1) onto support bars.
Prior to Assembly: Read the instructions carefully. Check all parts against the parts list.
Carry out assembly on a soft surface to avoid scratching the paint. Please retain this information for future reference.
For ease of assembly only loosely tighten bolts and then tighten fully when assembly is complete.
Assembly diagram
B
B
B
2 (1x)
3 (4x)
A (8x)
B (11x)
A
6
7
A
3
8
2


