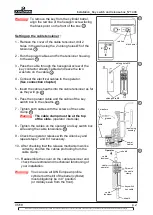
Attaching the key switch and release box :
1
-
Unscrew the front of the box, remove the cap
and the watertight seal.
2
-
Turn the key approx. 45° to the right or left
and unscrew the approx. 15 mm hexagon screw
with the 5 mm Allen key supplied with the box.
3
-
Take off the lid.
4
-
Remove the support with the micro
-
switches
and drill the 2 housing fastening holes.
5
-
Drill the 2 cable ducts (Ø12
-
14) and fix the housing to
the wall with the water evacuation hole downwards.
6
-
Reassemble the support with the cabled micro
-
switches in the housing, connect the cable to the
earth socket and push the cables neatly into the
housing.
(
See connection chapter)
7
-
Attach the earth cable to the cover and bypass
the micro
-
switches.
8
-
Reassemble the cover by turning the wrench by 45°
to right or left, screw in the hexagon screw with
an Allen key, replace the watertight seal and the
cover and screw the front of the box back on.
-
Check the mechanical functions of the key switch
box.
N°1400
This document is the exclusive property of FTFM La Toulousaine and must on no account be copied. The document may be modified at any time in accordance with product changes.
1
2
1
1
(Document reserved for installers)
Wall
-
mounted/built
-
in
key switch and release box
Attaching the key switch box and cable tensioner
1
Joint
Allen key
Hexagon screw
cable
ducts
2
fastening holes
evacuation hole
Installation manual
Cap
05/18
2


