Labconco Glassware Washer Service/Technical Manual
34
______________
Verify that the Water Temp to the unit from the start is 120
º
F or GREATER for
every fill.
______________
To service the Drain System, Remove the front Toe Kick Panel & Side Panel.
CHECK VALVE & PUMP
If the unit is a 230V Read the following (IF NOT Go to Valve & Pump
Diagnostic)
Check the actual line voltage to the unit.
•
If the line voltage is less than 207 VAC the drain valve will need to be
observed for proper actuation.
1.
Go to diagnostics (described below) and select the “Drain” test.
2.
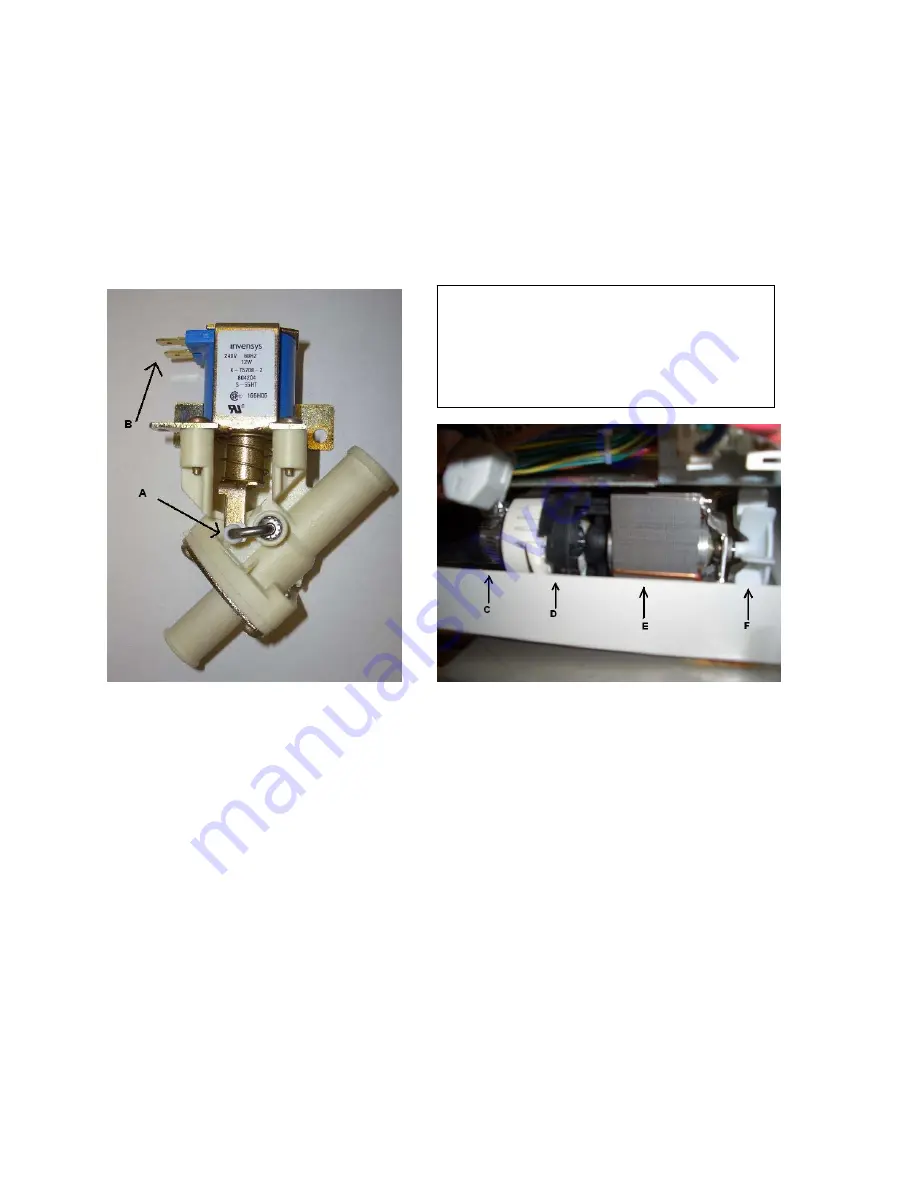
Listen for audible click/pop of valve [Fig. 7], (If you do not
hear this click do the following and then go to Step 11-13 of
“Valve & Pump Diagnostic” [below] for further testing and
replacement instructions).
3.
Turn off and On the “Drain” test and watch the actuation lever on
the valve.
Valve & Pump Diagnostic
1.
Go to the Diagnostic Menu as described in
Section I
of this manual.
2.
In diagnostics fill with tap until water turns off.
3.
Open the door and check water level. It should be touching the heater.
4.
Go back to diagnostics and push drain, verify drain is working
5.
Turn off and back on several times until drain is complete. Verify
water is coming out the drain hose every time.
6.
If it fails on any of the start ups check valve and pump operation
then skip to (11)
7.
If it does not fail run the cycle that did not work.
Figure 7:
(left) Drain Valve. (A) Valve Actuator Lever.
(B) Electrical Connector Leads.
Figure 8:
(below) Front View of Drain Pump. (C) Drain
Pump Inlet. (D) Drain Pump Impeller. (E) Drain Pump
Motor. (F) Drain Pump Fan.
Artisan Scientific - Quality Instrumentation ... Guaranteed | (888) 88-SOURCE | www.artisan-scientific.com


