Labconco Glassware Washer Service/Technical Manual
39
3.
Remove the front paneling as described in “Removing the Toe/Kick
Panels” in Section I.
4.
The Base Wiring Harness then connects to the front of the Relay Board
[Fig 13d].
a.
Inspect the connection and repair or reconnect as necessary.
5.
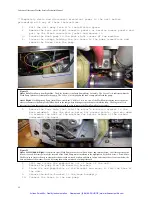
Lastly, check the door harness and ribbon cable.
a.
Remove the lower and middle panels as described in
Removing the
toe/kick panels
.
b.
Disconnect the springs on each side that connect the pivot
brackets to the washer base. Disconnect the hook on the washer
base side.
c.
Remove the two screws on each side of the outer door panel.
Lower the panel and remove it.
6.
Check these cables for any damage or pinching. Correct if necessary.
If there are no apparent problems with the wiring and the probe was found to
be out of its tolerance in the “Checking the Calibration of the Probe”
Section the probe should be replaced.
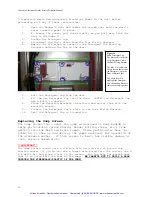
Replacing the Temperature Sensor
1.
Separate the connecters between the Temperature Sensor and the Sensor
Wiring Harness.
2.
With a wrench (or two) loosen and remove the Temperature Sensor from
the back wall of the tank.
3.
Place the new Sensor in its place (it is recommended that new o-rings
are used when replacing the Sensor) and tighten the mounting nut.
4.
Reset the connections at the Sensor Wiring Harness.
5.
Test the Sensor.
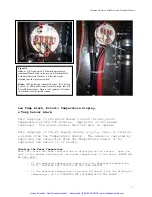
Figure 13
Above Left:
Back of washer Temperature Probe (B) connection to the Base Wiring Harness (C).
Above Right:
With the Toe, kick and Relay Board Cover panels removed, find the relay board on the bottom
front left of the machine. The Base Wiring Harness connects to this board at Circle D.
Artisan Scientific - Quality Instrumentation ... Guaranteed | (888) 88-SOURCE | www.artisan-scientific.com


