Labconco Glassware Washer Service/Technical Manual
43
1.
Remove the Control Panel from the door.
2.
Access the Control Module as described above and remove it.
3.
Disconnect the Button Pad’s ribbon cable from the PC Board.
4.
Pull the Button Pad Sticker from the Control Panel and discard.
5.
Fit the ribbon cable of the new Button Pad through the slot in the
Control Panel.
6.
Center and Place the Button Pad sticker on the Control Panel. (watch
for air bubbles and make sure the ribbon cable is pulled all the way
through)
7.
Connect the ribbon cable to the PC Board.
8.
Reseat the Control Module onto the Control Panel.
9.
Test the unit in diagnostics.
Water Inlet Solenoid Valve Replacement
Use the following procedures to replace and install the Tap and Pure
Water Inlet Solenoid Valves. These valves are important for filling
the unit before each wash and rinse cycle. If they are impeded or are
electrically weak, they may not open/close completely, which can cause
several problems, including the Low Water Alarm.
**Completely drain and disconnect electrical power to the unit before
proceeding with any of these instructions.
Replacing the Tap Water Valve
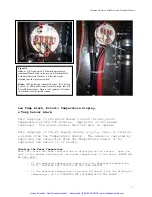
The Hot Tap Valve is regulated by the PC Board and allows the Lab water
pressure to fill the tank when set to fill via tap. The Tap water valve,
when fed with proper pressure, should allow the tank to fill to the
appropriate level within three (3) minutes.
Removing the Tap Valve
1.
Pull the unit out of its installation space.
2.
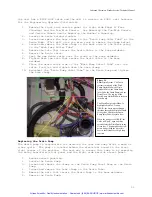
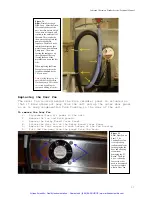
Locate the Hot Water Tap Valve.
3.
Close the customers Supply Water valve.
4.
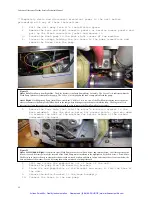
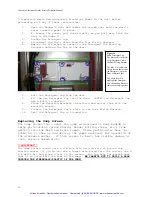
Remove either the back cosmetic panel or the back servicer access panel
and right cosmetic panel/service access panel.
5.
Remove the Inlet water supply tube from the valve.
6.
Loosen the clamp on the hose that goes from the valve to the Tank Inlet
Port. Remove the hose.
7.
Remove the electrical connector from the pins on the valve (go through
the left side panel.
8.
Remove the screws/nuts holding the valve to the flange of the base
weldment.
a.
The two screws holding the valve to the base weldment are
countered by nuts on the inner side of the valve. These will
need to be held secure while removing the screws.
9.
The valve should now be free.
Installing the Tap Valve
1.
Remove the Tap Valve as described above.
2.
Line up the valve with the drilled holes for the screws.
3.
Mount the screws with the nuts.
4.
Reconnect the connector to the valves pins.
5.
Place the hose on the Valve connector and tighten the clamp.
6.
Reconnect the user’s water supply tube and turn the water on. Check
for leaks.
Artisan Scientific - Quality Instrumentation ... Guaranteed | (888) 88-SOURCE | www.artisan-scientific.com


