167
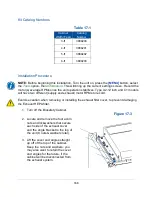
4. Install the replacement brackets as shown, with the lockwashers, and tighten the
acorn nuts. Reference Figure 17-4.
5. Carefully place the canopy between the brackets. Ensure the canopy fits on the
inside of the two mounting brackets as shown. Line up the holes in the canopy
connection with the threaded holes in the mounting bracket flanges. Reference
Figure 17-4.
6. Install the four canopy bolts, washers and lockwashers supplied with the canopy
connection kit into the mounting bracket threaded holes, and tighten them to
secure the canopy as shown. Reference Figure 17-4.
Figure 17-4
Acorn Nuts
Replacement
Mounting Bracket
(same opp. Side)
Canopy Bolts,
Washers, and
Lockwashers
Summary of Contents for Logic+ A2
Page 149: ...149 208 240V...
Page 151: ...151 Blower only will not start...
Page 152: ...152 Lights only will not illuminate...
Page 153: ...153 UV Light will not illuminate...
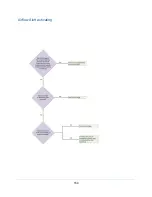
Page 154: ...154 Airflow Alert activating...
Page 155: ...155 Filter Life Gauge not at 100 when new...
Page 156: ...156 Contamination in the work area...
Page 200: ...200 Figure 23 4 1 2 4 3 5 7 6 8 8...
Page 201: ...201 END OF 3849920 Figure 23 5 9 10 11 12 13...


