54
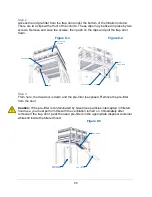
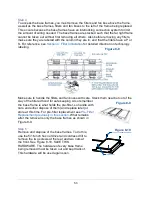
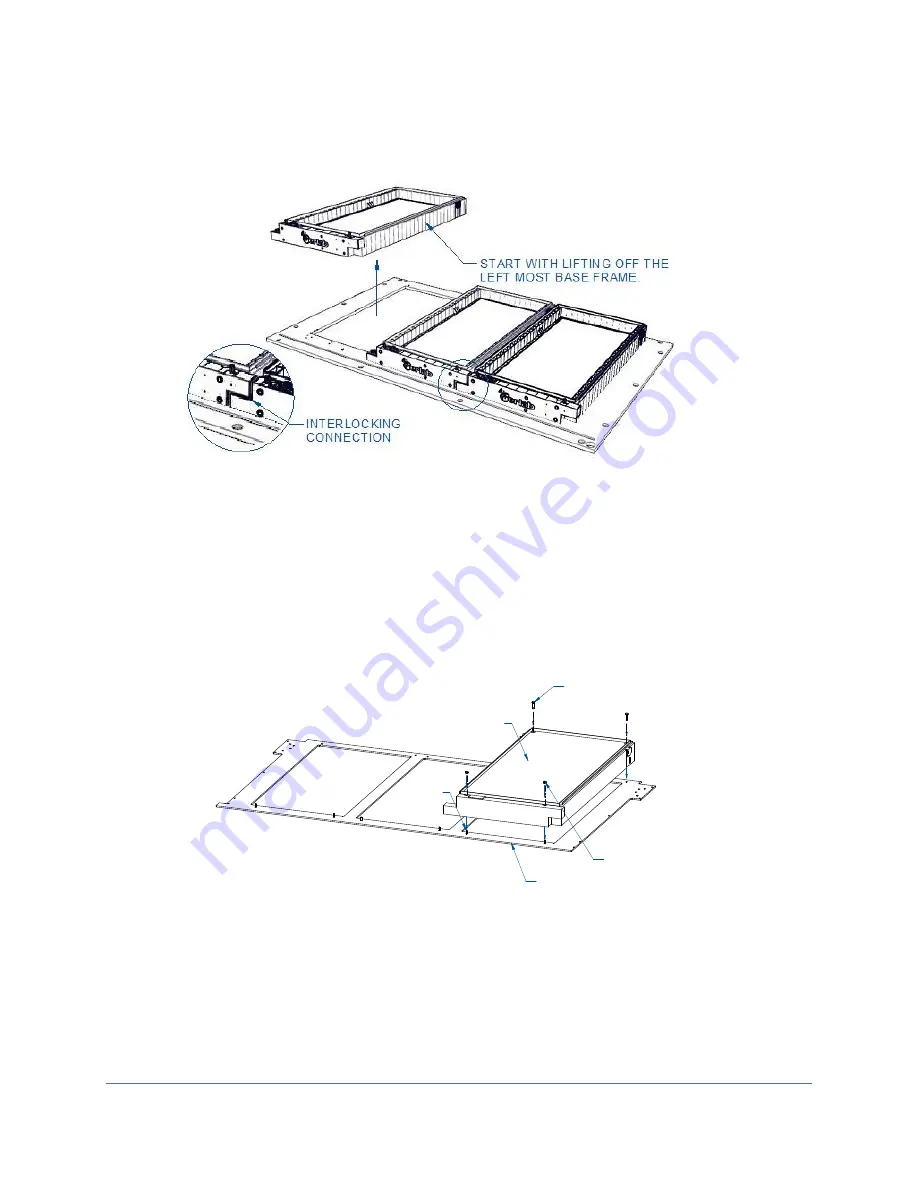
START WITH LIFTING OFF THE
LEFT MOST BASE FRAME.
INTERLOCKING
CONNECTION
Once the hardware is removed, lift the frames (in order due to the interlocking design)
and dispose of them in the correct manner.
Step 6
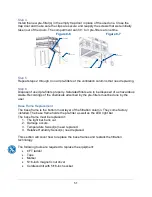
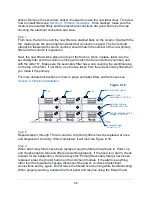
Once the old is removed, unpack and place the new base frames. Start with the furthest
right frame being replaced. Use the studs along the front of the top liner as locators for
the front base frame holes. The base frame front holes will go on the studs. From here,
use the magnetic nut driver to reinstall the nuts on the studs. The final step for this base
frame is to replace the two screws along the rear of the base frame. See Figure 8-12.
When the first base frame is secure, install the next frame to the left of it with the same
steps. Ensure a good interlocking connection between each base frame until they are all
in place.
Step 7
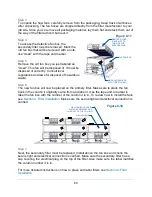
Restack all the filters and fan boxes removed earlier in step 4. Before replacing any
Neutrodine filters or fan boxes, first check the pre-filter is in place in the basket of the
#10 SELF-THREADING SCREW
#10 KEPS NUT
TOP LINER
STUDS
NEW BASE
FRAME
Figure 8-12
Figure 8-11
Summary of Contents for Protector Airo
Page 78: ...78 Fans and Lights not working ...
Page 79: ...79 Vertical sash no longer operates smoothly ...
Page 80: ...80 Electrical duplex outlets no longer have power Fan operates but lights dim or not working ...
Page 81: ...81 Contaminates outside the filtered hood ...
Page 82: ...82 Lights operate but fans will not ...
Page 83: ...83 Smart Command Alarms ...
Page 84: ...84 If needed contact Labconco to troubleshoot further ...
Page 94: ...94 Wiring Diagram Figure C 1 ...

