67
A
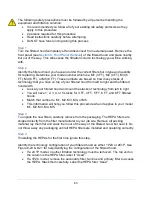
USE FLAT HEAD SCREW DRIVER
TO POP OUT SCREW COVERS
USE T10 TORX SCREW
TO REMOVE 6 SCREWS
SENSOR LABEL FOR
THE FAN MODULE
'A' FOR ACID & 'F' FOR
FORMALDEHYDE
FRONT PANEL OF
FAN MODULE
FAN MODULE
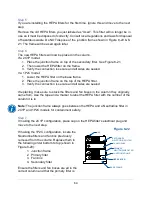
USE
D
FRONT PANEL
OF FAN MODULE
SENSOR
FAN MODULE
THE SENSOR'S FEMALE PLUG
MUST CONNECT PROPERLY
WITH THE FAN'S MALE PLUG
Step 1
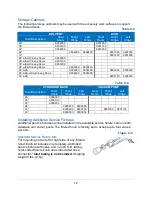
Order and unpack the new sensor. Orderable parts can be found in
. Locate the fan box in the
filtered hood with the ‘A’ or ‘F’ sticker as shown in Figure
8-25
. This is the old sensor; label it as ‘Used’. If installing the sensor for the first time,
Appendix G:Acid/Formaldehyde Sensor Locations
Step 2
Use the flathead screw driver to remove the 6 screw caps. Wedge underneath and pop
out to expose screws. Save
the caps.
Use the torx screw driver to
remove the 6 screws shown in
Figure 8-25 that keep the fan
box’s front panel in place.
Save the screws.
Step 3
Carefully pull the
‘Used’ front
panel away from the body of
the fan box. Dispose of the
used sensor.
Step 4
Install the new sensor front panel onto the fan box. Ensure a proper connection of the
female to male plug in the front of the fan box shown in Figure 8-26. Label the fan box
with the column number it is located in (the same number the ‘Used’ sensor had).
Figure 8-25
Figure 8-26
Summary of Contents for Protector Airo
Page 78: ...78 Fans and Lights not working ...
Page 79: ...79 Vertical sash no longer operates smoothly ...
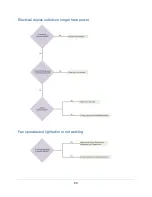
Page 80: ...80 Electrical duplex outlets no longer have power Fan operates but lights dim or not working ...
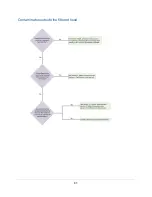
Page 81: ...81 Contaminates outside the filtered hood ...
Page 82: ...82 Lights operate but fans will not ...
Page 83: ...83 Smart Command Alarms ...
Page 84: ...84 If needed contact Labconco to troubleshoot further ...
Page 94: ...94 Wiring Diagram Figure C 1 ...

