LM1012TTS Table-Top Label Applicator System
USER'S MANUAL
Made in the U.S.A.
© 2022 LABELMILL
01/01/2022 Model LM1012TTS
Page 13
OPTIONAL MECHANICAL CLEAR LABEL DETECTOR
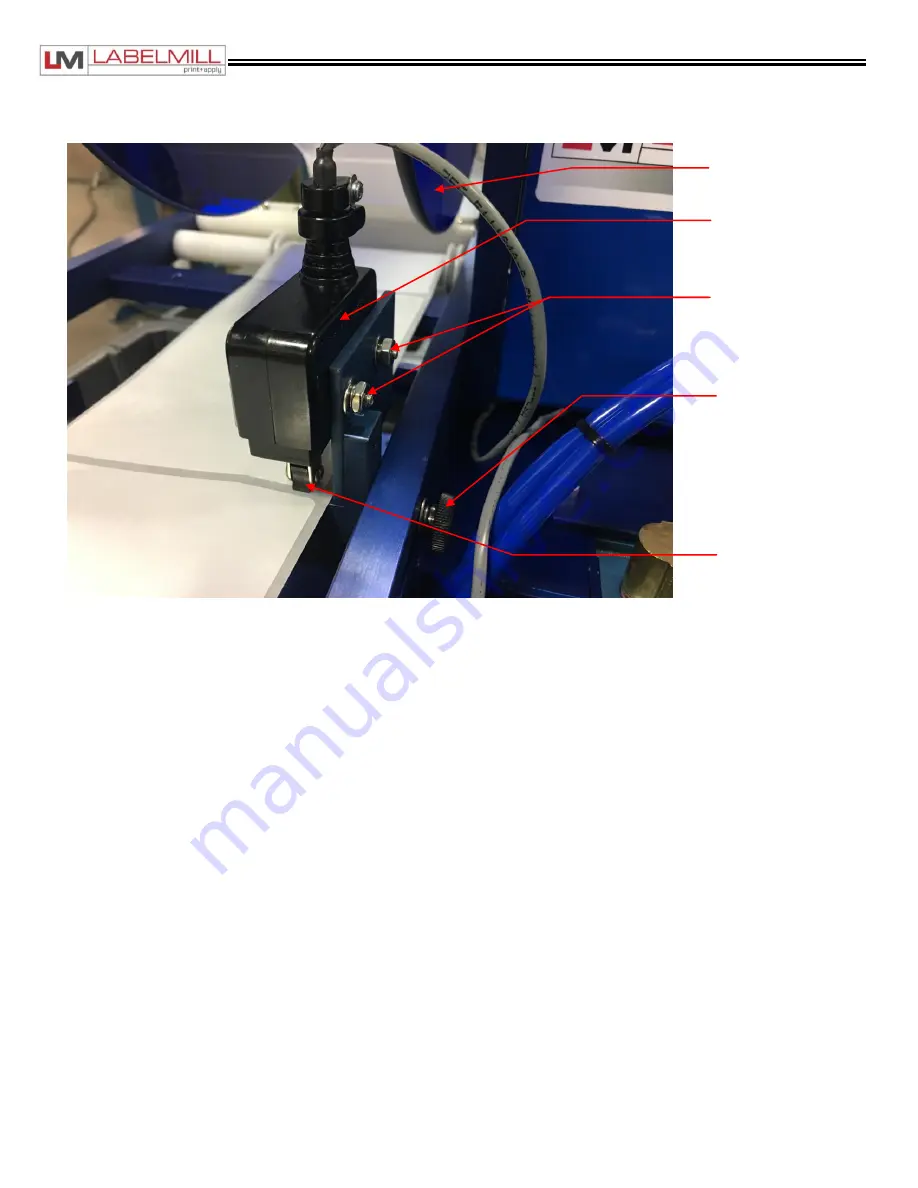
The Mechanical Clear Label Detector comes preset from the factory and should require no adjustment. If there is a need
to readjust the sensor, the following is a guide: Move the label stock until the gap between the labels is centered under
the Star Wheel and the star wheel is laying flat on the label stock as shown above. This can be accomplished by
unwinding the label storage spool enough to make the web “loose". To test adjustment, move the label stock gap back
and forth under the photo eye slowly. The STAR WHEEL catches the edge of the label stock and flips from one flat to the
next. The STAR WHEEL detects the gap between the labels by catching the edge of the label as it is fed. When the star
wheel catches the edge of the label, the wheel will quit sliding and rotate. The diameter across the flats of the star wheel
is smaller than the diameter across the points. When the star wheel rotates, the micro switch is activated indicating the
gap in the label stock.
If double or multiple label feeding occurs, and the micro switch is always activated, loosen the adjustment nuts and slide
the micro switch up away from the label.
If double or multiple label feeding occurs and the micro switch never activates, loosen the adjustment nuts and slide the
micro switch down towards the label.
LABEL PLACEMENT IN RELATION TO THE PEELER PLATE:
Loosen the lock screw on the
Mechanical Label Sensor Assembly
and slide it forward or backward on the
adjustment rails to achieve placement of the label with the peeler plate nose (+/- 1/32). After adjustment, cycle the labeler
to verify new label placement.
Mechanical
Clear Label
Detector
Lock Screw
Star Wheel
Adjusting Nuts
Storage Spool


