LM1012TTS Table-Top Label Applicator System
USER'S MANUAL
Made in the U.S.A.
© 2022 LABELMILL
01/01/2022 Model LM1012TTS
Page 44
Round Product Applicator Module Setup
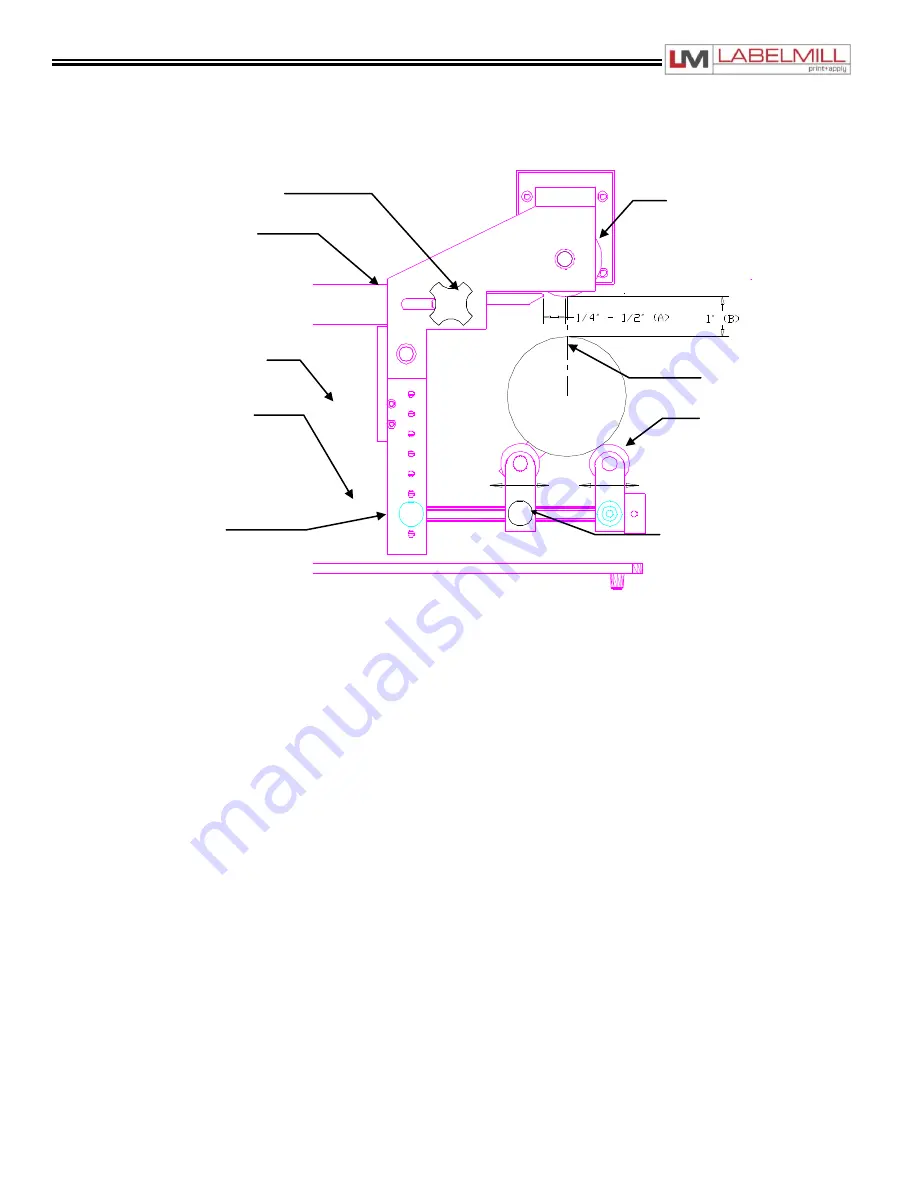
Round Module alignment
1. To adjust the round product applicator in relationship to the peeler plate (P) in the horizontal plain, loosen the
thumbscrews (S) and move the round product module forward or backward in the slots. There should be approximately
¼" - ½" (A) gap between the application roller (Q) and the peeler plate (P).
Bottle Roller adjustment
1. Loosen the thumbscrews (E) and adjust the support rollers (D) until the product is supported securely. These supports
(D) are moved to adjust for the size, location and height of the product in relation to the label application roller (Q).
2. Thumbscrew (R) is loosened and removed to allow the cradle assembly to be moved from hole to hole on the carriage
rail (F). This is a product rough adjustment.
3. Move the cradle assembly up or down and the support rollers horizontally until the desired 1" (B) of clearance between
the product and the label application roller (Q) is achieved.
4. Adjust the flow controls as described on page 4-6. Flow controls in this configuration will control the speed at which the
carriage moves the product up and down.
Adjustment Holes
Cradle Thumb Bolts
Centerline (G)
Support Rollers (D)
Peeler Plate (P)
Adjustment Holes (H)
Thumbscrew (R)
Application Roller (Q)
Roller Thumbscrews (E)
Carriage Rail (F)
Thumbscrew (S)


