2
3
2
1
1
1
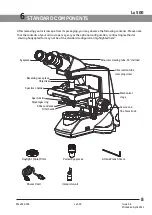
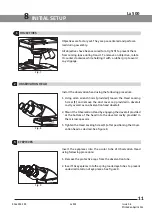
Each standard unit can be assembled by simply attaching the observation head, eyepieces and power cord.
Fig. 10
Fig. 11
2
1
Fig. 11.a
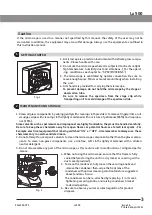
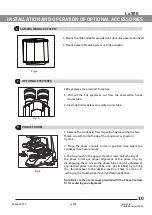
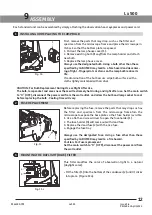
INSTALLING OR REPLACING THE LAMP BULB
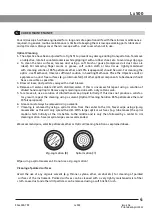
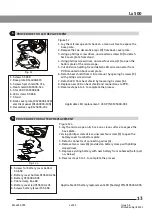
FUSE REPLACEMENT
ASSEMBLY
9
Lx 500
1
2
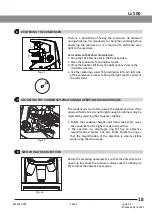
MOUNTING THE DAYLIGHT (BLUE) FILTER
3
First, remove the parts that may drop, such as the filter and
specimen from the microscope frame and place the microscope in
its back so that the bottom plate is exposed.
1. Pull out the lamp house cover (1) .
2. Remove existing bulb (if any)from the lamp holder and attach
new bulb.
3. Replace the lamp house cover.
Always use the designated bulb. Using a bulb other than those
specified by LABOMED may lead to a fore hazard and decenter-
ing of light . Fingerprints or stains on the lamp bulb reduce its
life.
If contamination of the bulb occurs, wipe bulb surface with a
cloth slightly moistened with alcohol .
Before replacing the fuse, remove the parts that may drop such as
the filter and specimen from the microscope frame.Turn the
microscope to expose the base plate so that fuse holder is visible.
1. Use a flat head screw driver to open the fuse holder (1).
2. The fuse holder (3) will come out with dead fuse.
3. Replace the dead fuse (2) with the live fuse.
4. Engage the fuse tray .
Always use the designated Fuse. Using a fuse other than those
specified by LABOMED may lead to a fire hazard.
Caution: For Fuse replacement
Set the main switch to “O” (OFF), disconnect the power cord from
the wall outlet
.
This filter modifies the color of observation light to a natural
(daylight color).
•
Fit the filter (1) into the bottom of the condenser (2) until it clicks
into place. (Figure 11a).
CAUTION: For Bulb Replacement During Use or Right After Use
The bulb, lamp socket and areas near these will extremely hot during and right after use. Set the main switch
to “O” (OFF), disconnect the power cord from the wall outlet, and allow the bulb and lamp socket to cool
before replacing the bulb . Cooling time will vary.
12
9144000-795
Lx 500
Issue 1.6
Printed on April,2022


