8 MHP Operating & Maintenance Manual
INSTALLATION
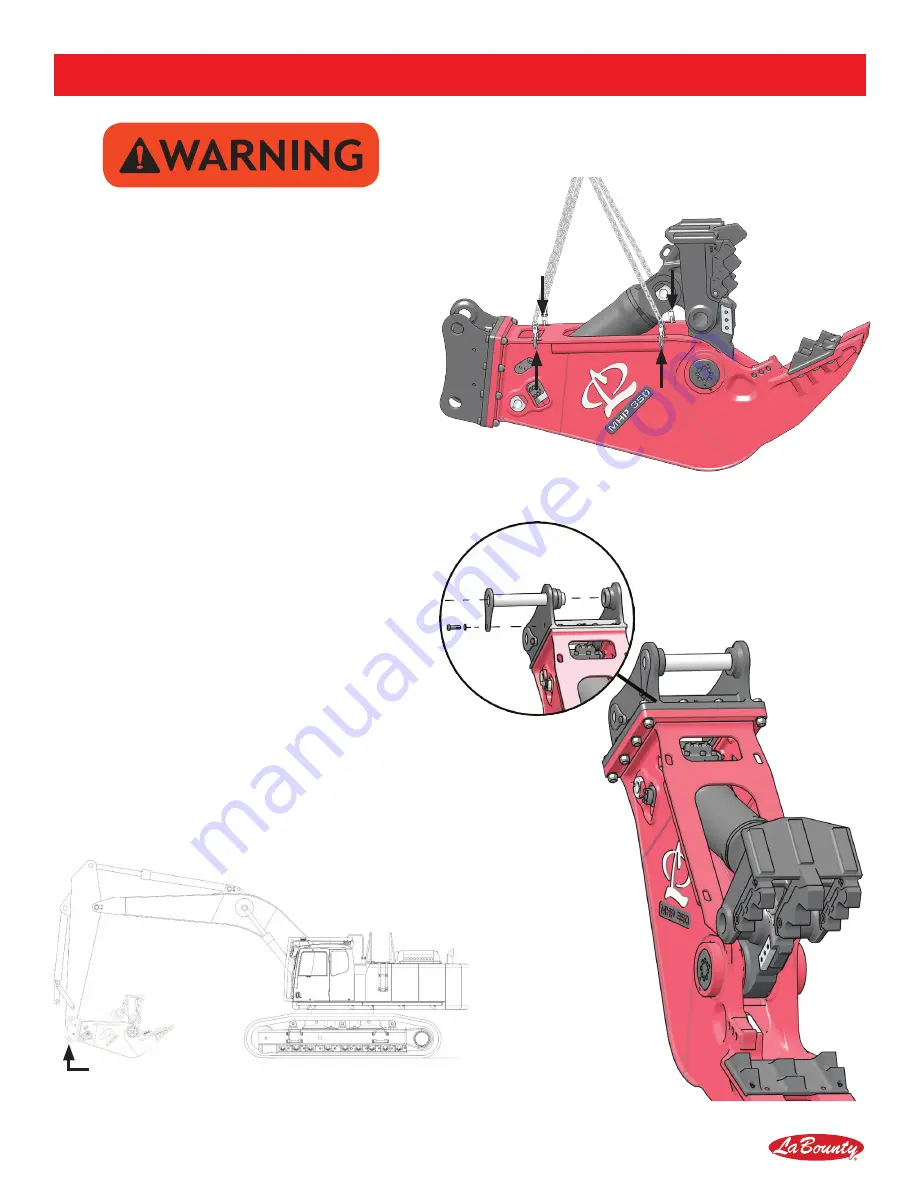
• Use only approved rigging hardware rated
for loads greater than the weight of MHP.
• Hooking Points are for moving the
attachment only. Do not lift other objects or
use MHP in a cable-hung application.
HOOKING POINTS FOR LIFTING
Figure 9
LINKAGE CONNECTION
REMOVE ARM & LINK PINS
Figure 10
1.
Locate flat, hard ground (e.g., concrete floor)
for installation. Lift and place the attachment
on the ground as shown. Use blocking if
necessary.
2.
Remove the excavator bucket. Follow the
manufacturer’s recommended procedure.
Note: When removing the excavator bucket, plug
hydraulic hoses to prevent contamination.
THIRD MEMBER INSTALLATION
3.
Remove the arm connection and link
connection pins, as shown in Figure 10.
4.
Bring the excavator into position, carefully
lining up the stick tip with the MHP mounting
bracket. Pin the stick tip to the MHP mounting
bracket using the pin provided (see Figure 11).
5.
Carefully extend the bucket cylinder to move
the bucket linkage. Position the link into the
mounting bracket linkage connection.
Note: It may be necessary to use a lifting device
(overhead hoist, forklift, etc.) to position the link.
6.
Pin the linkage connection to the MHP bracket..
THIRD MEMBER INSTALLATION
Figure 11


