4. You may hear a slight “click” as the case opening tool’s angled extension grips
the inside front of the metal casing. This sound is normal.
5. Using the tool, remove the top shell. Turn the drive over.
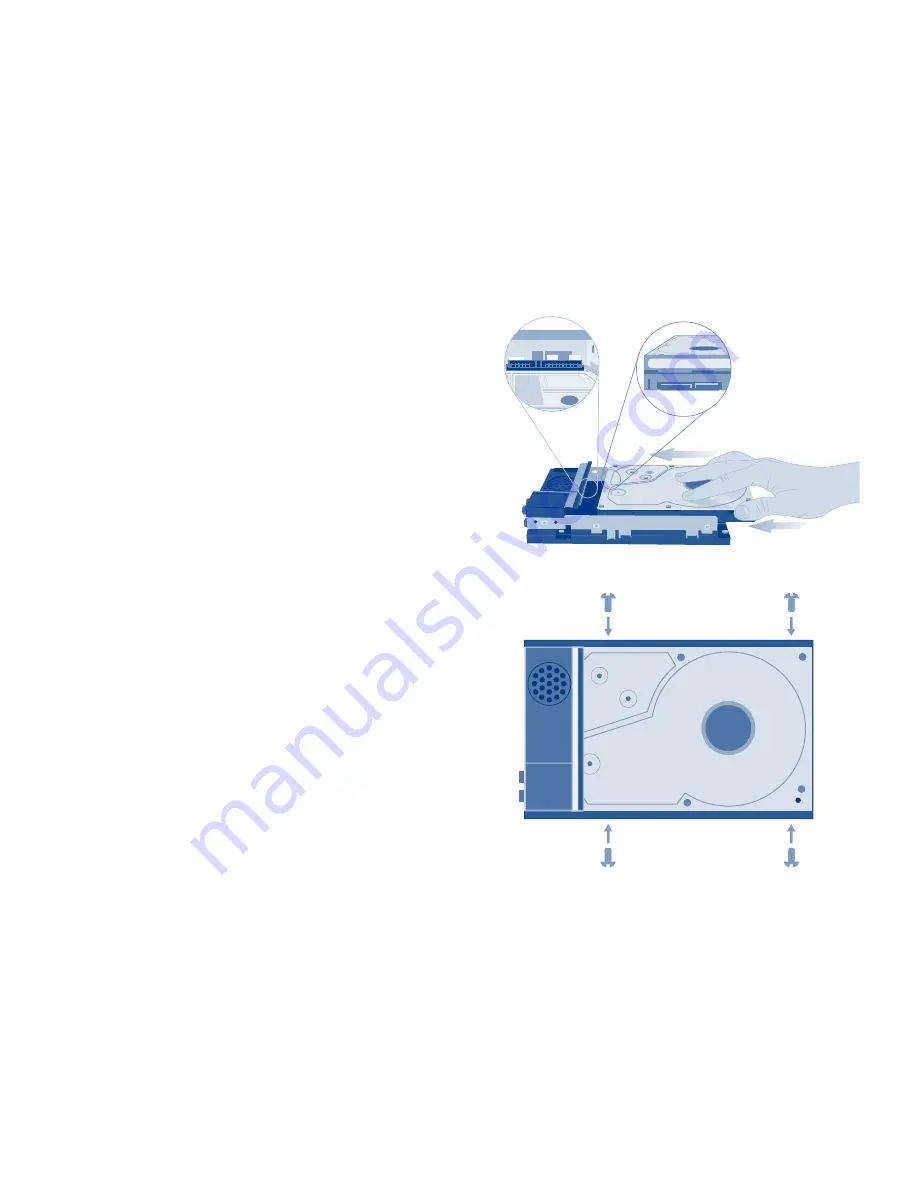
6. Slide the drive, label facing up, onto
the bottom plate rails. The drive’s
SATA connector plugs into the SATA
port of the LaCinema Classic HD Bridge.
7. Secure the disk drive in the casing by
inserting the four included screws into
the slots as indicated in the illustration.
8. Replace the top of the casing by first aligning the ports on the bottom plate with
the cutouts on the top shell and then gently press down. Please pay close
attention to the connectors in the back of the device when replacing the top of
the casing.
Summary of Contents for LaCinema Classic
Page 1: ...Quick Install Guide cLASSIC BRIDGE HD...
Page 2: ......


