Lacunza Silver 800/1000 Zero Clearance Box Assembly Instructions
June 12, 2022
7
2.4
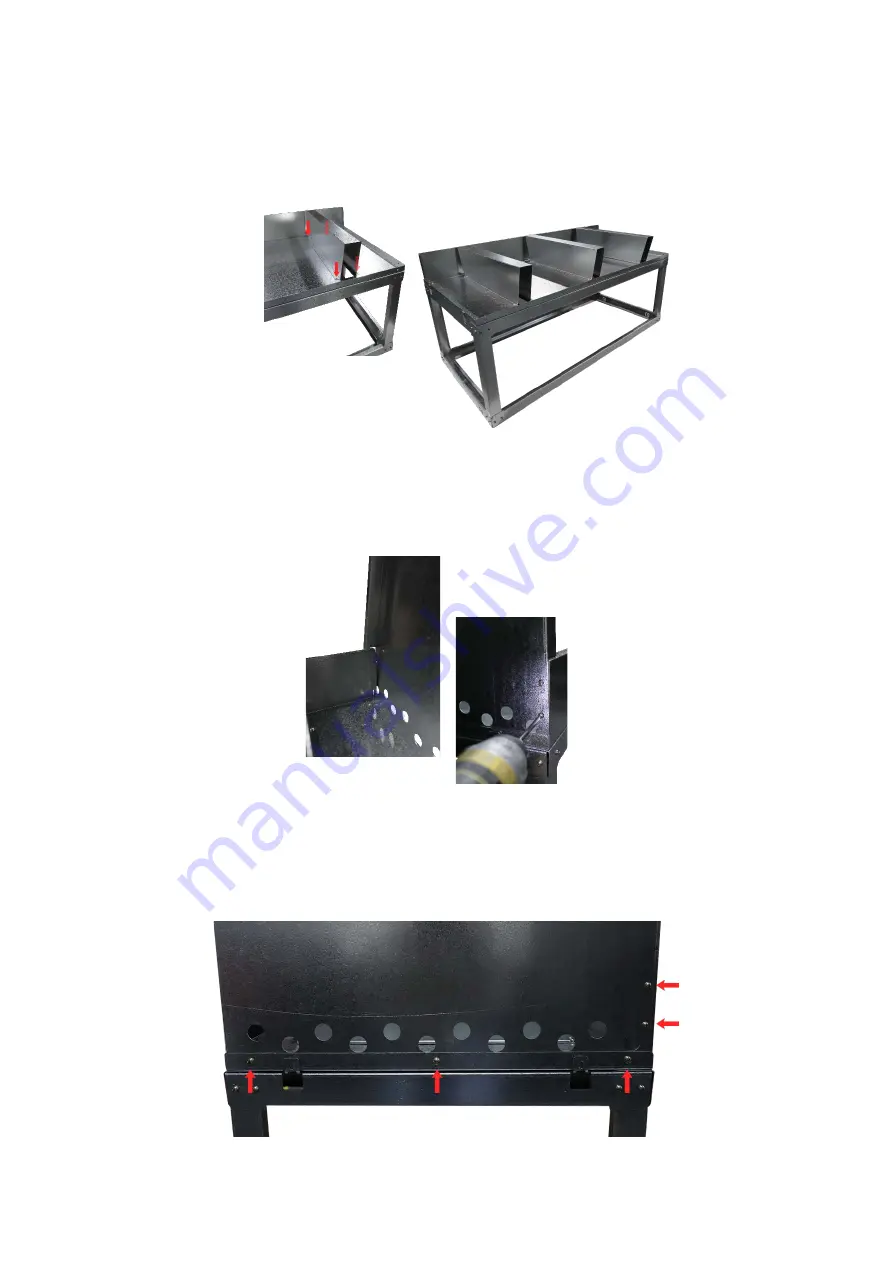
You can then add the 3 x Bottom Brackets to the fixed Bottom Panel. Line them up with
each hole on the Bottom Panel, and then use 4 x Self Tapping Screws on each Bottom
Bracket (A total of 12 x Self Tapping Screws). Note that each of the Bottom Brackets should
sit under the Front Fold of the Bottom Panel.
2.5
Grab either the RHS/LHS Side Panel, and slot it into the appropriate sides. This is indicated
with the circle cut-outs on each Side Panel, which should be on the bottom side, and the
three-fold edge should be on the front side. Note the Side Panels should be placed on the
inside of the Bottom Panel.
2.6
Screw the lined-up holes for the RHS/LHS Side Panel as shown below, you will need 5 x
Self Tapping Screws for one side (A total of 10 x Self Tapping Screws). Repeat this step for
the opposite side. Note only fully tighten the screws once the top is in position.


