background image

16

www.LAEGENDARY.com

Electronic

Speed Control

2. Throttle Range Setting (Throttle Range Calibration)


In order to make the ESC match the throttle range, you must calibrate it when you begin

to use a new ESC, or a new transmitter, or after changing the settings of the neutral

position of throttle channel, ATV or EPA parameters, otherwise the ESC cannot work

properly. There are 3 points need to be set, they are the top point of “forward”,

” backward” and the neutral point. The following pictures show how to set the throttle

range 

A) Switch off the ESC, turn on the transmitter, set the direction of throttle channel to

”REV”, set the “EPA/ATV” value of throttle channel to “100%”, and disable the “ABS”

brake function of your transmitter. (*Note 2)

B) Hold the “SET” key and then switch on the ESC, when the red LED begins to flash,

release the key immediately.(Please check the picture on the right side)

C) Set the THREE points according to the steps shown in the picture on theright side.

1) Neutral point

2) End point of forward direction

3) End point of backward direction

D) When the process of calibration is finished, the motor can be started after 3 seconds.

Note2:

 If you don’t release the “SET” key after the red LED begins to flash, the ESC will

enter the program mode, in such a case, please switch off the ESC and re-calibrate the

throttle range again from step A to step D.

Summary of Contents for THUNDER

Page 1: ......

Page 2: ......

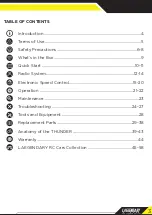
Page 3: ...e Box Quick Start Radio System Electronic Speed Control Operation Maintenance Troubleshooting Tools and Equipment Replacement Parts Anatomy of the THUNDER Warranty LAEGENDARY RC Cars Collection 4 5 6...

Page 4: ...that will allow you to unlock the performance potential that LAEGENDARY engineers designed into your model Also be sure to read and follow the precautions and warnings in this manual and on any labels...

Page 5: ...most updated version of the User Manual please visit our website LAEGENDARY reserves the right to make changes and improvements to products without incurring any obligation to incorporate such improve...

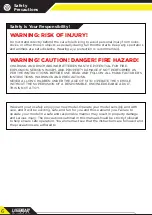
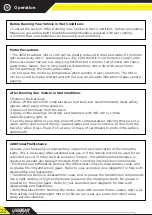
Page 6: ...Your Responsibility Do not stand directly behind the car while driving to avoid personal injury from rocks sticks or other thrown objects especially during full throttle starts Keep any spectators an...

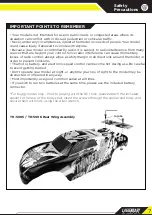
Page 7: ...io control always allow a safety margin in all directions around the model in order to prevent collisions The motor battery and electronic speed control can become hot during use Be careful to avoid g...

Page 8: ...MMEND USING 2S BATTERIES WITH A 30C MAX DISCHARGE RATE Always adhere to the minimum and maximum limitations 4 9 NiMH cells The ESC can accept a maximum input voltage of 10 8 volts 9s NiMH Always adher...

Page 9: ...What s in the box WHAT S IN THE BOX TOP DESIGN MAY VARY DEPENDING ON THE MODEL YOU PURCHASED 2 Body Shells OR Velcro Strap User Manual USB Charger USB Plug Adapter 2 Body Shells Battery Battery Conne...

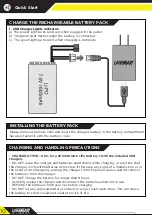
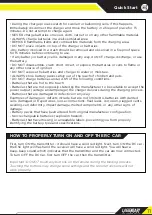
Page 10: ...iPo battery with the included USB charger DO NOT leave the charger and batteries unattended while charging or any time that the charger is ON with batteries connected If there are any signs of a malfu...

Page 11: ...ash should be removed and observed in a fireproof space for 15 minutes before continuing to use If any battery or battery cell is damaged in any way do NOT charge discharge or use the battery DO NOT d...

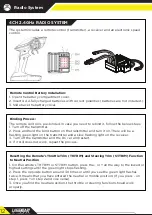
Page 12: ...e RC car and restart 4 If it still does not work repeat the process Binding Process 1 On the remote s TH TRIM or ST TRIM button press the or all the way to the lowest or highest settings until the gre...

Page 13: ...13 www LAEGENDARY com Radio System REMOTE CONTROL OVERVIEW...

Page 14: ...Button Remote Control Channels The car and remote come pre programmed in the normal mode To change to beginner mode do the following 1 Turn off the transmitter 2 Press and hold CH4 3 Fully turn and ho...

Page 15: ...cut off protection for LiPo or NiMH battery Over heat protection Throttle signal loss protection Motor blocked protection 8 Easily programmed with the SET button on the ESC or with the LED Program Ca...

Page 16: ...e direction of throttle channel to REV set the EPA ATV value of throttle channel to 100 and disable the ABS brake function of your transmitter Note 2 B Hold the SET key and then switch on the ESC when...

Page 17: ...transmitter 2 Press and hold the SET button on the car then turn on the car Release the SET button then press it again 3 Pull and hold the throttle press the SET button again then release 4 Push and h...

Page 18: ...flash and long Beep tone to represent number 5 so it is easy to identify the options with big numbers For example if the LED flashes as the following A long time flash Motor sounds B The option 5 A lo...

Page 19: ...or instruction on how to change the Running Mode 3 2 How to Change the Running Mode 1 Turn off the ESC RC Car switch 2 Turn on the transmitter 3 Press and hold the Set Key then turn on the ESC Check t...

Page 20: ...art effect as you want If the motor cannot run smoothly that is the motor is trembling it may caused by the weak discharge ability of the battery please choose a better battery or increase the gear ra...

Page 21: ...ter contact can reduce the life of your motor Special care must be taken to modify your driving style in wet conditions to extend the life of the motor details below Running Your Vehicle in Wet Condit...

Page 22: ...iece of cardboard to protect the surface underneath Additional Maintenance Increase your frequency of disassembly inspection and lubrication of the following items This is necessary after extended wet...

Page 23: ...he drive cups After cleaning lubricate the pins and cross pins with a drop of light weight machine oil DO NOT use too much oil to avoid build up of dust and dirt Remove the gear cover Inspect the spur...

Page 24: ...thermal protection may have been activated 1 The discharge capacity of the pack is insufficient 2 The RPM is too high the gear ratio or final drive ratio is incorrect 1 Refer to the ESC guide to set t...

Page 25: ...ns between battery pack and ESC are not correct 1 The Slipper and or Main Drive Shaft is broken 2 The differential spur gear and drive gear are stripped 1 Reset gear mesh 2 Replace gears 1 Replace ser...

Page 26: ...e throttle signal is lost 2 The ESC has entered the Low Voltage Protection Mode 1 Some connections are not reliable 2 There is strong electro magnetic interference in flying field Check the voltage of...

Page 27: ...nd check if the car steers 2 Reset the steering trim to Neutral position 3 Tighten the Servo Saver s spring and E clip or replace if needed 1 Check if the servo plug is connected to the receiver in co...

Page 28: ...the lowest settings there will be no steering sensitivity Note If this troubleshooting does not fix the issue try to insert the servo plug in receiver Ch4 and see if the steering response on this chan...

Page 29: ...Pliers Sharp Hobby Knife Instant Glue Hex wrench Round Cutter For trimming bodies No need to pre drill precise holes 1mm to 15mm can be drilled Wire Cutters Awl Body Reamer Differential Grease Grease...

Page 30: ...005 Flat Head Hex Screw 1x6 M3 x 12 Product Name Remarks Quantity Specifications No TH 1006 Flat Head Hex Screw 1x6 M3 x 14 Product Name Remarks Quantity Specifications No TH 1007 Flat Head Hex Screw...

Page 31: ...ips 1x6 Small Product Name Remarks Quantity Specifications No TH 1018 Body Clips 1x6 Medium Product Name Remarks Quantity Specifications No TH 1019 Ball Bearing 1x6 10 x 5 x 4mm Product Name Remarks Q...

Page 32: ...tial Drive Gear with Pin 1x6 2 Sets Product Name Remarks Quantity Specifications No TH 2003 Center Coupler 1x3 Product Name Remarks Quantity Specifications No TH 2004 Steering Knuckle Arm 1 Set Produc...

Page 33: ...ame Remarks Quantity Specifications No TH 2013 Rear Oil Shocks 1x2 Aluminium Caps Product Name Remarks Quantity Specifications No TH 2014 Front Shock Tower 1x1 Product Name Remarks Quantity Specificat...

Page 34: ...TH 2025 Metal Bushing 1x6 8 x 5 x 2 5mm Product Name Remarks Quantity Specifications No TH 3000 3650 Brushless Motor 1x1 3000kv Product Name Remarks Quantity Specifications No TH 3001 Spur Gear 1x1 65...

Page 35: ...or Rear Spur Gear Cover 1x2 Product Name Remarks Quantity Specifications No TH 4001 Battery Cover Body Posts Servo Mounts 1 Set Product Name Remarks Quantity Specifications No TH 4002 Rear Spur Gear C...

Page 36: ...ifications No TH 5004 Truck Body 1x1 Green Yellow Product Name Remarks Quantity Specifications No TH 5005 Truggy Body 1x1 Green White Product Name Remarks Quantity Specifications No TH 5006 Truggy Bod...

Page 37: ...rts No TH 5011 Batteries Connector 1x1 Product Name Remarks Quantity Specifications No TH 5012 Remote Control 1x1 2 4 GHz Product Name Remarks Quantity Specifications No TH 5013 Receiver 1x1 Product N...

Page 38: ...cations No TH 2013 U Rear Oil Shocks 1x2 Aluminum Product Name Specifications Remarks Quantity No TH 2017 U Steering Ackerman 1x1 Steel Product Name Remarks Quantity Specifications No TH 2020 U Front...

Page 39: ...Product Name Remarks Quantity Specifications No TH 4002 U Rear Spur Gear Cover Install together with aluminum chassis 1x1 Plastic Product Name Remarks Quantity Specifications No TH 4008 U Battery Cove...

Page 40: ...H 2001 TH 1009 Differential Box TH 2001 TH 2002 TH 2003 TH 1019 TH 1014 TH 2012 Oil Oil Front Shocks Rear Shocks Front Rear Differential Box Assembly Front Gearbox Assembly 40 www LAEGENDARY com Anato...

Page 41: ...TH 1016 TH 2005 TH 2020 TH 1023 TH 1023 TH 1006 TH 1026 TH 2001 TH 1009 TH 3008 TH 1014 TH 1022 TH 3001 TH 3007 TH 1011 TH 1014 TH 3002 TH 1004 TH 3006 TH 3000 TH 3009 TH 1019 TH 2002 TH 1021 TH 2001...

Page 42: ...4001 TH 3005 TH 3005 TH 1000 TH 1005 TH 1005 TH 2023 TH 1000 TH 1017 TH 3003 Brushless ESC RECEIVER TH 1004 TH 2025 TH 2024 TH 2025 TH 2016 TH 1000 TH 2017 TH 1020 TH 1000 TH 2016 TH 2024 TH 1003 TH...

Page 43: ...DARY com Anatomy of the THUNDER TH 1006 TH 4001 TH 4001 TH 4000 TH 4007 TH 4000 TH 1004 TH 1004 TH 1004 TH 1006 TH 1006 TH 1006 TH 3010 TH 1008 TH 1008 TH 1008 Central Chasis Assembly I Central Chasis...

Page 44: ...Wheelie set TH 5002 is included in the package but needs to be assembled with the Alen wrench Before assembling please remove the 4 pcs TH 1008 screws and use the 4pcs TH 1006 screws to assemble inste...

Page 45: ...ll is not just for looks it is also designed to protect vital areas of the running gear and electronics from damage LAEGENDARY DOES NOT operate a new for old warranty once the product has been used On...

Page 46: ...RC CARS COLLECTION You can find more models at www laegendary com...

Page 47: ......

Page 48: ......

Page 49: ......

Page 50: ......

Page 51: ......

Page 52: ......

Page 53: ......

Page 54: ......

Page 55: ......

Page 56: ......

Page 57: ......

Page 58: ......

Page 59: ......

Reviews: