Figure 1
7. Use a screwdriver to hold bolt steady while tightening wing nut.
8. Reinsert chest plate and deltoid pad.
To remove arms, reverse procedure.
Legs
Legs are attached with a 6” long bolt, a spring, a large washer, a small
washer and a wing nut.
Attachment hardware is located in envelope inside carton.
To attach:
1. Remove belly plate from manikin to locate hole in hip.
2. Remove thigh injection pad from leg by squeezing skin in center of pad
while pulling.
3. Slide spring and small washer over bolt.
4. Insert bolt through hole in thigh.
5. Insert bolt through hole in pelvis.
6. Slide large washer and wing nut over bolt.
7. Use screwdriver to hold bolt while tightening wing nut. (Figure 2)
Figure 2
To remove legs, reverse procedure.
IV Arm
Multiple Venipuncture sites:
• Dorsal Veins of Hand (3)
• Antecubital
- Cephalic Vein
- Median Vein
- Basilic Vein
A 22 gauge needle or smaller is recommended to extend the life of
the IV Arm.
When using an IV catheter, lubricate with manikin lubricant for easier
insertion.
Directions for Use:
1. Attach IV bag to IV tubing.
2. Attach IV tubing to either latex vein.
3. Allow fluid to flow through arm and out other latex vein.
4. Clamp off flow of water from open vein.
The arm is now ready to practice venipuncture.
When excessive leaking occurs at puncture sites, either a new vein
system or skin should be installed to reduce loss of fluid.
We recommend working at a sink when replacing
the skin and vein system.
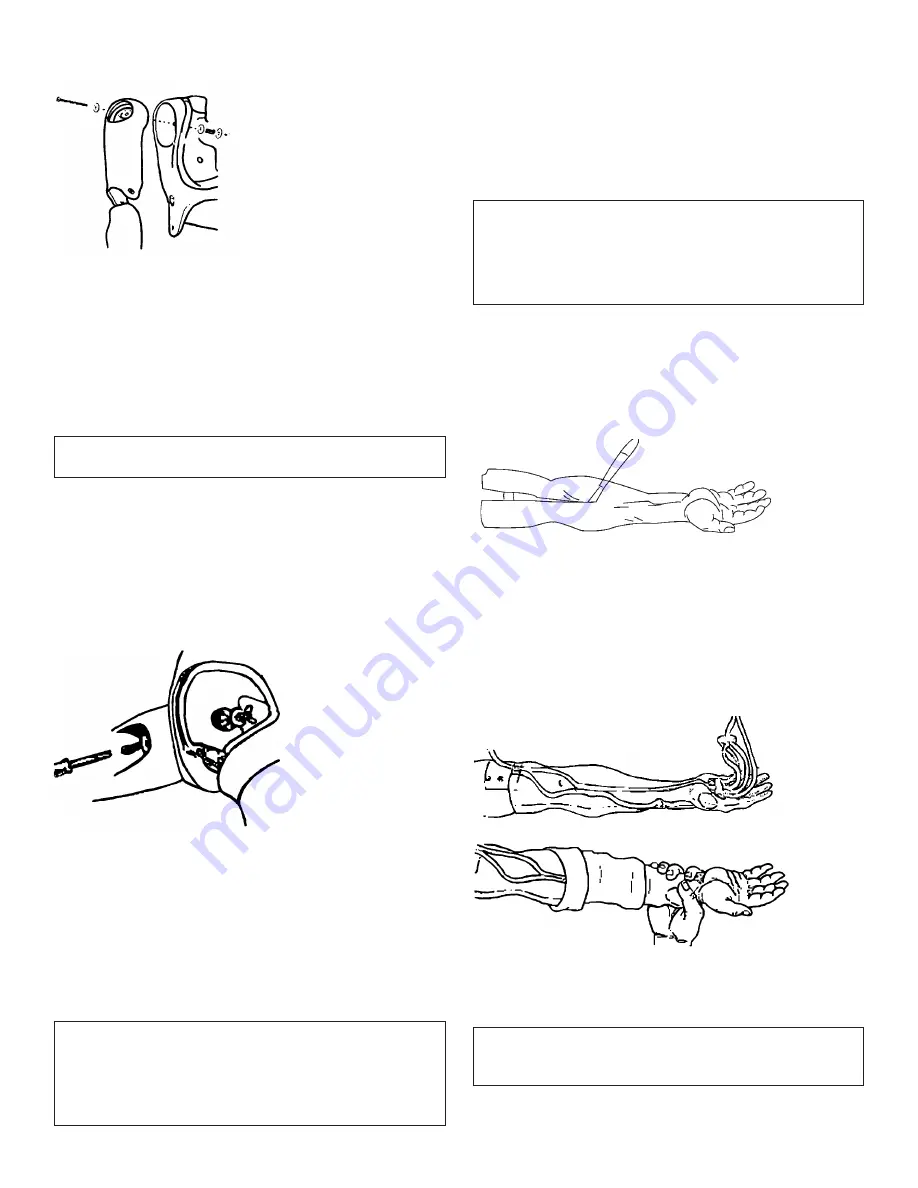
Replacing Skin and Veins
Remove skin:
If replacing skin and veins, cut off skin. This can be done with a sharp knife,
scalpel or scissors. (Figure 3)
When finished, discard skin, but keep thumb insert.
Figure 3
Replacing veins: (Keeping skin)
1. Lubricate inside of skin with liquid detergent; let it flow down into the
finger area.
2. Begin at top of arm and slowly pull skin down and off of arm. Do not roll,
as that will cause skin to bind. Thumb will detach with skin; be sure to
place in new skin.
3. Remove tubing from track in mandrel. Glue may need to be scraped away
to allow removal.
4. Rinse and dry vein grooves well and swab with alcohol. Be sure to
remove any excess glue.
Figure 4
Figure 5
5. Place new veins along grooves, (Figures 4 & 5) spot gluing as needed.
(We recommend a fast-drying glue.)
6. Generously lather arm mandrel with liquid soap. Add thumb insert.
Heat arms skins before replacing on mandrel. This can be done with a
blow-dryer.
Laerdal
4
Nursing Kelly
Summary of Contents for Nursing Kelly VitalSlim
Page 2: ......
Page 10: ...Laerdal 8 Nursing Kelly...
Page 18: ...Laerdal 8 Nursing Kelly...
Page 26: ...Laerdal 8 Nursing Kelly...
Page 34: ...Laerdal 8 Nursing Kelly...
Page 50: ...Laerdal 8 Nursing Kelly...
Page 58: ...Laerdal 8 Nursing Kelly...
Page 66: ...Laerdal 8 Nursing Kelly...
Page 74: ...Laerdal 8 Nursing Kelly...
Page 81: ...Laerdal 16 French 7mm VitalSim Vital 1 2 3 4 5 6 Nursing Kelly 7 Laerdal C hinese...
Page 84: ...2 IV Nursing Kelly VitalSim 3 3 3m Nursing Kelly VitalSim 100 cc 1 1 a 1 b 1 1 2 3 4 6mm...
Page 85: ...a 7 5mm ID b c 10ml d 3 e f 16Fr 1 2 1 2 1 2 3 1 2 3 1 2 2 2 1 2 a b c 3 J apanese...
Page 86: ...a b 4 3 1 2 3 4 5 6 1 7 8 1 6 2 1 2 3 4 5 6 7 2 2 IV 3 4...
Page 87: ...20G IV 1 IV IV 2 IV 3 4 3 3 1 2 3 IV 4 4 5 5 4 5 6 7 3 3 8 4 4 5 J apanese...
Page 88: ...9 5 6 5 6 1 2 7 7 3 1 8 2 8 6 6 1 2 3 9 10 11 1 7 6...
Page 89: ...7 2 3 4 5 6 9 10 11 12 12 a O b c d 16Fr 7mm 7 J apanese...
Page 95: ...1 3 3 1 2 3 4 4 5 5 4 5 6 Laerdal 7 3 8 4 4 9 5 6 5 6 1 2 7 7 Nursing Kelly 5 Laerdal K orean...
Page 99: ......
Page 100: ...LAERDAL 2004 All rights reserved 9895 rev Printed in US D...


