Classic Collection Installation Instructions 2
BACK
Thank you for choosing Lafayette aluminum blinds. With proper installation and care,
your new aluminum
blinds will provide many years of beauty and performance.
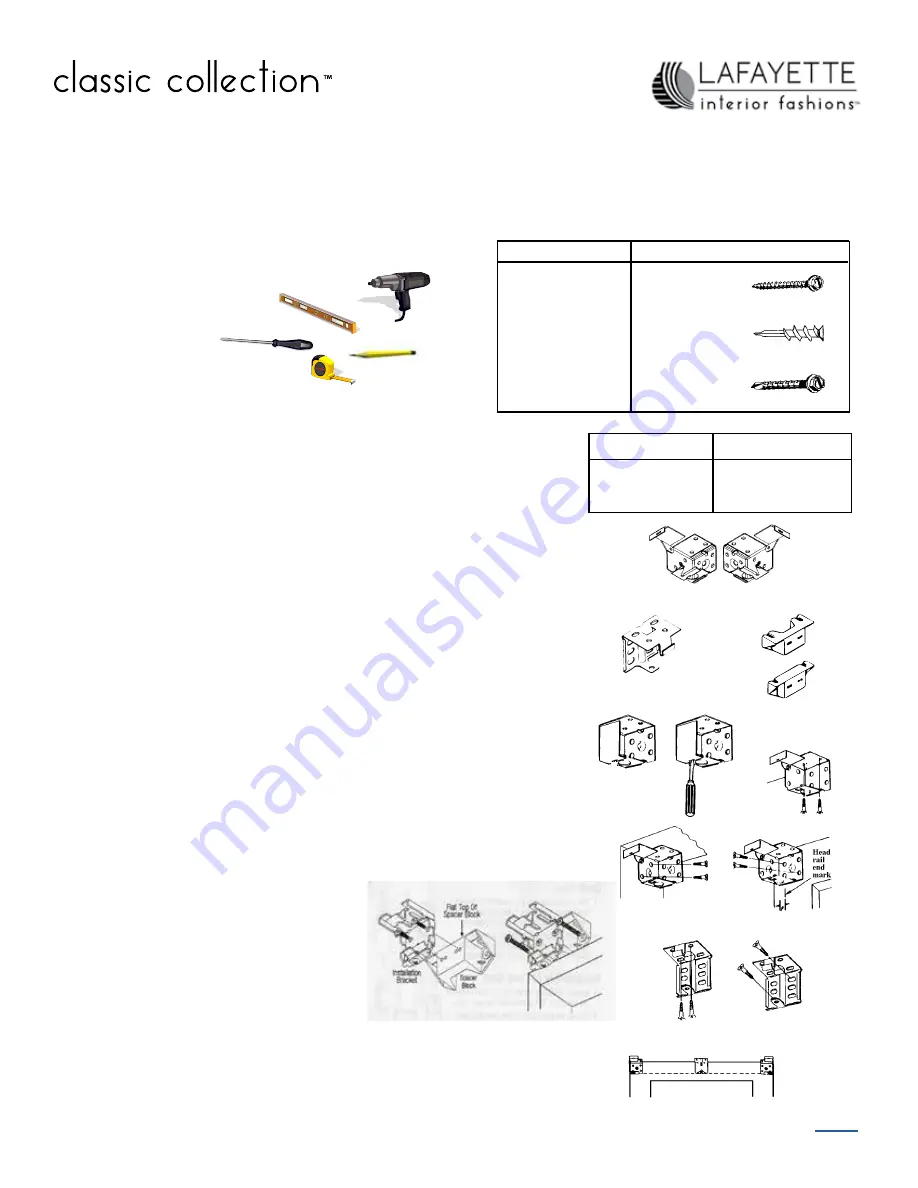
Tools and Fasteners Needed
Power Drill, 1/4” Driver and drill bits
Tape Measure
Flat blade Screwdriver
Phillips Screwdriver
Pencil
Level
Mounting Surface
Fastener
Wood
Drywall, Plaster
Metal
#6 Hex Head
Provided
Wall Anchors
Not Provided
Sheet Metal
Not Provided
Up to 60 1/16”
60 1/4” - 120 1/16”
Over 120 1/4”
Blind Width
Supports Required
0
1
2
Echelon™ , Traditions™ & Integra™
Aluminum Blinds
Before Installing
Remove shade from the package. Keep all packaging until the shade oper-
ates to your satisfaction.
• Contents of your hardware package may vary depending on options
chosen.
• Blinds over 60 sq. feet will be sent with one extra support bracket (Tra-
ditions) or one extra installation bracket (Integra) to be spaced evenly
along the headrail at a maximum distance between brackets of 60”.
•
Additional fasteners may be needed based on your specific mounting
surface.
Traditions Headrail: Mounting Inside or Outside
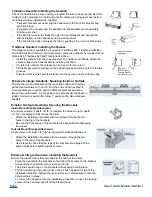
• For inside installations, mount the brackets in the corner of the jambs.
• For outside installations, hold the blind level at the desired height and
mark the window frame on the end and bottom of the headrail. The
brackets should be located 1/4” beyond the end of the headrail marks.
• The brackets must be level in order for the blind to operate properly.
Traditions Headrail: Bracket Attachment
Two hinged-cover installation brackets (marked “L” for the left side and “R”
for the right side) are provided for each blind. The safety lock cover will
secure the blind firmly into place.
• Open the bracket cover by inserting a screw driver into the rectangular
slot and twisting.
• Each bracket is designed to be mounted with two diagonally located
screws.
Traditions Installation Brackets
Traditions Support Bracket
Inside Mount
Inside Mount
Outside Mount
Inside Mount
Outside Mount
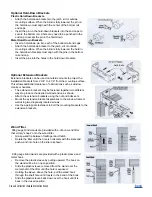
Supporting Wide Blinds
If the blind is over 60” wide (and/or 60 square feet in area) an intermediate
support is required. It should be close to the center, but must not interfere
with the headrail components. For blinds over 120” wide, two support brack-
ets must be installed. Use a level to align the support brackets with the end
brackets.
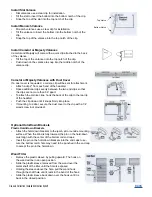
Spacer Blocks
7/8”
1/2”
Traditions Headrail: Spacer Blocks (Optional)
Spacer blocks can also be used to add clearance. Two versions are
available: 1/2” and 7/8”.
• Attach the spacer blocks to the installation
brackets using the two screws provided
with each spacer block.
• Attach the installation brackets to the
mounting surface with screws through the
two holes in the rear of the spacer blocks.


