Classic Collection Installation Instructions 6
BACK
Thank you for choosing Lafayette aluminum blinds. With proper installation and care,
your new aluminum
blinds will provide many years of beauty and performance.
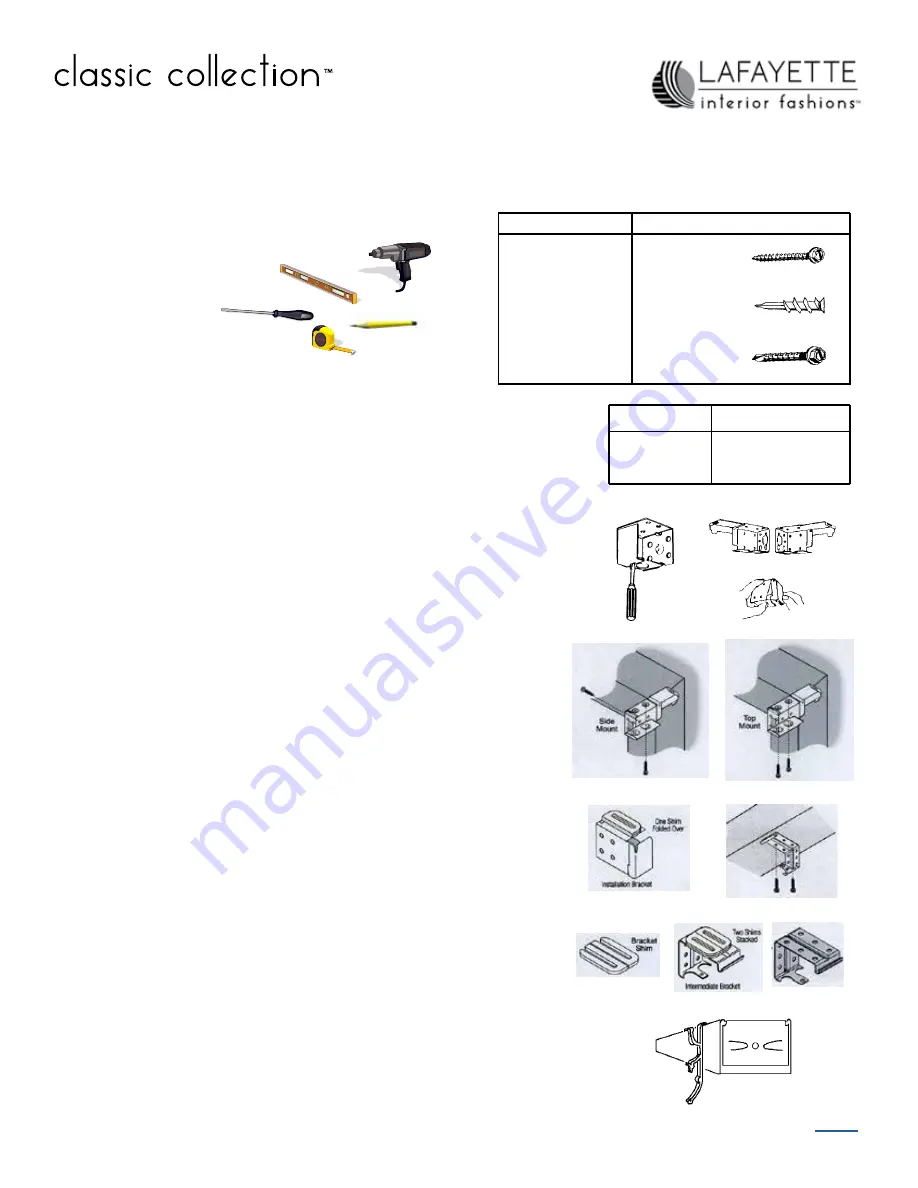
Tools and Fasteners Needed
Power Drill, 1/4” Driver and drill bits
Tape Measure
Flat blade Screwdriver
Phillips Screwdriver
Pencil
Level
Mounting Surface
Fastener
Wood
Drywall, Plaster
Metal
#6 Hex Head
Provided
Wall Anchors
Not Provided
Sheet Metal
Not Provided
2” Metro™
Aluminum Blinds
Up to 72”
72 1/16” - 96”
96 1/16” - 144”
Blind Width
Supports Required
0
1
2
Before Installing
Remove shade from the package. Keep all packaging until the shade
operates to your satisfaction.
• Contents of your hardware package may vary depending on options
chosen.
•
Additional fasteners may be needed based on your specific mounting
surface.
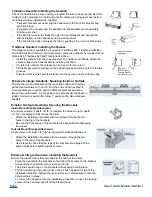
Inside and Ceiling Mount
Attach the two end brackets flush against the sides of the window
casement or ceiling. Choose the most appropriate of the following
mounting methods:
• Open end mount bracket as shown. A screw driver may be inserted
into the rectangular slot and twisting.
• Side mount brackets with one screw through a side hole and one
screw through a top holes.
•
If the brackets are flush with the back wall, attach them with one
screw through a top hole and one through a rear hole.
• Top mount the brackets with screws through the top holes.
• If limited mounting depth is available, the bracket may be mounted
with two screws through diagonal side holes.
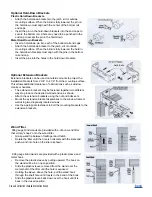
Intermediate Brackets
Evenly space the intermediate bracket or brackets between the two end
brackets. A minimum depth of 1 1/8” is required for bracket attachment.
• Adjust spacing if needed to avoid interference with the internal head-
rail mechanisms.
• Attach with two screws through diagonal holes.
• The backs of the end brackets and intermediate brackets should line
up with each other.
• With ceiling mounts, you may need to add a bracket shim to allow
clearance for the valance clip.
Bracket Shims (Optional)
Bracket shims may be used whenever the mounting surface is not flat
enough to mount the blind correctly.
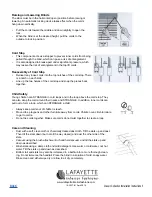
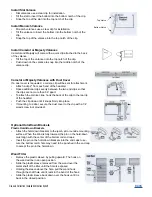
Install Valance Clips
• Attach valance clips to the headrail as shown.
• Evenly space valance clips along the length of the headrail. DO not
place a valance clip where it can interfere with working parts.
• NOTE
: Do not put any valance clip or obstruction over the
motor/transmission.


