4 Functions and Operations
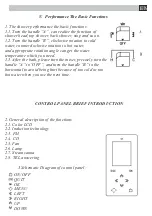
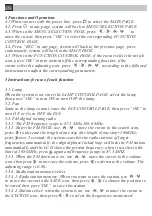
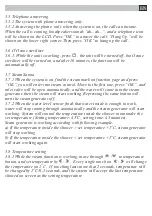
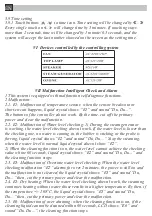
4.1 When connect with the power line, press to select the MAIN PAGE.
4.2. Press in any page, system will back to MENU SELECTION PAGE.
4.3. When in the MENU SELECTION PAGE, press to
move the cursor, then press “OK” to select the corresponding FUNCTION
CONTROL PAGE.
4.4. Press “ESC” in any page, system will back to the previous page, press
continuously, system will back to the MAIN PAGE.
4.5. When in the FUNCTION CONTROL PAGE, if the cursor select the switch
icon, press“OK” to turn on/turn off the corresponding function: if the
cursor select the adjusting icon, press according to the followed
instructions to adjust the corresponding parameters.
5 Instructions for use of each function
5.1. Lamp
When the system is on, enter the LAMP CONTROL PAGE, select the lamp,
then press “OK” to turn ON or turn OFF the lamp.
5.2. Fan
Same as the lamp control, enter the FAN CONTROL PAGE, then press “OK” to
turn ON or t urn OFF the FAN.
5.3. FM digital turning radio
5.3.1. The FM frequency scope is 87.5 MHz-108.0 MHz.
5.3.2. Enter the FM PAGE, use move the cursor to the search icon,
press to increase the length of one step (the length of one step=100KHz);
press over 2 seconds, the system searches the radio stations of larger
frequencies automatically: the digital phase locked loop will lock the FM station
automatically and the LCD shows the present frequency; when it reaches to the
limit of 108.0MHz, press again and frequency jumps to 87.5 MHZ.
5.3.3. When the FM function is on, use move the cursor to the volume
icon, then press to increase the volume, press to decrease the volume. The
adjusting range is 0-80.
5.3.4. Radio station memory/select.
5.3.4.1. Radio station memory: When you want to save the station, use
to move the cursor to the SAVE icon, then press to choose the position to
be saved, then press“OK” to save this station.
5.3.4.2. Station select: when the system is on, use to move the cursor to
the STATION icon, then press to select the frequencies memorized.
EN
Summary of Contents for 1200X900X2200
Page 1: ...ALTEA 1200X900X2200 Installation Montage Инструкция ...
Page 2: ......
Page 3: ...DE Montage und Betriebsanweisung für das Model Lagard Altea ...
Page 4: ...DE ...
Page 5: ...DE ...
Page 7: ...DE ...
Page 8: ...DE ...
Page 9: ...DE ...
Page 10: ...DE ...
Page 11: ...DE ...
Page 12: ...DE ...
Page 13: ...DE ...
Page 14: ...DE ...
Page 15: ...DE ...
Page 16: ...DE ...
Page 17: ...DE ...
Page 18: ...DE ...
Page 19: ...DE ...
Page 20: ...DE ...
Page 21: ...DE ...
Page 28: ...EN III INSTALLATION ...
Page 29: ...EN ...
Page 31: ...EN RIGHT MODEL LEFT MODEL ...
Page 32: ...EN ...
Page 33: ...EN ...
Page 34: ...EN ...
Page 35: ...EN ...
Page 36: ...EN ...
Page 37: ...EN ...
Page 38: ...EN ...
Page 39: ...EN ...
Page 40: ...EN ...
Page 41: ...EN ...
Page 42: ...EN ...
Page 43: ...EN ...
Page 44: ...EN ...
Page 45: ...EN ...
Page 46: ...EN ...
Page 52: ...RU ...
Page 53: ...RU ...
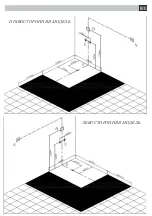
Page 55: ...ПРАВОСТОРОННЯЯ МОДЕЛЬ ЛЕВОСТОРОННЯЯ МОДЕЛЬ RU ...
Page 56: ...RU ...
Page 57: ...RU ...
Page 58: ...RU ...
Page 59: ...RU ...
Page 60: ...RU ...
Page 61: ...RU ...
Page 62: ...RU ...
Page 63: ...RU ...
Page 64: ...RU ...
Page 65: ...RU ...
Page 66: ...RU ...
Page 67: ...RU ...
Page 68: ...RU ...
Page 69: ...RU ...
Page 75: ......

