FLIP
®
01.12.2012
English / Englisch
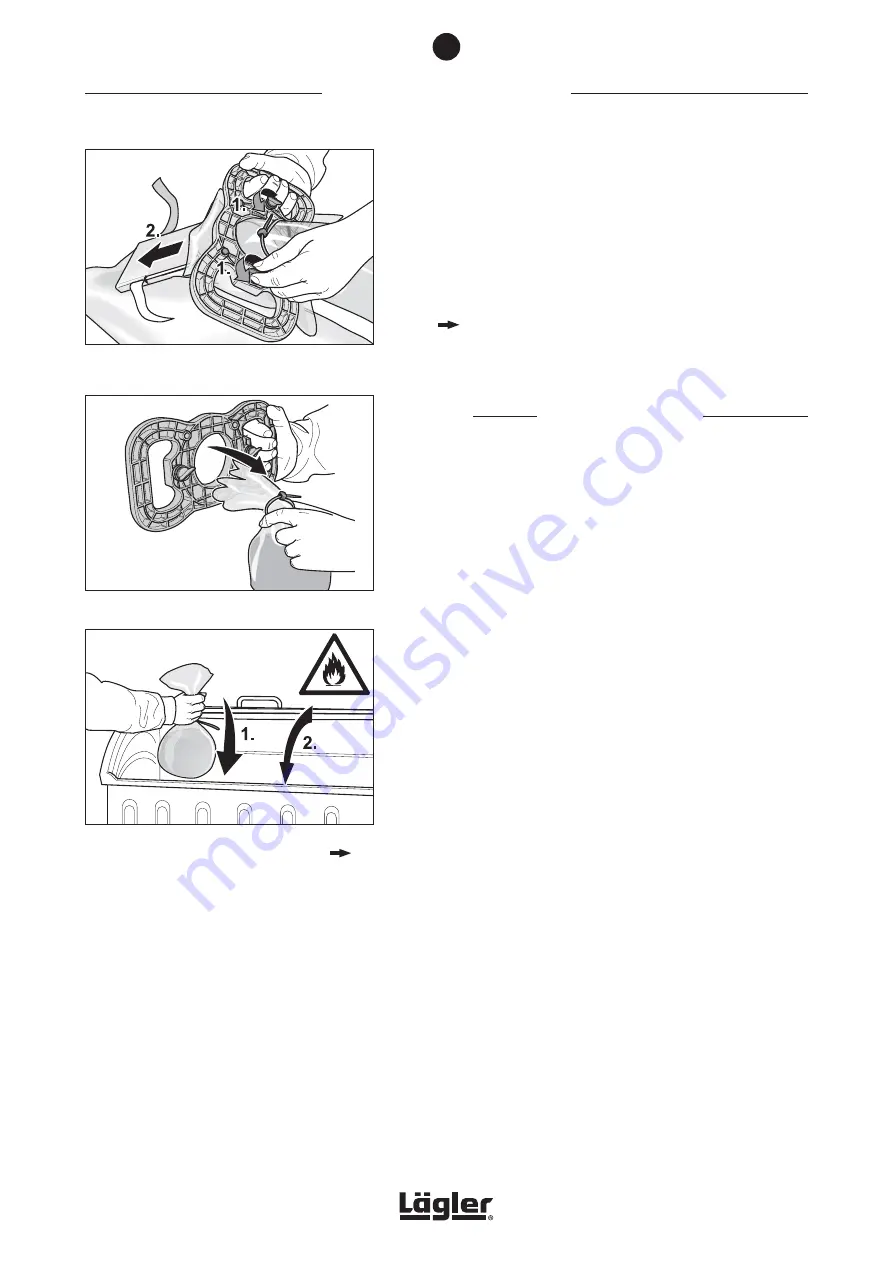
Fig. 25
Open the quick-release fasteners (1.) and remove
the dust bag (2.).
Fig. 26
Remove the waste bag from the emptying fixture.
WORKING WITH THE FLIP
®
5
16
Open the two quick-release fasteners on the emptying fixture
(Fig. 25, 1.).
17
Keep the dust bag tilted at a slight angle for the residual dust
to fall back into the dust bag and remove the emptying fixture
from the dust bag (Fig. 25, 2.).
18
Reattach the dust bag to the machine in the reverse order
(
Section 4.1, Preparing the machine
).
19
Remove the filled waste bag from the emptying fixture (Fig.
26) and place it in a non-combustible container (Fig. 27). Due
to the risk of fire, seal the container with a non-combustible
cover!
Fig. 27
Throw the filled waste bag into a non-combustible
container (1.) and keep this closed (2.)
risk
of fire!
22
Summary of Contents for Flip
Page 48: ...FLIP 01 12 2012 English Englisch SPARE PARTS 48 11...
Page 50: ...FLIP 01 12 2012 English Englisch SPARE PARTS 50 11...
Page 52: ...FLIP 01 12 2012 English Englisch SPARE PARTS 52 11...
Page 54: ...FLIP 01 12 2012 English Englisch SPARE PARTS 54 11...
Page 56: ...FLIP 01 12 2012 English Englisch SPARE PARTS 56 11...


