FLIP
®
01.01.2019
English / Englisch
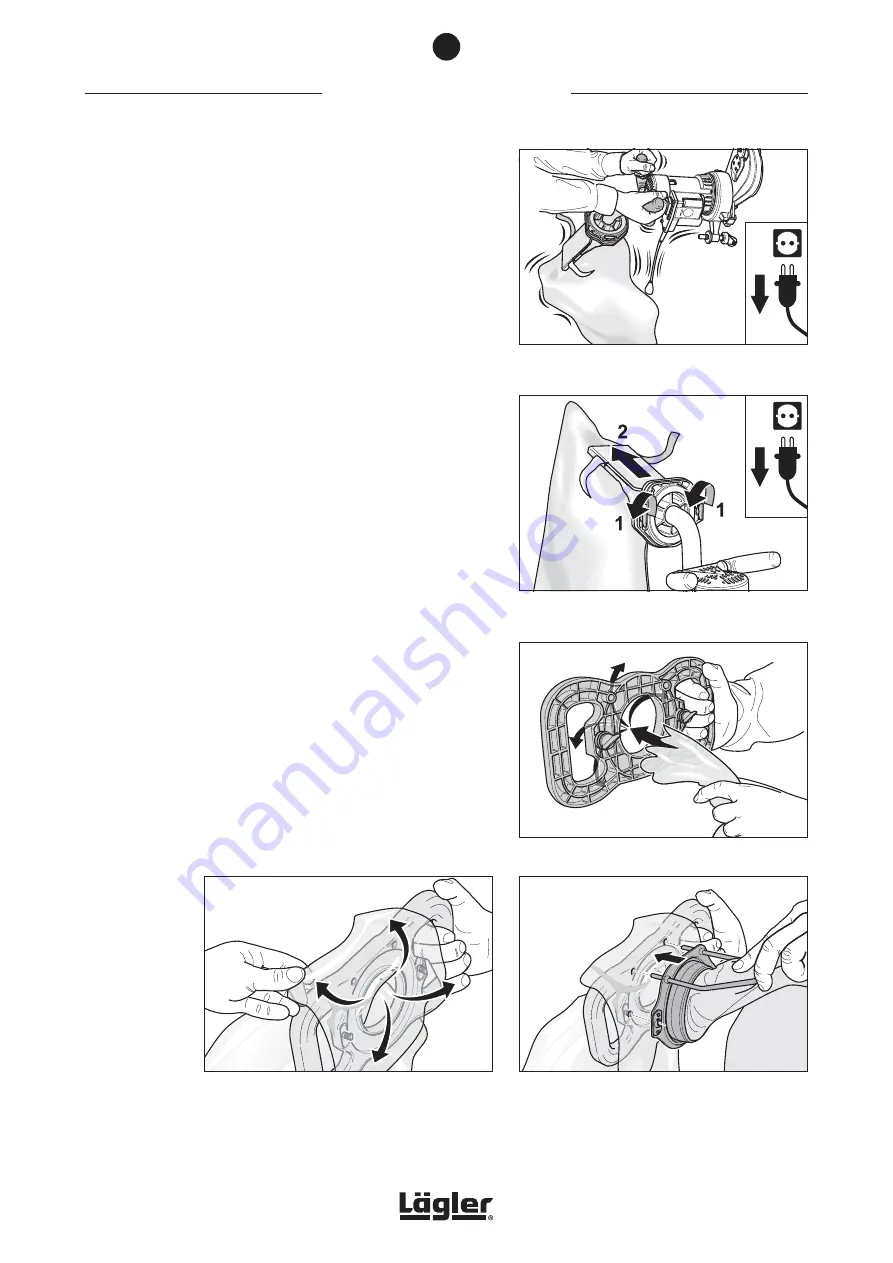
Fig. 23
Open both quick-release fasteners (1) and remove
the dust bag (2).
Fig. 22
Shake the dust residue from the machine into the
dust bag.
Fig. 25
Pull the waste bag over the fixture.
Fig. 24
Insert the waste bag into the emptying fixture.
WORKING WITH THE FLIP
®
5
3
Remove the plug of the motor cable from the extension cable
coupler.
4
Shake the dust residue from the machine into the dust bag
(fig. 22).
5
Open the quick-release fasteners on the locating flange
(fig. 23, 1).
6
Slowly pull the dust bag off of the locating flange (fig. 23, 2).
7
Hold the handle of the emptying fixture and insert a waste
bag from the ribbed side through the opening in the center
of the fixture (fig. 24).
8
Pull the waste bag over the emptying fixture from behind
(fig. 25).
9
Take hold of the emptying fixture with the waste bag in one
hand and take hold of the dust bag in the other. Hold the dust
bag at a slight angle to prevent dust from escaping.
10
Insert the dust bag with fixing plate into the emptying fixture.
Make sure that the dust bag rods are in the correct position:
The pins must fit into the openings provided (fig. 26).
11
Apply light pressure to insert the fixing plate of the dust sack
completely into the emptying fixture. The pins on the dust bag
rods will pierce the waste bag and prevent it from slipping
(fig. 26).
Fig. 26
Insert the dust bag with fixing plate into the emp-
tying fixture.
25


