SINGLE 01.06.2019
English / Englisch
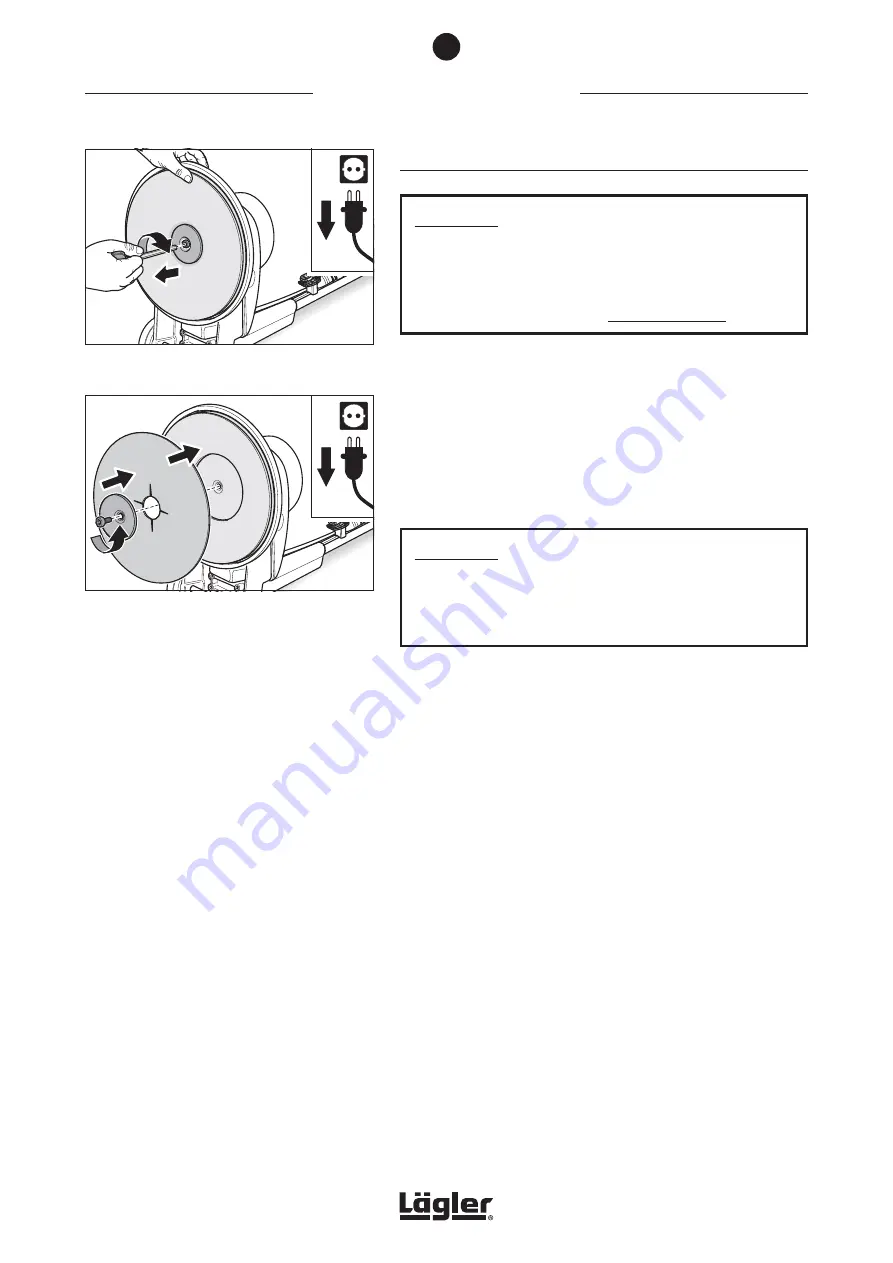
Fig. 24
Turn the screw for releasing the disc
in a clock-
wise
direction (
left-handed thread
)!
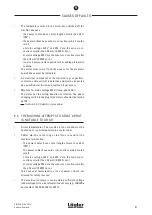
Fig. 25
Place the new sanding disc in the sanding
plate (1) and screw it in place (2). Turn the screw
counterclockwise
to tighten (
left-handed thread
)!
11
22
22
11
WORKING WITH THE SINGLE
5.3.2 CHANGING CONVENTIONAL SANDING DISCS
ATTENTION!
So that sanding discs that are attached in the conventional
way do not come loose during sanding work (because of the
direction in which the plate rotates), the fastening screw for
the paper retaining disc has a left-handed thread!
4
To release the paper retaining disc, turn the screw
clockwise
(
left-handed thread
) with a hexagonal socket wrench! As
you do so, hold the sanding plate steady (fig. 24).
5
Unscrew and remove the fastening screw completely.
Remove the paper retaining disc and the worn sanding disc
from the sanding plate and lay them to one side.
ATTENTION!
Only ever attach one sanding disc, otherwise the sanding
results will be unsatisfactory and the dust suction system
will not function properly!
6
Place a new sanding disc on the sanding plate and push the
fastening screw with paper retaining disc into the sanding
plate (fig. 25, 1).
7
Use the hexagonal socket wrench to turn the fastening screw
counterclockwise
into the sanding plate (
left-handed thread
,
fig. 25, 2)! Please ensure that the sanding disc is attached to
the sanding plate as centrally as possible.
8
Hand-tighten the fastening screw using the hexagonal socket
wrench.
5
28


