SINGLE 01.06.2019
English / Englisch
TRANSPORT AND STORAGE
6
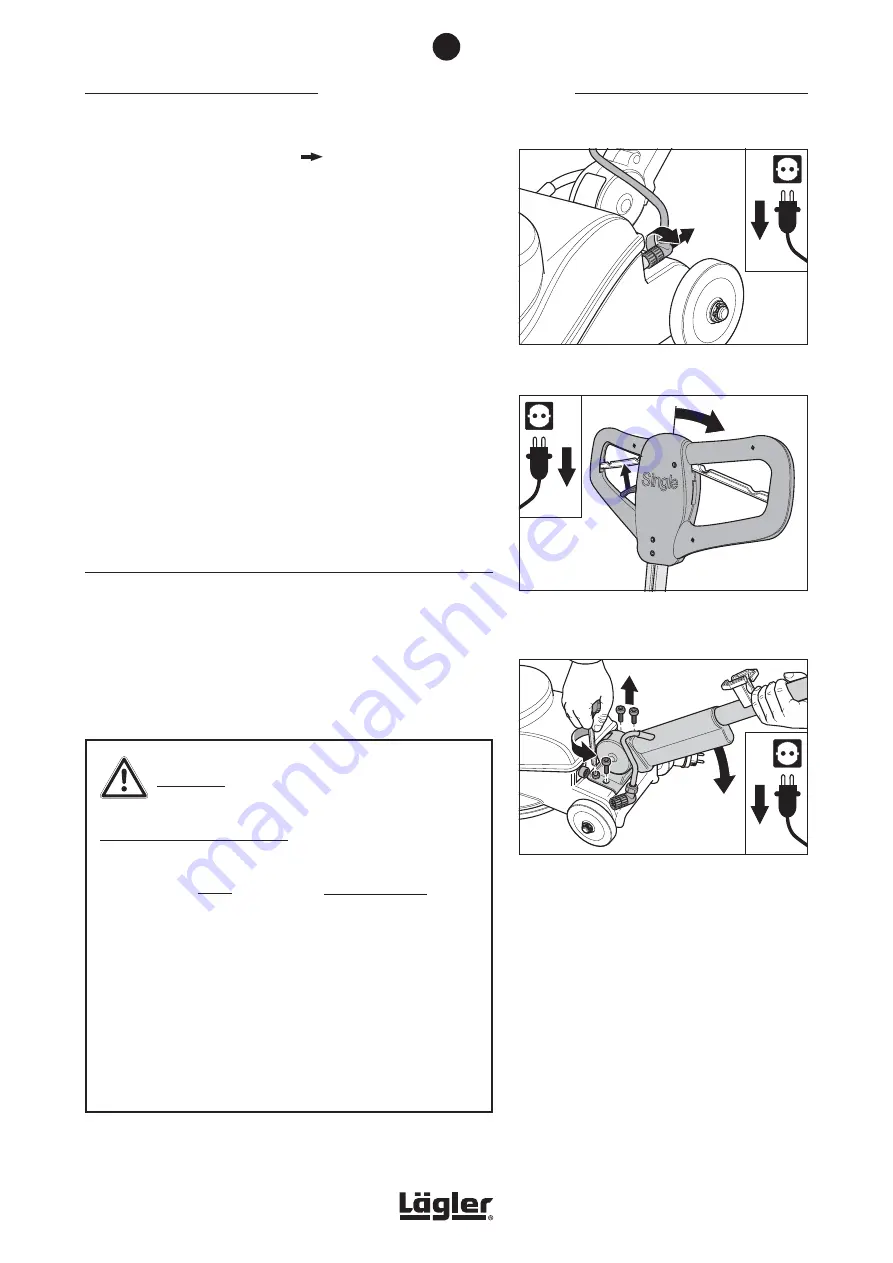
Fig. 38
Disconnect the cable plug of the guide tube from
the machine housing.
Fig. 39
Pull the adjusting lever to release the lock on the
guide tube (1) and push the guide tube back into
horizontal position (2).
Fig. 40
Unscrew the guide tube.
1.
2.
22
11
2.
22
11
4x
11
22
3
Remove the sanding plate (
Section 5.2, Changing the
sanding plate
).
4
Release the cable plug of the guide tube by turning the
threaded ring on the cable plug counterclockwise (fig. 38, 1)
and pull out the plug (fig. 38, 2).
5
Pull the adjusting lever on the handle towards you to release
the lock of the guide tube (fig. 39, 1) and push the guide tube
back into a horizontal position (fig. 39, 2).
6
Use a hexagonal socket wrench to release the four fastening
screws at the base of the guide tube. Steady the guide tube
with one hand as you do so (fig. 40).
To reassemble the machine, mount the individual components again
in reverse order to that described above.
6.2 STORAGE
If you wish to keep the machine in storage for a longer period of
time, ensure that it is kept dry and free of the influence of frost in
a location without excessive temperature fluctuations.
Store your unused machine in closed locations out of the reach
of children!
CAUTION!
RISK OF PROPERTY DAMAGE:
• If the machine is not in use, remove the plate from the
machine to avoid the following negative effects:
- Damage to the surface which may be caused by the
abrasive of the sanding plate, the diamond segments
or the indexable inserts of the milling disc!
- Damage to the flexible Velcro ring of the sanding plate,
the diamond segments or the indexable inserts of the
milling disc which can be caused by the weight of the
machine!
• When storing for long periods, place the machine on the
bottom part of the supplied transport packaging!
33


