background image

SINGLE  01.06.2019

English / Englisch

SPARE PARTS SINGLE

52

11

A

TTENTION: Please specify in inquiries and spare part orders always the serial numbers of your machines (


Section 3.1

)!

Summary of Contents for SINGLE

Page 1: ...C SANDING MACHINE SINGLE SINGLE English Englisch www laegler com Operating Instructions Translation of original operating instructions for the single disc sanding machine 00 850 20 002 01 06 2019 00 8...

Page 2: ...h the SINGLE 25 5 1 General application tips 25 5 2 Changing the sanding plate 26 5 2 1 Removing the sanding plate 26 5 2 2 Inserting the sanding plate 27 5 3 Changing the sanding disc 27 5 3 1 Changi...

Page 3: ...meaning CONTENTS 8 Regular inspection and maintenance work in accordance with accident prevention regulations 38 9 Causes of faults 40 9 1 The machine does not run or has switched off automatically 4...

Page 4: ...the single disc sanding machine SINGLE Cable holder Start lever ON OFF for two hand operation Adjusting lever Handle with stepless adjustment of the guide tube Drive motor Rubber buffer Motor cover G...

Page 5: ...E MACHINE The SINGLE single disc sanding machine is suitable for sanding wooden and cork floors and for work on floor underlays in the professional and DIY rental sectors It can also be used for sprea...

Page 6: ...ACHINE CONFIGURATION 1 5 1 BASIC EQUIPMENT 1 Machine ready for operation 1 Operating instructions 1 Sanding plate 1 Extension cable length 10 m 394 for single phase AC motor 3 x 2 5 mm 3 x 0 0039 sq i...

Page 7: ...he safety related parts mentioned below at regular intervals in order to be able to work safely and optimally at all times Replace the following parts in case of wear and or damage Extension cable Mot...

Page 8: ...ts in the mains supply use a safety switch PRCD for German mains supply part number in Section 11 Spare parts SINGLE Observe the applicable regulations and legal requirements in your country All exten...

Page 9: ...use the machine near sources of fires flammable liquids or gases potentially explosive areas Do not smoke in a dusty environment e g while sanding emptying the vacuum cleaner or cleaning the machine R...

Page 10: ...section of at least 1 5 mm 0 0023 sq in The maximum cable length in order to connect the machine to the mains supply must not exceed 20 m 790 HEALTH RISK caused by dust Use only external vacuum clean...

Page 11: ...the switched on machine backwards to such an extent that the plate cannot be touched under any circumstances The machine may only be switched on when Section 4 3 Switching on the machine it is in the...

Page 12: ...the bottom of the guide tube either by wiping it with a dry cloth or by vacuuming it with a suitable vacuum cleaner Never blow off the gas spring with compressed air other wise the seals of the gas sp...

Page 13: ...off by using its switch Maintain your machines with care Always keep the machines clean so that you can work better and more safely Follow the maintenance guidelines and the instructions for replacing...

Page 14: ...y attention to your work Work carefully and do not use the machines if you are not concentrating Store your machines safely Store your unused machines in a dry closed location out of the reach of chil...

Page 15: ...e 5 Required mains voltage in volt V 6 Current consumption in ampere A 7 Motor frequency in CPS Hz 8 Motor power in kilowatt KW 9 Motor speed in 1 min Rpm 10 Weight of machine in kilogram Weight 11 In...

Page 16: ...plate fig 2 Motor type single phase AC motor Voltage 230 V 220 V 230 V Frequency 50 Hz CPS 60 Hz CPS Motor power 1 2 kW Starting capacitor 60 F Running capacitor 40 F Motor type three phase AC motor...

Page 17: ...ncertainty constant of the noise emission values 4 dB A Vibration total value ahv measured at the handle 2 5 m s NOTE on noise emission The values indicated are emission values and must not represent...

Page 18: ...ully Please ensure that packaging materials that are no longer needed are disposed of respon sibly in an environmentally friendly way 2 Attach the sanding disc you need to the sanding plate Section 5...

Page 19: ...SK OF PROPERTY DAMAGE from rotating parts of the machine Always adjust the guide tube only when the machine is switched off 8 The height of the guide tube can be adjusted allowing you to work with the...

Page 20: ...may be used Machines with motor for mains voltage 220 V or 230 V Cables with three wires Each wire must have a cross section of at least 2 5 mm 0 0039 sq in Machines with motor for mains voltage 400...

Page 21: ...he danger area Never allow the machine to run unattended 4 3 1 GENERAL NEVER switch on the machine if no sanding plate or milling disc is mounted fig 11 the machine is not in the working position the...

Page 22: ...with a vacuum cleaner hose you are in the middle of the room with the machine as far away as possible from other persons or obstacles 4 3 2 SWITCH ON PROCEDURE When you have made the checks mentioned...

Page 23: ...lock the phase changing switch press the screwdriver in the slit and at the same time turn the screwdriver 180 fig 17 2 Original L GLER plug with yellow nut at the cable outlet fig 16 B Put a screwdri...

Page 24: ...unattended Always remove the power plug from the socket after you have switched off the machine RISK OF PROPERTY DAMAGE If the machine is not in use remove the plate from the machine to avoid the fol...

Page 25: ...g tracks from the previous grit used by adhering to the grit sequence and not skipping more than one grit at a time Thoroughly vacuum the floor and expansion gap immediately before starting each work...

Page 26: ...l it reaches the mechanical stop fig 18 2 3 Release the adjusting lever so that the guide tube can engage again fig 19 1 Carefully tilt the machine backwards on the wheels As you do so steady the mach...

Page 27: ...al position until it reaches the mechanical stop fig 18 1 3 Release the adjusting lever so that the guide tube can engage again fig 19 1 Carefully tilt the machine backwards on the wheels As you do so...

Page 28: ...ise left handed thread with a hexagonal socket wrench As you do so hold the sanding plate steady fig 24 5 Unscrew and remove the fastening screw completely Remove the paper retaining disc and the worn...

Page 29: ...washer into the hole on the cable holder and on the other side screw the sliding block loosely onto the screw 3 Push the sliding block into the groove on the guide tube fig 28 1 and tighten the screw...

Page 30: ...SINGLE into the coupler of the extension cable 2 Insert the plug of the extension cable into the socket on the vacuum cleaner fig 30 3 Open the cap of the dust extraction socket on the machine housing...

Page 31: ...E from spontaneous combustion Oil or wax can lead to spontaneous combustion Therefore the machine must always be cleaned carefully directly after sanding or application of oil or wax 6 1 TRANSPORT WAR...

Page 32: ...achine can be held and moved with little effort 7 Pull the machine slowly and carefully over small landings such as doorsills so that the machine cannot slip out of your hand 6 1 2 TRANSPORT OVER LARG...

Page 33: ...ube Steady the guide tube with one hand as you do so fig 40 To reassemble the machine mount the individual components again in reverse order to that described above 6 2 STORAGE If you wish to keep the...

Page 34: ...continues to perform Warranty claims for foreign parts or damage caused thereby cannot be accepted Never conduct the maintenance work and replacement of wearing parts on the newly sanded floor Thus yo...

Page 35: ...tion performance and the dust load at the workplace increases excessively Remove any dirt from the gas spring at the bottom of the guide tube either by wiping it with a dry cloth or by vacuuming it wi...

Page 36: ...he machine backwards on the wheels As you do so steady the machine with your foot to stop it rolling away fig 42 2 Please ensure that the machine is stable before commencing work 4 Release and remove...

Page 37: ...n never open the oil drainage screws in the motor shaft or in the gear cover fig 44 A and B 8 To assemble follow the instructions above in reverse order Please ensure that the pattern of holes on the...

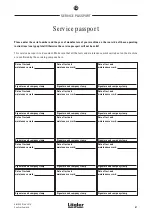
Page 38: ...when and where your machine was serviced Enter the serial number and the year of manufacture of your machine please see the type plate on the back cover of these operating instructions If you do not...

Page 39: ...portable electrical equipment insofar as is used extension and device connection cables with plugs connection cables with plugs movable cables with plugs and fixed connections Inspection interval Ever...

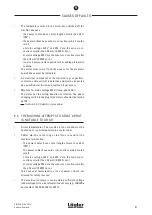
Page 40: ...lown fuse must be professionally removed and the fuse in the fuse holder replaced The fuse holder and two spare fuses are located under the motor cover near the control electrics part number in Sectio...

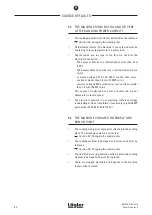
Page 41: ...ase AC The motor has the wrong direction of rotation The phase changing switch in the plug of the motor cable must be turned by 180 Section 4 3 2 Switch on procedure 9 2 THE MACHINE ATTEMPTS TO START...

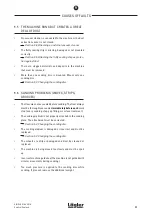
Page 42: ...m 0 0039 sq in at mains voltage 400 V are the wire cross sections smaller than 1 5 mm 0 0023 sq in This causes of faults lead to a loss of power and are not allowed for safety reasons The electrical n...

Page 43: ...9 6 SANDING PROBLEMS WAVES STRIPS GROOVES The floor was not vacuumed before sanding The floor always must be thoroughly vacuumed immediately before each work step every sanding step gap filling or sur...

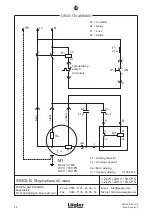
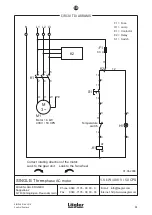
Page 44: ...ww laegler com 1 2 kW 230 V 50 CPS 1 2 kW 230 V 60 CPS Phone 0049 7135 98 90 0 Fax 0049 7135 98 90 98 C S A C Ha Hi A B tarting capacitor Running capacitor Main winding uxiliary winding K1 Contactor K...

Page 45: ...ase AC motor Correct rotating direction of the motor Look to the gear unit Look to the fan wheel F1 Fuse S1 Switch H1 Lamp K1 Contactor K2 Relay Phone 0049 7135 98 90 0 Fax 0049 7135 98 90 98 6 5 4 K1...

Page 46: ...SINGLE 01 06 2019 English Englisch SPARE PARTS SINGLE 46 11 ATTENTION Please specify in inquiries and spare part orders always the serial numbers of your machines Section 3 1...

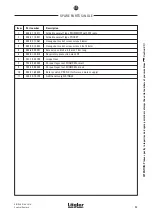
Page 47: ...850 05 10 100 Wheel holder 12 850 05 19 105 Wheel from year of manufacture 2019 850 05 09 105 Wheel up to year of manufacture 2018 0125 1012 000 Washer for wheel up to year of manufacture 2018 0471 0...

Page 48: ...SINGLE 01 06 2019 English Englisch SPARE PARTS SINGLE 48 11 ATTENTION Please specify in inquiries and spare part orders always the serial numbers of your machines Section 3 1...

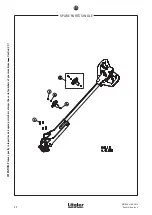
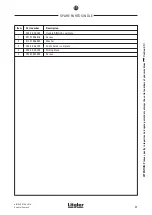
Page 49: ...0 00 200 Handle SINGLE complete 1 0912 1006 016 Screw 2 0125 1006 000 Washer 3 850 20 26 100 Cable holder complete 4 850 20 29 100 Sliding block 5 7984 1008 020 Screw 49 11 ATTENTION Please specify in...

Page 50: ...SINGLE 01 06 2019 English Englisch SPARE PARTS SINGLE 50 11 ATTENTION Please specify in inquiries and spare part orders always the serial numbers of your machines Section 3 1...

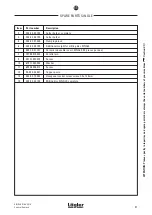
Page 51: ...000 65 20 012 Contactor 7 000 65 20 230 Relay 8 850 64 06 100 Adapter mounting 9 850 64 07 205 Shock absorber 10 850 64 08 100 Plate mounting 11 1481 0006 032 Spring type straight pin 12 6797 1008 000...

Page 52: ...SINGLE 01 06 2019 English Englisch SPARE PARTS SINGLE 52 11 ATTENTION Please specify in inquiries and spare part orders always the serial numbers of your machines Section 3 1...

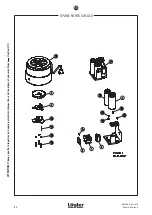
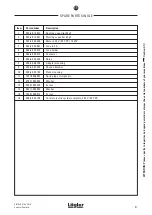
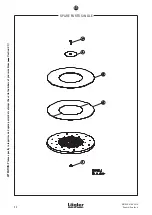
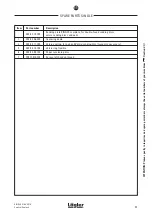
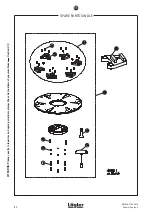
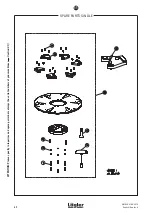
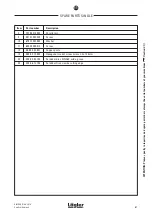
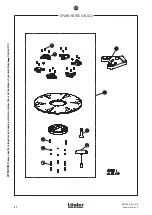
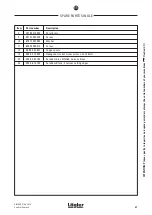
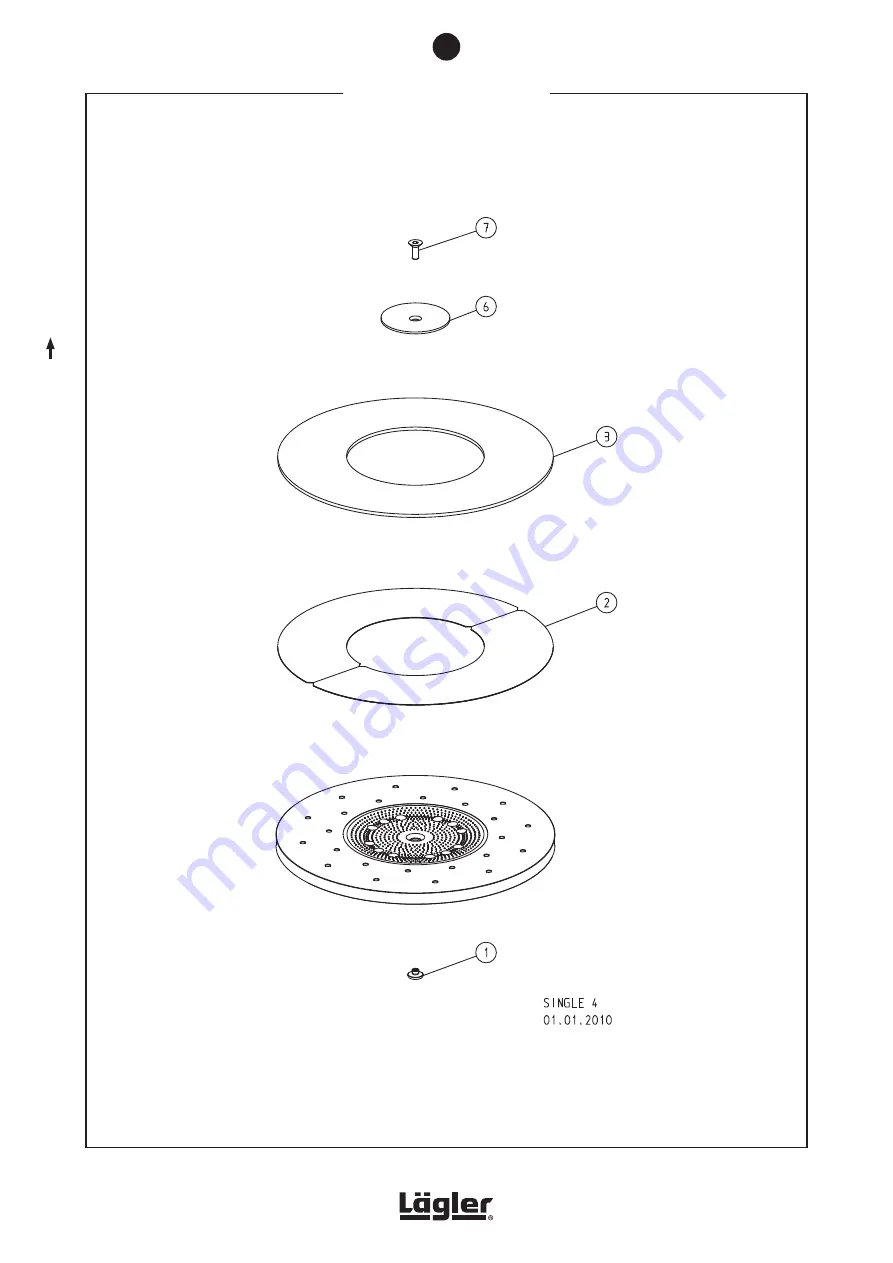
Page 53: ...ing discs and pads 1 850 02 06 200 Centering dome 2 850 02 11 100 Velcro coating for pad and Velcro sanding disc two parts necessary 3 850 02 13 105 Velcro ring flexible 6 850 02 05 100 Paper tensioni...

Page 54: ...SINGLE 01 06 2019 English Englisch SPARE PARTS SINGLE 54 11 ATTENTION Please specify in inquiries and spare part orders always the serial numbers of your machines Section 3 1...

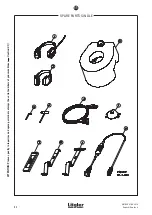
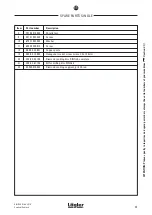
Page 55: ...rew wrench 5 x 150 mm 5 000 65 53 251 Extension cable 3 x 2 5 mm 10 m long 6 000 01 20 010 Respiratory protection mask P3 7 701 10 00 100 Impact tool 8 702 00 00 200 Parquet layer tool ZUGEISEN small...

Page 56: ...SINGLE 01 06 2019 English Englisch SPARE PARTS SINGLE 56 11 ATTENTION Please specify in inquiries and spare part orders always the serial numbers of your machines Section 3 1...

Page 57: ...isc SINGLE 7 000 10 21 101 Ceramic indexable insert SINGLE 10 pieces per box 8 7979 0010 028 Parallel pin 9 0912 1008 020 Screw 10 6797 1008 000 Washer 11 6902 0305 012 Screw 13 00 000 32 501 Copper p...

Page 58: ...SINGLE 01 06 2019 English Englisch SPARE PARTS SINGLE 58 11 ATTENTION Please specify in inquiries and spare part orders always the serial numbers of your machines Section 3 1...

Page 59: ...012 Screw 13 00 000 32 501 Copper paste 14 000 93 13 052 Hexagonal socket screw wrench 8 x 125 mm 20 850 02 50 100 Diamond sanding disc SINGLE complete 21 850 02 61 100 Kit for milling disc SINGLE 22...

Page 60: ...SINGLE 01 06 2019 English Englisch SPARE PARTS SINGLE 60 11 ATTENTION Please specify in inquiries and spare part orders always the serial numbers of your machines Section 3 1...

Page 61: ...08 000 Washer 11 6902 0305 012 Screw 13 00 000 32 501 Copper paste 14 000 93 13 052 Hexagonal socket screw wrench 8 x 125 mm 30 850 02 52 100 Scrabber disc SINGLE wide green 32 850 06 12 100 Scrabber...

Page 62: ...SINGLE 01 06 2019 English Englisch SPARE PARTS SINGLE 62 11 ATTENTION Please specify in inquiries and spare part orders always the serial numbers of your machines Section 3 1...

Page 63: ...00 Washer 11 6902 0305 012 Screw 13 00 000 32 501 Copper paste 14 000 93 13 052 Hexagonal socket screw wrench 8 x 125 mm 40 850 02 53 100 Scrabber disc SINGLE narrow black 42 850 06 13 100 Scrabber Bl...

Page 64: ...SINGLE 01 06 2019 English Englisch NOTES 64...

Page 65: ...SINGLE 01 06 2019 English Englisch NOTES 65...

Page 66: ...SINGLE 01 06 2019 English Englisch NOTES 66...

Page 67: ...Signature and company stamp Date of test and maintenance work Signature and company stamp Date of test and maintenance work Signature and company stamp Date of test and maintenance work Signature and...

Page 68: ...e Commercial name Single disc sanding machine fulfils all the relevant provisions of the specified above European Directive The machine also fulfils all the relevant provisions of the European Directi...

Reviews: