SUPERHUMMEL
01.11.2011
ENGLISH
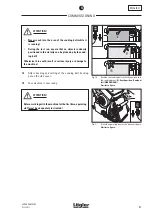
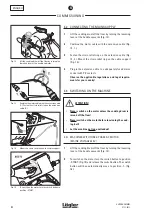
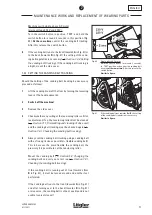
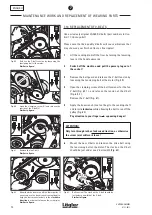
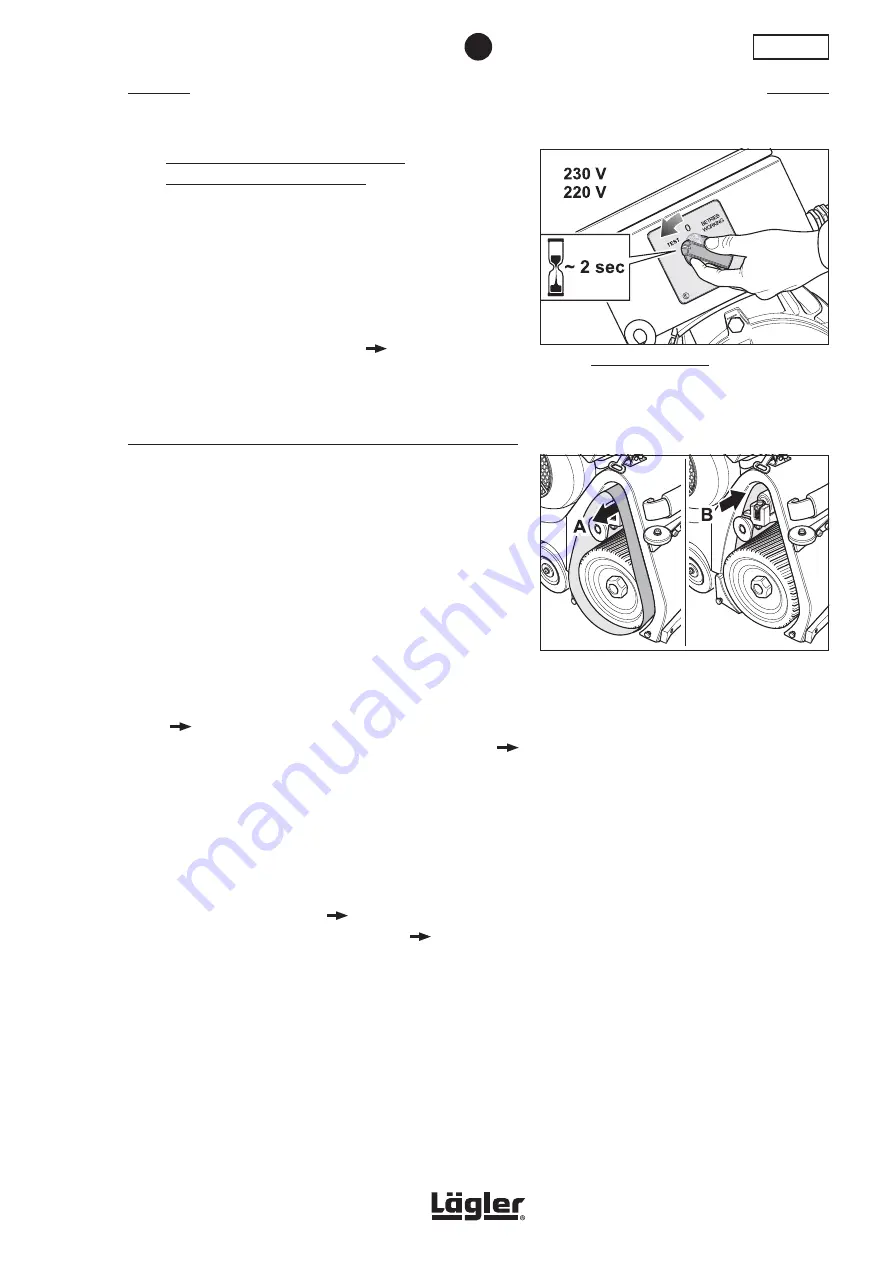
Fig. 40
Single-phase AC motor:
Hold the switch button for around 2 seconds
in -TEST- position and control the sanding belt
tracking
at the same time
. After this release the
switch button.
Similar to figure.
MAINTENANCE WORK AND REPLACEMENT OF WEARING PARTS
7
Machines with single-phase AC motor
(mains voltage 230 V and 220 V):
Turn the switch button in position -TEST- and hold the
switch button for around 2 seconds in this position (Fig.
40).
At the same time
control the sanding belt tracking.
After this release the switch button.
5
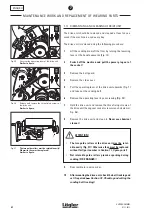
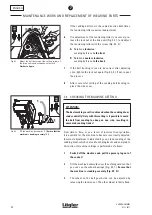
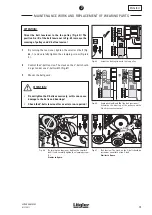
If the sanding belt runs to the front (towards
A
in Fig. 41) or
to the back (towards
B
in Fig. 41) the setting of the sand-
ing belt regulation is necessary (
Section 7.3.2, Setting
the sanding belt tracking
). If the sanding belt tracking is
alright, mount the side cover.
7.3.2 SETTING THE SANDING BELT TRACKING
Should the setting of the sanding belt tracking be necessary,
proceed as follows:
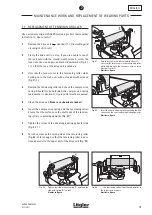
1
Lift the sanding drum off the floor by turning the lowering
lever at the handle upwards.
2
Switch off the machine!
3
Remove the side cover.
4
Check whether any soiling at the tensioning roller calls for
readjustment. If so, the tensioning roller must be cleaned
(
Section 7.1.1, Dismantling and cleaning of drive unit)
and the sanding belt tracking must be checked again (
Section 7.3.1, Checking the sanding belt tracking
).
5
Always set the sanding belt tracking using a sanding belt
with as fine a grit size as possible (= flexible sanding belt).
This is because the more flexible the sanding belt, the
precisely it is possible to set the tensioning roller.
Mount the sanding belt
(
Section 5.2, Changing the
sanding belt)
and carry out a test run (
Section 7.3.1,
Checking the sanding belt tracking
).
If the sanding belt is running out of true (towards
A
or
B
in Fig. 41), it must be turned around and another test
performed.
If the sanding belt runs to the front (towards
A
in Fig. 41)
and after turning over to the back (towards
B
in Fig. 41)
or vice versa, the sanding belt is of poor quality and is not
usable (conical sleeve)!
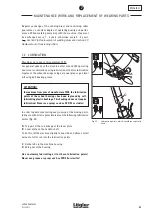
Fig. 41
If the sanding belt runs towards
A
or
B
, the setting
of the sanding belt regulation is necessary.
Similar to figure.
71
Summary of Contents for Superhummel
Page 45: ...SUPERHUMMEL 01 11 2011 DEUTSCH NOTIZEN 45...
Page 85: ...SUPERHUMMEL 01 11 2011 ENGLISH NOTES 85...
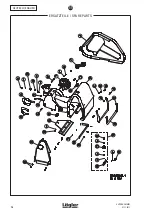
Page 86: ...SUPERHUMMEL 01 11 2011 DEUTSCH ENGLISH ERSATZTEILE SPARE PARTS 11 86...
Page 88: ...SUPERHUMMEL 01 11 2011 DEUTSCH ENGLISH ERSATZTEILE SPARE PARTS 11 88...
Page 90: ...SUPERHUMMEL 01 11 2011 DEUTSCH ENGLISH ERSATZTEILE SPARE PARTS 11 90...
Page 92: ...SUPERHUMMEL 01 11 2011 DEUTSCH ENGLISH ERSATZTEILE SPARE PARTS 11 92...
Page 94: ...SUPERHUMMEL 01 11 2011 DEUTSCH ENGLISH ERSATZTEILE SPARE PARTS 11 94...
Page 96: ...SUPERHUMMEL 01 11 2011 DEUTSCH ENGLISH ERSATZTEILE SPARE PARTS 11 96...
Page 98: ...SUPERHUMMEL 01 11 2011 DEUTSCH ENGLISH ERSATZTEILE SPARE PARTS 11 98...
Page 100: ...SUPERHUMMEL 01 11 2011 DEUTSCH ENGLISH NOTIZEN NOTES 100...

